Camshaft - Assembly
1. Install the tappets and the mechanical lash adjuster shims in their original positions.
Tappets and mechanical lash adjuster shims must be installed in their original positions as marked before disassembly.
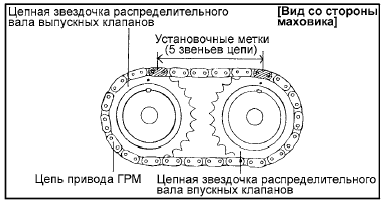
2. Align the timing chain with the sprockets of the intake and exhaust camshafts, as shown in the illustration.
3. Apply engine oil to the camshaft journals, then install the camshaft.
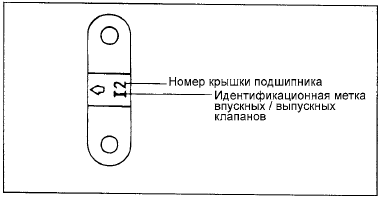
4. Install the camshaft bearing caps. The identification marks on the bearing caps indicate the installation position (intake / exhaust side).
I: Intake camshaft E: Exhaust camshaft
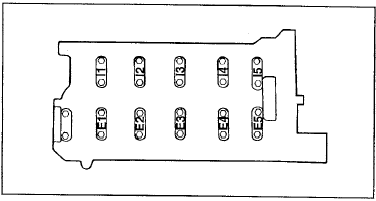
5. Tighten the camshaft bearing cap bolts to the specified torque in two or three steps, in the sequence shown by the numbers in the illustration.
Tightening torque Camshaft bearing cap bolt: 14 – 15 N·m
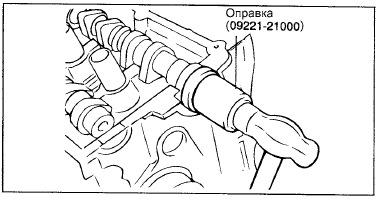
6. Using the special service tool (camshaft oil seal installer: 09221-21000), press in the camshaft oil seal. Make sure the sealing lip of the camshaft oil seal is coated with engine oil. Install the seal onto the camshaft from the timing belt sprocket side, then tap the installer with a hammer until the distance between the seal lip and the end of the shaft is 8.5 mm.
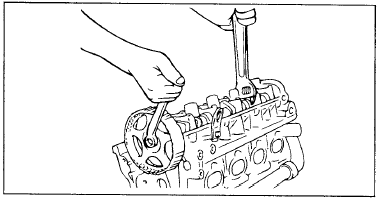
7. Install the camshaft timing belt sprocket and tighten its bolt to the specified torque.
Tightening torque Camshaft timing belt sprocket bolt: 100 – 120 N·m
8. Align the marks on the crankshaft and camshaft sprockets with the corresponding alignment marks, and position the No. 1 piston at TDC on the compression stroke.
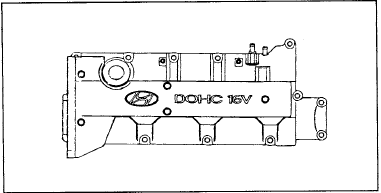
9. Install the cylinder head cover.
Tightening torque Cylinder head cover bolts: 8 – 10 N·m
10. Install the ignition coil assemblies, the high-tension spark plug cables, and the center cover.
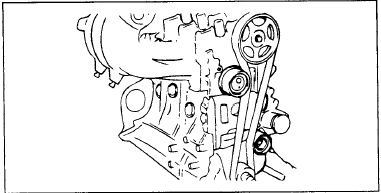
12. Install the timing belt covers.
Tightening torque Timing belt cover bolts: 8 – 10 N·m 13. Install the coolant pump pulley and the crankshaft pulley.
Test yourself
A quick Hyundai Elantra CN7 quiz: every answer comes with an explanation and a link to the manual page.