Service Operations - Accessory Drive Belt Adjustment
1. Check that the belt is not damaged and that it is correctly seated in the pulley grooves.
2. Apply a force of 100 N to the back (non-working) side of the belt at the midpoint between the two pulleys, as shown in the illustration. Measure the belt deflection using a belt tension gauge.
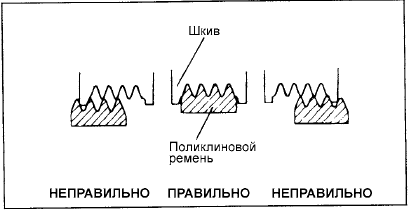
2. If the belt squeals or slips during operation, check the contact surfaces with the pulleys for wear, damage or delamination, and check the pulley for damage. Also check the belt tension.
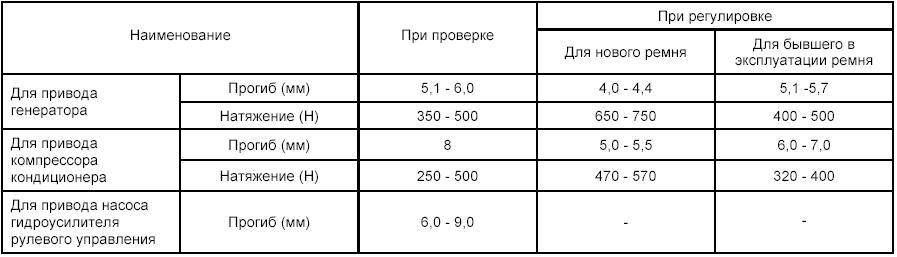
SPECIFICATIONS
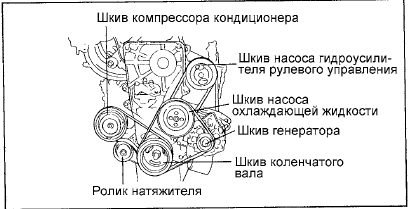
1. Belt tension must be measured at the middle of the belt span between the specified pulleys.
2. When installing a new belt, adjust the tension to the middle value of the allowable range given in the "New Belt" column of the table above. After installing the belt, run the engine for 5 minutes or longer, then check that the belt tension matches the nominal value in the "Inspection" column.
3. When adjusting a used belt, or a new belt that has been run for more than 5 minutes, use the nominal values given in the "Used Belt" column.
4. For periodic belt tension inspection, use the nominal values given in the "Inspection" column.
BELT TENSION GAUGE - TYPE "A"
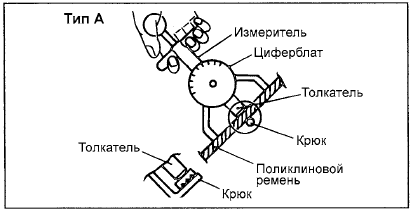
Do not allow the gauge dial to contact anything during measurement.
BELT TENSION GAUGE - TYPE "B"
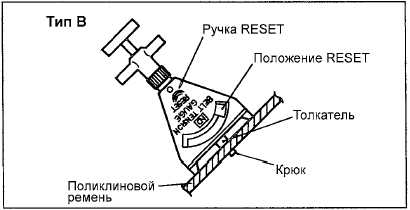
1. When performing measurements, turn the RESET knob in the direction indicated by the arrow and set the pointer to the RESET position.
2. If the tension gauge is removed from the belt, the pointer will remain at the position corresponding to the tension value. Read the value after removing the tension gauge.
Test yourself
A quick Hyundai Elantra CN7 quiz: every answer comes with an explanation and a link to the manual page.