Lubrication System - Oil Pump Removal and Inspection
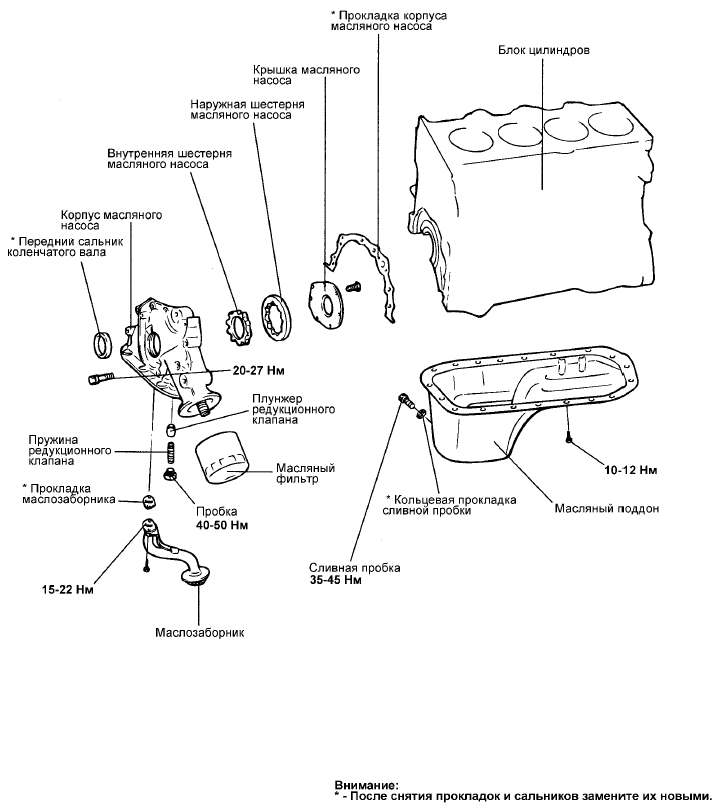
OIL PUMP AND OIL PUMP HOUSING
REMOVAL 1. Remove the timing belt.
2. Loosen all oil pan mounting bolts.
3. Remove the oil pan.
4. Remove the oil strainer.
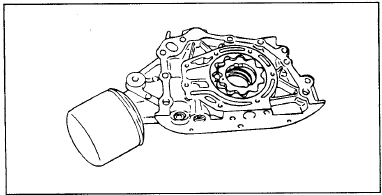
5. Remove the oil pump housing assembly.
6. Remove the oil pump cover.
7. Remove the inner and outer oil pump rotors from the oil pump housing. The alignment marks on the inner and outer rotors indicate the correct rotor position for assembly.
INSPECTION OIL PUMP HOUSING
1. Inspect the oil pump housing for cracks or damage. Replace if necessary.
2. Inspect the front crankshaft oil seal for wear or damage to the sealing lip. Replace if any defects are found.
OIL PAN AND OIL STRAINER
1. Inspect the oil pan for deformation, damage, or cracks. Replace if any defects are found.
2. Inspect the oil strainer for deformation, damage, or cracks. Replace if any defects are found.
OIL PUMP COVER AND HOUSING
Inspect the contact surfaces with the oil pump rotors for damage or wear.
OIL PUMP ROTORS
1. Inspect the rotor teeth for wear or damage.
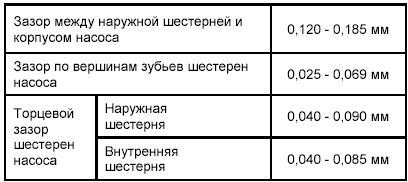
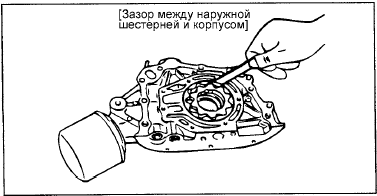
2. Measure the clearance between the outer surface of the outer rotor and the pump housing.
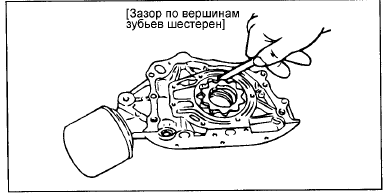
3. Measure the tip clearance of the pump rotors and the rotor end clearance.
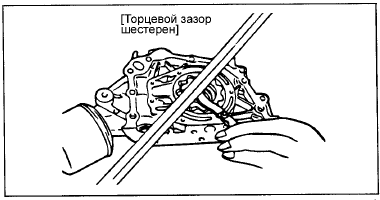
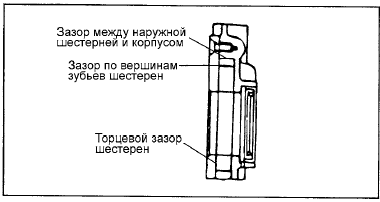
RELIEF VALVE AND SPRING
1. Check that the relief valve plunger moves freely in the oil pump housing.
2. Inspect the relief valve spring for breakage or deformation.
Standard value:
Free length of spring : 43.8 mm Length of spring under 37 N load : 40.1 mm
OIL PRESSURE SWITCH
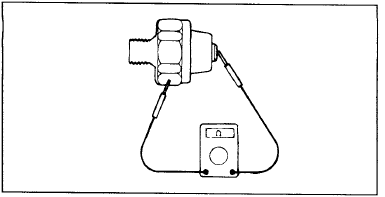
1. Using an ohmmeter, check for continuity between the switch terminal and the switch body. If there is no continuity, replace the oil pressure switch.
2. Insert a thin rod (or wire) into the switch opening and gently push it inward. If there is continuity between the terminal and the switch body with the rod inserted, replace the oil pressure switch.
3. If there is no continuity between the terminal and the switch body when a pressure of 50 kPa is applied to the switch diaphragm through the opening, the oil pressure switch is normal.
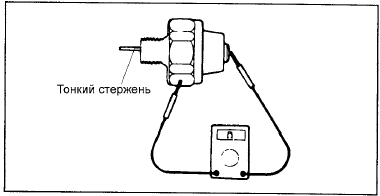
4. Check for pressure (air) leakage. If pressure (air) leaks, the diaphragm is damaged. Replace the oil pressure switch.
Test yourself
A quick Hyundai Elantra CN7 quiz: every answer comes with an explanation and a link to the manual page.