Gauges and indicators
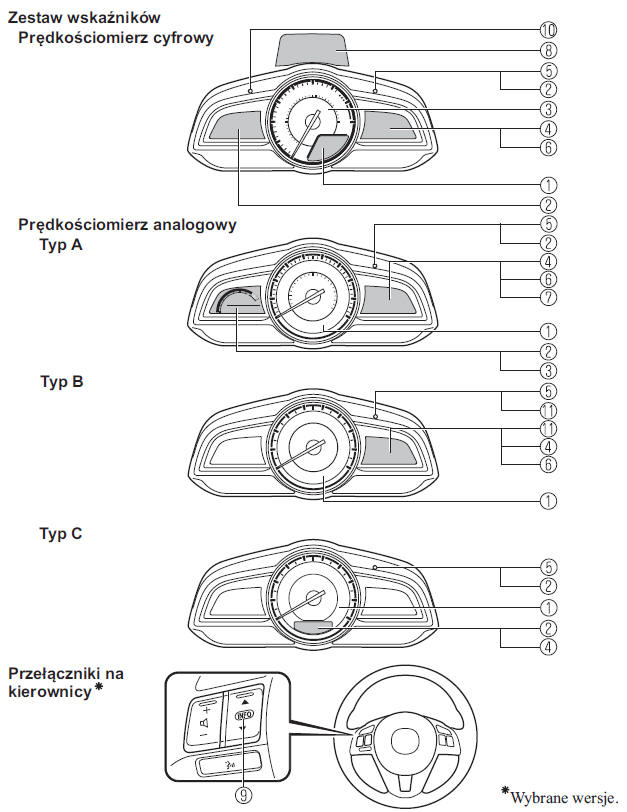
- Speedometer
- Odometer, trip odometer and trip meter selector
- Tachometer.
- Fuel Gauge
- Instrument cluster illumination
- Outside air temperature indicator
- Cruise control set speed indicator
- Head-up display
- Trip computer and INFO button
- Speed unit selection button
- Odometer, trip meter, trip computer and trip meter select button
Speedometer
The speedometer shows the vehicle speed.
CAUTION
(Analog speedometer) If only a few seconds have passed since the ignition was switched off, the needle may not show the actual value. This does not indicate a problem.
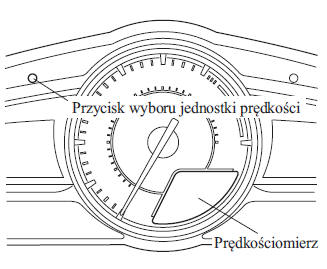
Speed unit selection (Digital speedometer)*
In some countries it may be necessary to change the speed units from km/h to mph or vice versa.
Press and hold the speed unit select button for 1.5 seconds or longer.
The speed units on the speedometer will change from km/h to mph or vice versa.
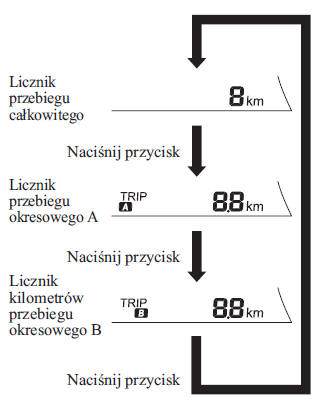
Odometer, trip meter and trip meter select switch
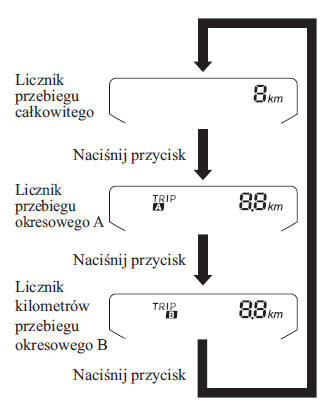
The display can show the odometer, trip meter A or trip meter B by pressing the select button repeatedly. The selected mode will be displayed.
Instrument cluster with digital/analog speedometer (Type A)
Instrument cluster with analog speedometer (Type C)
CAUTION
When the ignition switch is in the ACC or OFF position, the odometer and trip meter are not displayed. However, pressing the select button may accidentally switch the trip meters or reset them for approximately ten minutes:
After turning the ignition switch from ON to OFF.
After opening the driver’s door.
Odometer
The odometer records the total distance traveled by the vehicle.
Trip meter
This meter can record the distance traveled on two trips. One trip is shown on trip meter A and the other on trip meter B.
For example, trip meter A can record the distance from the starting point of a trip, and trip meter B the distance from the point where fuel was last added.
When trip meter A is displayed, press the button for less than one second to switch to trip meter B.
When trip meter A is selected, the abbreviation TRIP A will be displayed. When trip meter B is selected, the abbreviation TRIP B will be displayed.
The trip meter shows the total distance the vehicle has traveled since it was last reset. To reset the trip meter, press and hold the select button for more than 1 second. Use this meter to measure the length of a trip and to calculate fuel consumption.
CAUTION
(Vehicles with audio system type C/type D) When fuel consumption data is reset with the fuel consumption monitor, or trip meter A is reset with the trip meter while the fuel consumption monitor synchronization function is enabled, the fuel consumption data and trip meter A data are reset at the same time.
See “Fuel Consumption Monitor” on page 4-94.
Only the trip meters show tenths of a kilometer.
The trip meter memory will be erased when:
Power is interrupted (blown fuse or disconnected battery).
The vehicle travels more than 9999.9 km.
Odometer, trip meter, trip computer and trip meter select button
The display can show trip meter A or trip meter B by pressing the select button repeatedly. The selected mode will be displayed.
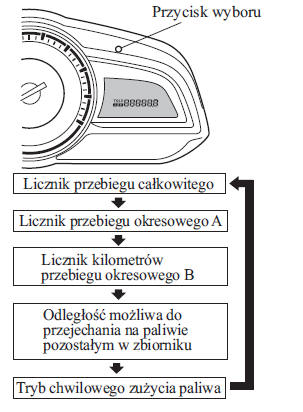
CAUTION
When the ignition switch is in the ACC or OFF position, the odometer and trip meter are not displayed. However, pressing the select button may accidentally switch the trip meters or reset them for approximately ten minutes:
After turning the ignition switch from ON to OFF.
After opening the driver’s door.
Odometer
The odometer records the total distance traveled by the vehicle.
Trip meter
This meter can record the distance traveled on two trips. One trip is shown on trip meter A and the other on trip meter B.
For example, trip meter A can record the distance from the starting point of a trip, and trip meter B the distance from the point where fuel was last added.
When trip meter A is displayed, press the button for less than one second to switch to trip meter B.
When trip meter A is selected, the abbreviation TRIP A will be displayed. When trip meter B is selected, the abbreviation TRIP B will be displayed.
The trip meter shows the total distance the vehicle has traveled since it was last reset. To reset the trip meter, press and hold the select button for more than 1 second.
Use this meter to measure the length of a trip and to calculate fuel consumption.
CAUTION
(Vehicles with audio system type C/type D) When fuel consumption data is reset with the fuel consumption monitor, or trip meter A is reset with the trip meter while the fuel consumption monitor synchronization function is enabled, the fuel consumption data and trip meter A data are reset at the same time.
See “Fuel Consumption Monitor” on page 4-94.
Only the trip meters show tenths of a kilometer.
The trip meter memory will be erased when:
Power is interrupted (blown fuse or disconnected battery).
The vehicle travels more than 9999.9 km.
Trip computer
When the ignition is on, the following information can be selected by pressing the switch.
- Approximate driving range on the fuel remaining in the tank.
- Instantaneous fuel consumption
If there is any problem with the trip computer, consult a specialist. We recommend a Mazda Authorized Service Center.
Driving range on the fuel remaining in the tank
This mode displays the approximate distance that can be driven on the fuel remaining in the tank.
This distance is calculated and displayed every second.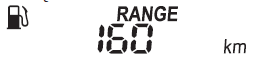
CAUTION
Although the displayed driving range may suggest there is enough fuel to reach your destination, refuel as soon as possible if the fuel gauge shows a very low level or when the low fuel warning light comes on.
The display may not change until more than 9 liters of fuel are added to the tank.
The driving range on the fuel remaining in the tank is the approximate distance you can drive until all the segments of the fuel gauge go out.
Instantaneous fuel consumption
This mode displays the instantaneous fuel consumption, calculated from the amount of fuel used and the distance traveled.
Instantaneous fuel consumption is calculated and displayed every 2 seconds.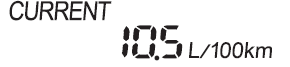
If you slow down to approximately 5 km/h, the instantaneous fuel consumption will be displayed as - - - L/100 km.
Tachometer*
The tachometer shows the engine speed in thousands of revolutions per minute (rpm).
CAUTION
Do not use engine speeds where the needle is in the RED ZONE.
This may cause serious engine damage.
Type A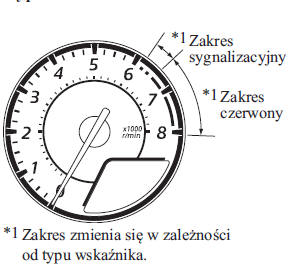
Type B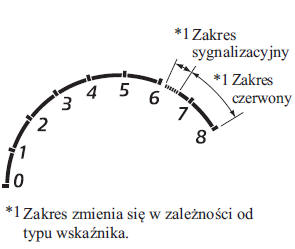
CAUTION
When the tachometer needle enters the warning zone (closely spaced marks), this is a signal to the driver to shift gears before the needle reaches the red zone.
Fuel Gauge
This gauge shows the approximate amount of fuel remaining in the tank when the ignition switch is in the ON position.
We recommend keeping the tank at least 1/4 full at all times.
Digital speedometer / Instrument cluster Type A / Instrument cluster Type B
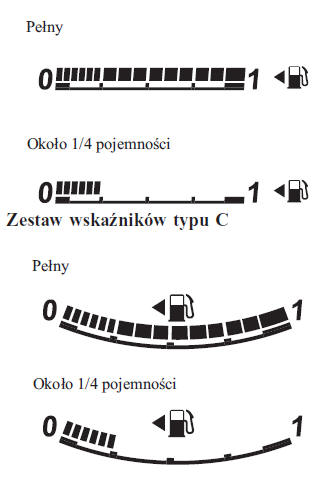
If the low fuel warning light is on or the fuel level is very low, refuel as soon as possible.
See the section “Warning and Indicator Lights” on page 4-40.
CAUTION
After refueling, it may take some time for the gauge needle to settle. The needle may fluctuate while driving on slopes or through curves, as the fuel in the tank moves.
The fuel gauge has more segments when the tank contains less than 1/4 of its capacity, so that the remaining fuel level can be shown in more detail.
The direction of the arrow (
 ) indicates that
the fuel filler is located on the left side of the vehicle.
(SKYACTIV-D 1.5)
If the engine performs abnormally or stalls due to low fuel, refuel as soon as possible to at least 10 liters.
Instrument cluster illumination
If the light switch is in the or

position with the ignition on, the instrument cluster illumination is dimmed.
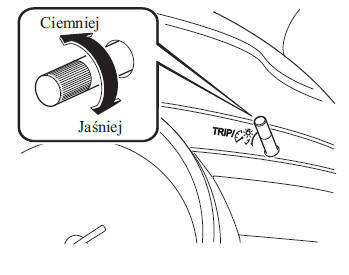
The brightness of the instrument cluster and the instrument cluster illumination can be adjusted using the dial.
- The brightness decreases when the dial is turned to the left. When the dial is turned to the maximum dimming position, a beep sounds.
- The brightness increases when the dial is turned to the right.
Illumination dimming cancel function
Illumination dimming adjustment can be canceled by turning the dial to the right until a beep sounds, while the light switch is in the or
 position with the ignition on. If visibility of the
instrument cluster is limited due to dazzling light from outside, use the illumination dimming cancel function.
CAUTION
When illumination dimming is canceled, the instrument cluster cannot be dimmed, even if the light switch is in the

or position.
When illumination dimming is canceled, the center display screen permanently shows the day mode screen.
Outside temperature indicator*
When the ignition switch is in the ON position, the outside temperature value is displayed.
CAUTION
Under the following conditions, the displayed outside temperature may differ from the actual outside temperature, depending on the surrounding and vehicle conditions:
Very high or low temperatures
Sudden changes in the outside temperature.
The vehicle is parked.
The vehicle is traveling at low speed.
Cruise control set speed display*
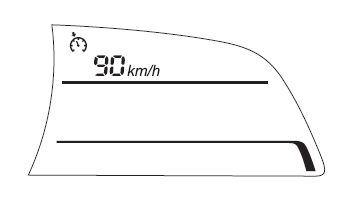
The vehicle speed set using the cruise control is displayed.
Trip computer and INFO button
When the ignition switch is in the ON position, the following information can be selected by pressing the upper  or lower
 part of the INFO button.
- Approximate driving range on the fuel remaining in the tank.
- Average fuel economy
- Instantaneous fuel consumption
- Average vehicle speed
- Vehicle speed warning*
If there is any problem with the trip computer, consult a specialist. We recommend a Mazda Authorized Service Center.
Approximate driving range on the fuel remaining in the tank
This mode displays the approximate distance that can be driven on the fuel remaining in the tank.
This distance is calculated and displayed every second.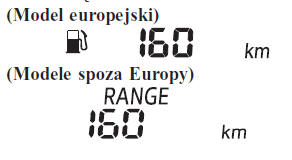
CAUTION
Although the displayed driving range may suggest there is enough fuel to reach your destination, refuel as soon as possible if the fuel gauge shows a very low level or when the low fuel warning light comes on.
The display may not change until more than 9 liters of fuel are added to the tank.
The driving range on the fuel remaining in the tank is the approximate distance you can drive until all the segments of the fuel gauge go out.
Average fuel economy
This mode displays the average fuel consumption calculated from the total fuel used and the distance driven since the vehicle was purchased, the battery was reconnected, or the data was reset. The average fuel consumption is calculated and displayed every minute.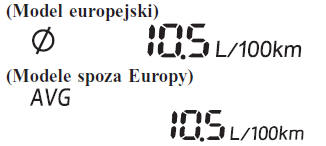
To reset the displayed data, press and hold the INFO button for more than 1.5 seconds.
After pressing the INFO button, the calculated average fuel consumption is displayed as - - - l/100km (- - - mpg) for 1 minute.
Instantaneous fuel consumption
This mode displays the instantaneous fuel consumption, calculated from the amount of fuel used and the distance traveled.
Instantaneous fuel consumption is calculated and displayed every 2 seconds.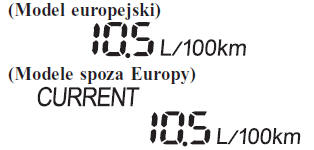
If you slow down to approximately 5 km/h, the instantaneous fuel consumption will be displayed as - - - L/100 km.
Average vehicle speed
This mode displays the average vehicle speed, calculated from the distance and driving time since the battery was reconnected or the data was reset.
The average speed is calculated and displayed every 10 seconds.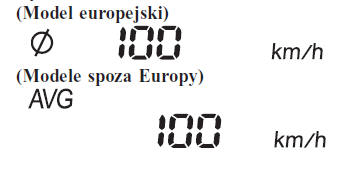
To reset the displayed data, press and hold the INFO button for more than 1.5 seconds. After pressing the INFO button, the calculated average speed is displayed as - - - km/h for 1 minute.
Vehicle speed warning*
This mode displays the speed value set for the vehicle speed warning function. You can change the speed at which the warning is sounded.
CAUTION
The vehicle speed warning indication appears on the display at the same time the warning sound is emitted. The set vehicle speed flashes several times.
The vehicle speed warning can be set using the INFO button.
CAUTION
Always set the vehicle speed in accordance with the laws of the country/region in which you are driving. Also, always check the vehicle speed on the speedometer.
The vehicle speed warning function can be set to values from 30 to 250 km/h.
The vehicle speed warning can be set as follows.
1. Press the INFO button on the vehicle speed warning screen.
2. Select ON and press the INFO button.
3. Set the vehicle speed using the upper or lower part of the INFO button, then press the INFO button.
Test yourself
A quick Mazda 2 quiz: every answer comes with an explanation and a link to the manual page.