Camshafts. Removal and Installation
Special Service Tools / General Equipment
 |
303-1532 Installer, Camshaft Seal TKIT-2010B-FLM TKIT-2010B-RYAD |
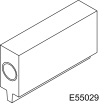 |
303-393-02 Adapter, 303-393 TKIT-2012A-FL TKIT-2012A-RHD |
 |
303-393A Flywheel Locking Tool TKIT-2012A-FL TKIT-2012A-RHD |
 |
303-409 (T92C-6700-CH) Remover, Crankshaft Seal TKIT-1992-FX/FMX/FLMX TKIT-1993-LMX/MX |
 |
303-748 Crankshaft Locking Tool TKIT-2010B-FLM TKIT-2010B-RHD |
| Feeler gauge | |
| Heat gun | |
Materials
| Name | Specification |
|---|---|
| Flange Sealant CU7Z-19B508-A |
WSS-M2G348-A11 |
| Motorcraft® Metal Surface Preparation Wipes ZC-31-B |
- |
| Engine Oil — SAE 5W-20 — Semi-Synthetic Engine Oil XO-5W20-Q1SP |
WSS-M2C945-B1 |
Removal
NOTICE: When performing engine repairs, cleanliness is extremely important. Any foreign material (including any material created during gasket surface cleaning) that enters the oil passages, coolant passages or oil pan may cause engine failure.
NOTICE: Do not rotate the camshafts unless specified in this procedure. Rotating the camshafts or crankshaft with timing components loosened or removed may cause serious damage to the valves and pistons.
- Remove the VCT units.
Refer to: Variable Camshaft Timing (VCT) Unit (Engine 303-01B — 1.6 L EcoBoost (132 kW/180 L PS) — Sigma, Removal and Installation). - Using the special tools, remove the camshaft seals.
Use special service tool: 303-409 (T92C-6700-CH) Crankshaft Seal Remover.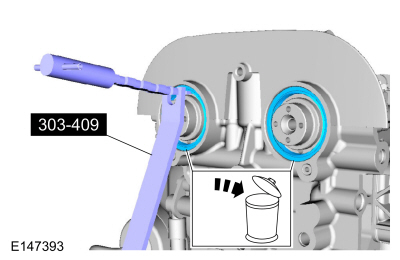
NOTICE: Use a heat gun to soften the flange sealant; this will assist in removing the camshaft cap. Failure to follow these instructions may damage the camshaft cap.
- Remove the camshaft cap bolts and caps, and discard the bolts.
- Heat the cap and remove it.
Use common service equipment: heat gun.
- Remove the camshafts.
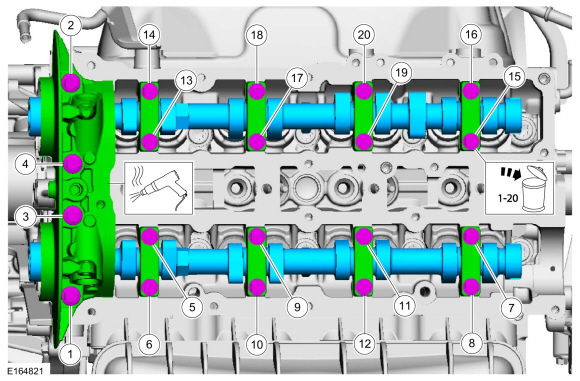
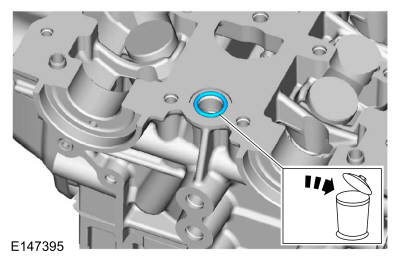
- Remove and discard the O-ring.
- Make sure the mating surfaces are clean and free of foreign material.
Material: Motorcraft® Metal Surface Preparation Wipes / ZC-31-B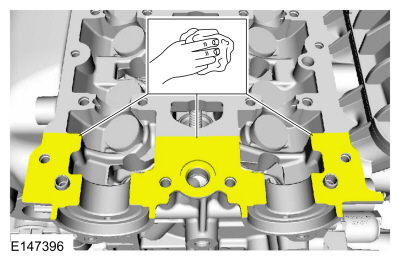
- Make sure the mating surfaces are clean and free of foreign material.
Material: Motorcraft® Metal Surface Preparation Wipes / ZC-31-B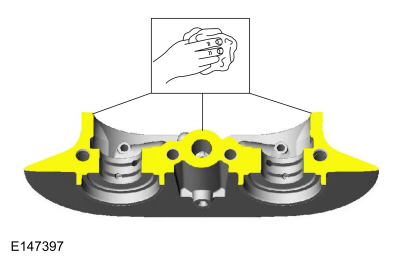
Installation
NOTICE: If any new components (cylinder head, valves, lifters, camshafts) are installed, the valve clearance must be checked. Follow the next 12 steps exactly, otherwise serious engine damage may occur. If original components are installed, it is not necessary to check the valve clearance; proceed to step 13.
Paint a mark on the crankshaft at the 12 o'clock position.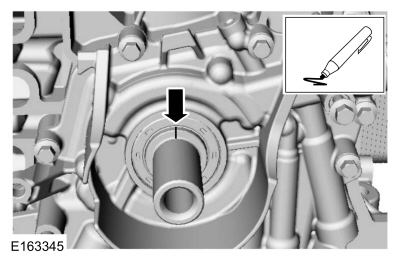
- Remove the special service tools: 303-393A Flywheel Locking Tool, 303-393-02 Adapter, 303-393.
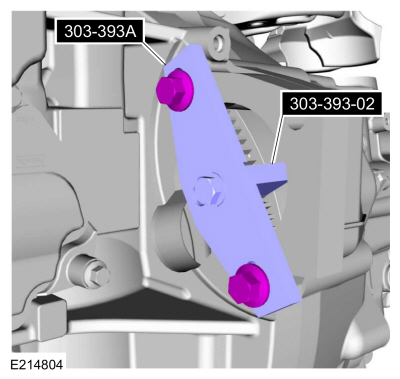
- Remove the special service tool: 303-748 Crankshaft Locking Tool.
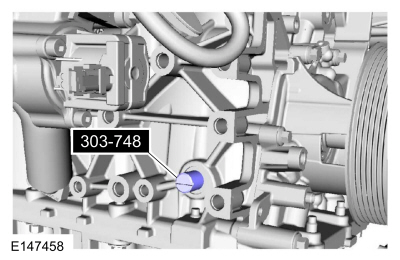
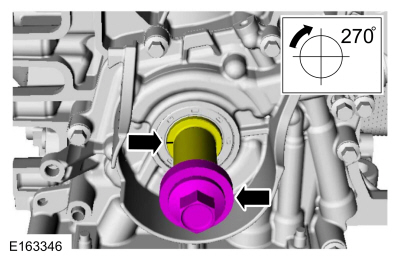
- Using the crankshaft bolt and a washer, rotate the crankshaft clockwise 270 degrees until the paint mark is at the 9 o'clock position.
NOTICE: Failure to follow the camshaft tightening procedure may damage the camshafts.
Evenly tighten the bolts in half-turn increments until the camshaft bearing caps and VCT bridge are seated against the cylinder head.
Material: Engine Oil — SAE 5W-20 — synthetic engine oil / XO-5W20-Q1SP (WSS-M2C945-B1)
Torque:
Step 1: Tighten bolts 1 through 16 to: 62 lb-in (7 N·m)
Step 2: Tighten bolts 17 through 20 to: 89 lb-in (10 N·m)
Step 3: Tighten bolts 1 through 16 an additional: 45°
Step 4: Tighten bolts 17 and 18 an additional: 70°
Step 5: Tighten bolts 19 and 20 an additional: 53°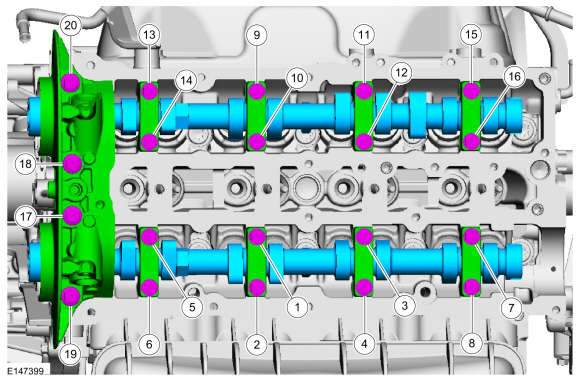
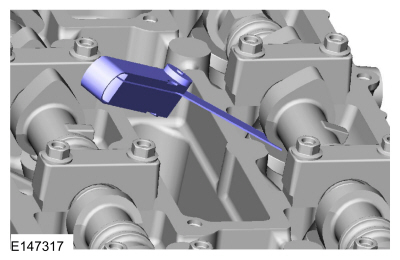
- Using the camshaft flats, rotate the camshaft to place the cam lobe on the base circle so that the lobe points away from the tappet.
- Using a feeler gauge, measure the clearance of each valve and record its position.
Use general equipment: Feeler Gauge
- Repeat to measure all cam/tappet clearances.
- Intake: 0.0118 in (0.3 mm)
- Exhaust: 0.0157 in (0.4 mm)
- Intake: 0.010–0.014 in (0.255–0.345 mm)
- Exhaust: 0.014–0.018 in (0.355–0.445 mm)
NOTICE: Failure to follow the camshaft loosening procedure may damage the camshafts.
Loosen the camshaft bearing caps sequentially, 2 turns at a time, until all tension is released from the camshaft bearing caps in the sequence shown.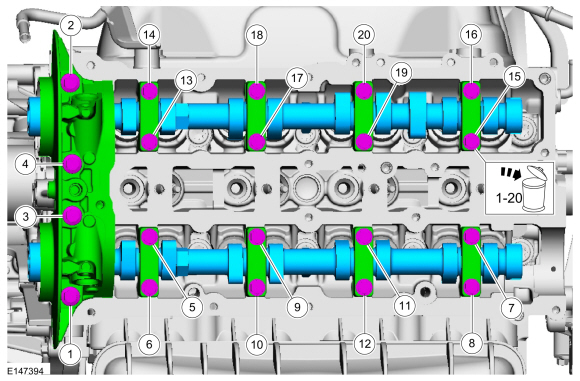
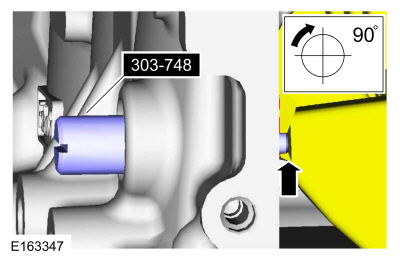
- Install the special service tool: 303-748 Crankshaft Locking Tool.
- Rotate the crankshaft clockwise 90 degrees until the crankshaft contacts the crankshaft pin.
- If necessary, replace all lifters with the lifters selected during the valve clearance check.
Material: Engine Oil — SAE 5W-20 — synthetic engine oil / XO-5W20-Q1SP (WSS-M2C945-B1)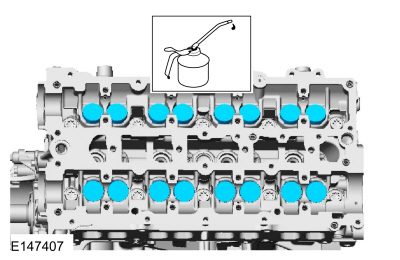
- Install the special service tools: 303-393A Flywheel Locking Tool, 303-393-02 Adapter, 303-393.
- Install a new O-ring.
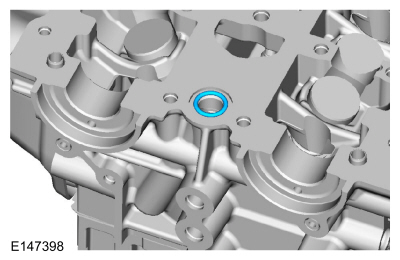
- Apply flange sealant as shown in the illustration.
Material: Flange Sealant / CU7Z-19B508-A (WSS-M2G348-A11)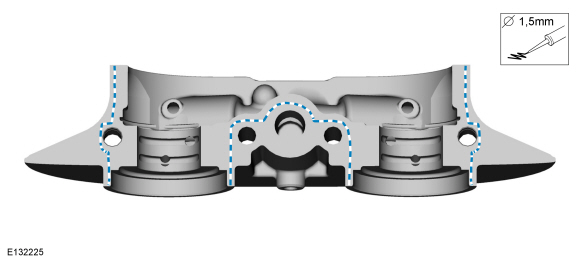
NOTICE: Failure to follow the camshaft tightening procedure may damage the camshafts.
Evenly tighten the bolts in half-turn increments until the camshaft bearing caps and VCT bridge are seated against the cylinder head.
Material: Engine Oil — SAE 5W-20 — synthetic engine oil / XO-5W20-Q1SP (WSS-M2C945-B1)
Torque:
Step 1: Tighten bolts 1 through 16 to: 62 lb-in (7 N·m)
Step 2: Tighten bolts 17 through 20 to: 89 lb-in (10 N·m)
Step 3: Tighten bolts 1 through 16 an additional: 45°
Step 4: Tighten bolts 17 and 18 an additional: 70°
Step 5: Tighten bolts 19 and 20 an additional: 53°- Lubricate the camshaft seals with clean engine oil and install them using the special tool.
Use special service tool: 303-1532 Camshaft Seal Installer.
Material: Engine Oil — SAE 5W-20 — synthetic engine oil / XO-5W20-Q1SP (WSS-M2C945-B1)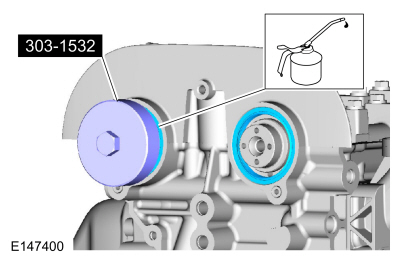
- Install the VCT units.
Refer to: Variable Camshaft Timing (VCT) Unit (Engine 303-01B — 1.6 L EcoBoost (132 kW/180 L PS) — Sigma, Removal and Installation).
Test yourself
A quick Ford Fiesta quiz: every answer comes with an explanation and a link to the manual page.