Engine
Engine — Removal
In this manual: Engine
62steps
~382min
5/5difficulty
2special tools
Done 0 of 62
Special Service Tools / General Equipment
 |
300-OTC1585AE Powertrain Lift |
 |
300-OTC1819E Floor Crane 2200 lb, Folding |
 |
303-1502 Engine Lifting Device TKIT-2012A-FL TKIT-2012A-RYAD |
 |
303-476 (T94P-9472-A) Socket, Exhaust Gas Oxygen Sensor TKIT-1994-LM/M TKIT-1994-F TKIT-1994-FLM/FM |
| Strap wrench | |
| Oil Drain Equipment | |
| Cable Ties | |
| Hose Clamp Removal/Installation Tool | |
| Wood block | |
Materials
| Name | Specification |
|---|---|
| Motorcraft® Penetrating and Locking Lubricant XL-1 |
- |
- Position the vehicle in NEUTRAL on the lift.
Refer to: Jacking and Lifting - Overview (100-02 Jacking and Lifting, Description and Operation). - Relieve the fuel system pressure.
Refer to: Fuel System Pressure Relief (310-00B Fuel System – General Information) – 1.6 L EcoBoost (132 kW/180 L hp) – Sigma, General Procedures). - Recover the refrigerant.
Refer to: Air Conditioning (A/C) System Recovery, Evacuation and Charging (412-00 Climate Control System — General Information). - Drain the cooling system.
Refer to: Engine Cooling System Draining, Vacuum Filling and Bleeding (303-03B Engine Cooling – 1.6 L EcoBoost (132 kW/180 L hp) – Sigma, General Procedures). - Remove the engine appearance cover.
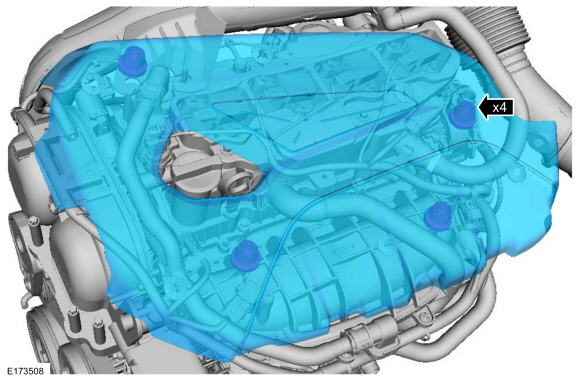
- Disconnect the vacuum hose connector.
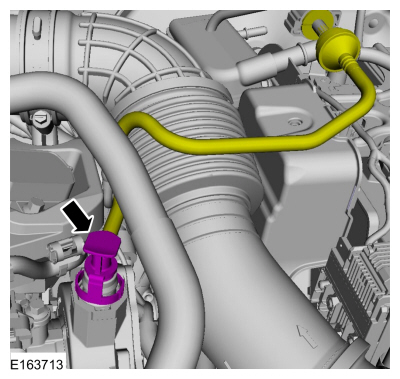
- Remove the air cleaner.
Refer to: Air Cleaner (303-12B Intake Air Distribution and Filtration – 1.6 L EcoBoost (132 kW/180 L hp) – Sigma, Removal and Installation). - Disconnect the quick-connect coupling from the air cleaner outlet tube.
- Loosen the clamp and remove the air cleaner outlet tube.
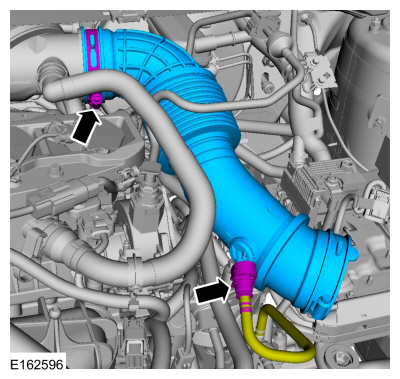
NOTICE: Whenever turbocharger intake system components are removed, always cover open ports to protect against debris. It is important to prevent foreign material from entering the system. The turbocharger compressor wheel blades are susceptible to damage from even small particles. All components must be inspected and cleaned, if necessary, before installation or reassembly.
- Remove the engine outer cover stud and nut.
- Disconnect the crankcase vent tube, loosen the clamp and remove the air cleaner outlet tube.
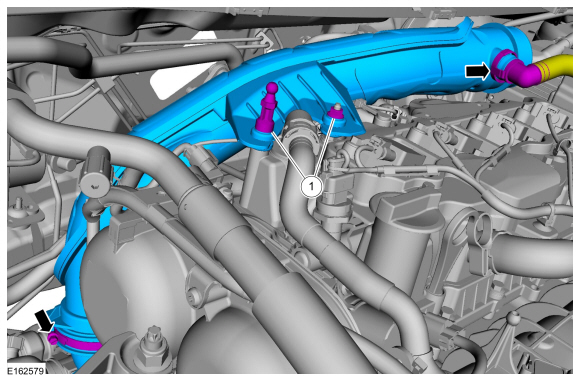
- Remove the battery tray.
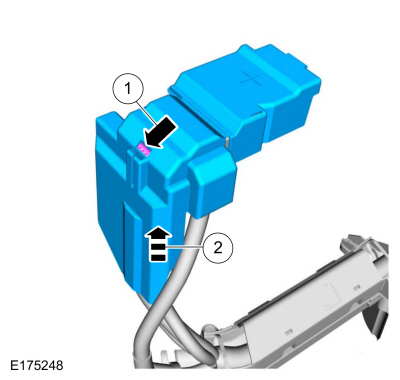
Refer to: Battery Tray – 1.6 L EcoBoost (132 kW/180 L hp) – Sigma (414-01 Battery, Mounting and Cables, Removal and Installation). - Release the tab.
- Remove the battery terminal cover.
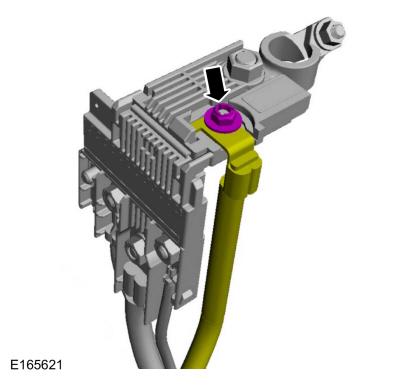
- Remove the nut and wire.
- Disconnect the electrical connector.
- Remove the ground bolt and wire.
- Disconnect the wiring harness retainers.
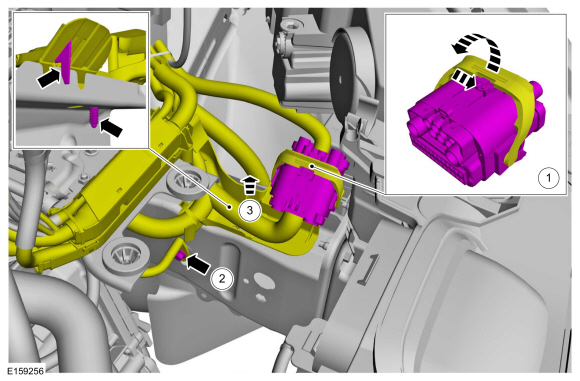
- Remove the wiring harness retainers.
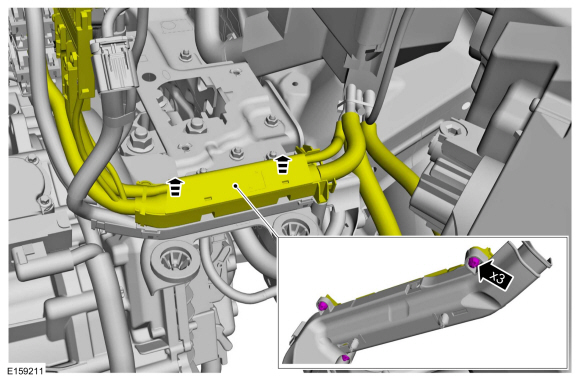
- Disconnect the wiring harness retainers.

- Remove the nuts and the bracket.

- Disconnect the coolant hose.
Use the general equipment: hose clamp removal/installation tool.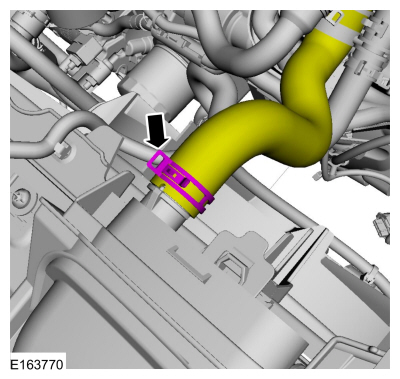
- On early-build vehicles, disconnect the fuel feed line connection.
Refer to: Quick Connect Coupling (310-00B Fuel System – General Information) – 1.6 L EcoBoost (132 kW/180 L hp) – Sigma, General Procedures).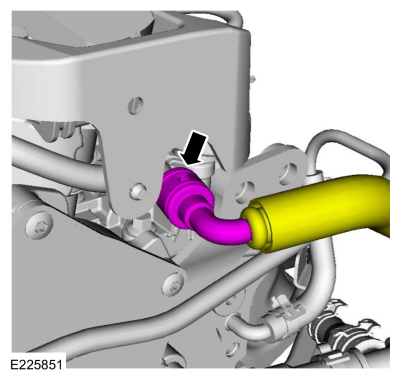
- On late-build vehicles, disconnect the fuel feed line connection.
Refer to: Spring-Lock Couplings (310-00B Fuel System – General Information) – 1.6 L EcoBoost (132 kW/180 L hp) – Sigma, General Procedures).
- Disconnect the quick connectors and electrical connector, then remove the fuel vapor tube assembly.
Refer to: Quick Connect Coupling (310-00B Fuel System – General Information) – 1.6 L EcoBoost (132 kW/180 L hp) – Sigma, General Procedures).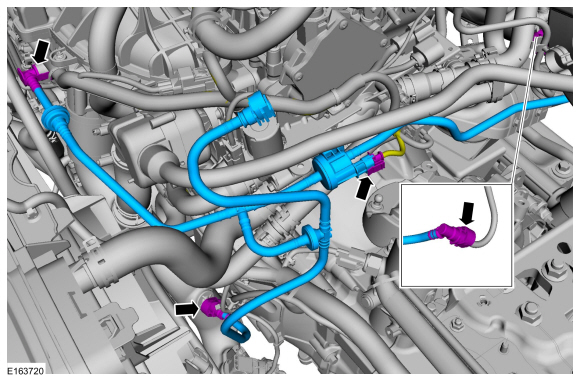
- Disconnect the coolant tube and remove the retainer.
Use general equipment: hose clamp removal/installation tool.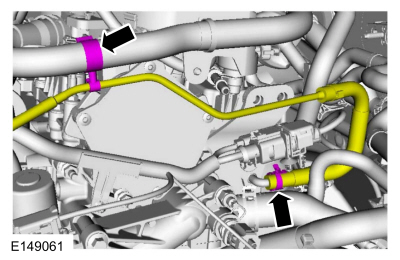
- Disconnect the heater hoses.
Use general equipment: hose clamp removal/installation tool.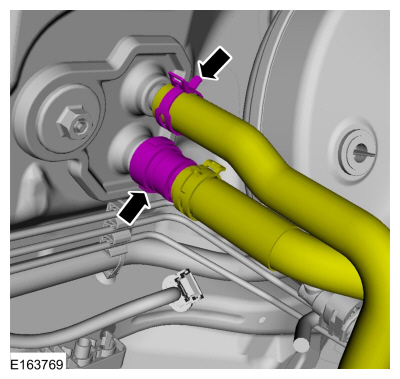
- Disconnect the tube from the retaining clip.
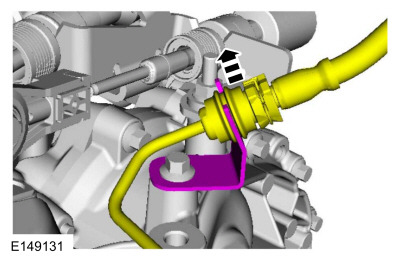
- Disconnect the clutch master cylinder fluid supply tube.
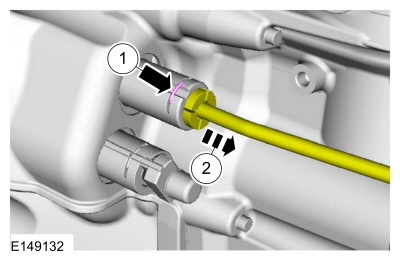
- Disconnect the shift selector cables.

- Remove the nut and disconnect the A/C line.
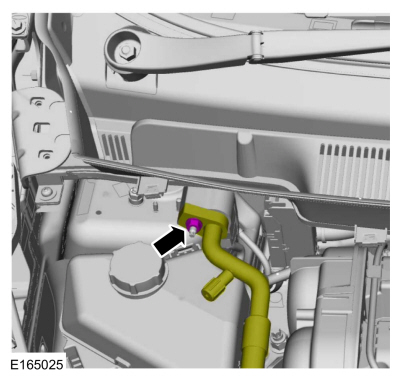
- Remove the nut and disconnect the A/C line.

- Remove the coolant recovery reservoir.
Refer to: Coolant Recovery Reservoir (303-03B Engine Cooling - 1.6 L EcoBoost (132 kW/180 L PS) - Sigma, Removal and Installation). - Disconnect the hose, loosen the clamp and remove the resonator assembly.
- Loosen the hose clamp and move the throttle body hose aside.

- Loosen the clamp and disconnect the electrical connector.
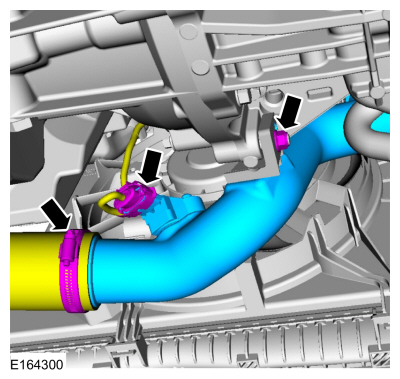
- Remove the nut and the CAC outlet tube.
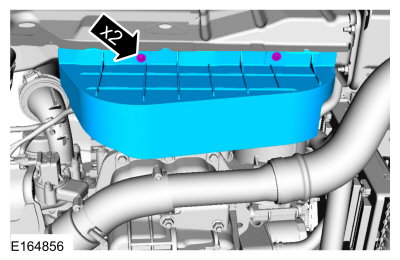
- Remove the clips and the shield.
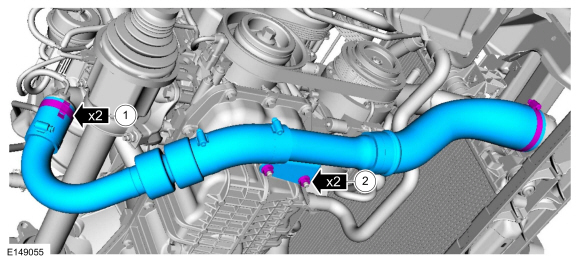
- Loosen the clamps.
- Remove the nuts and the TP outlet tube.
- Remove the front subframe.
Refer to: Front Subframe (502-00 Uni-Body, Subframe and Mounting System, Removal and Installation). - Remove the drain plug and drain the engine oil, then install the drain plug.
Use general equipment: oil drain equipment.
Torque: 21 lb-ft (28 N·m)
- Remove and discard the engine oil filter.
Use general service equipment: strap wrench.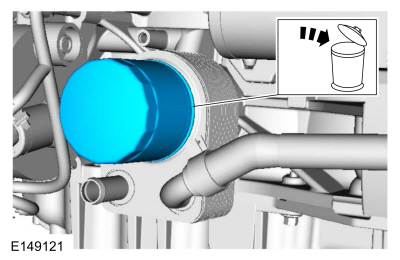
- Drain the transmission fluid.
Refer to: Transmission Fluid Draining and Filling (308-03B Transmission/Transaxle — 6-Speed Manual Transmission — B6, General Procedures). - Remove and discard the half shaft bearing retaining clip and nut.
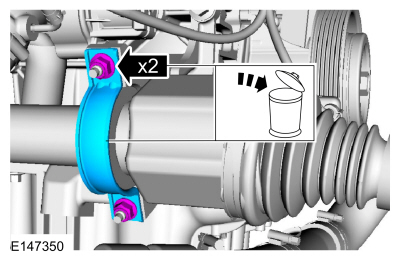
- Remove and support the half shaft from the transmission.
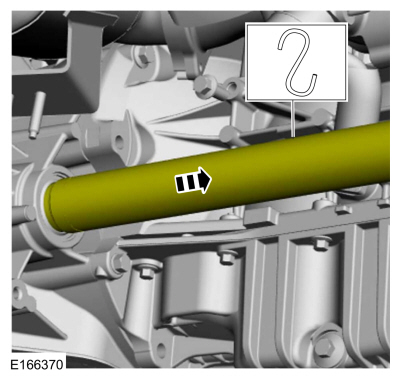
- Using a pry bar, separate the half shaft from the transmission and support.

- Remove the bolts and the bracket.

- Support the flexible exhaust pipe with support wire or a suitable strap.
Use general equipment: cable ties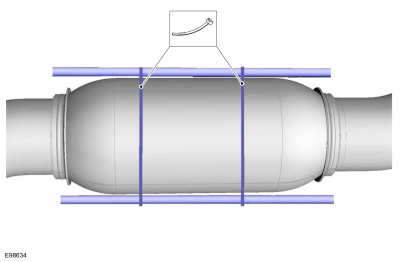
- Remove the nuts.
- Install the exhaust system. Remove and discard the gasket.
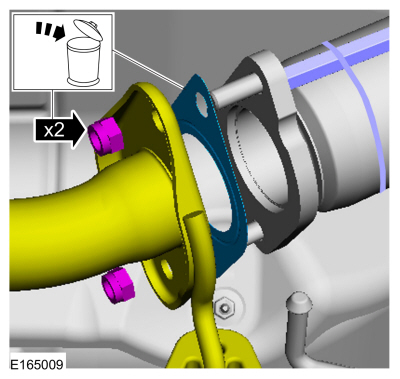
- Install the special service tool: 300-OTC1585AE Powertrain Lift.
Use the general equipment: wooden block.
- Remove the nuts.
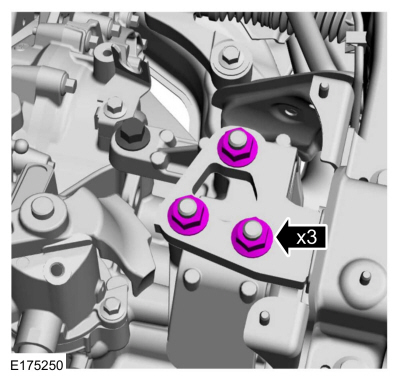
- Remove the nuts.
- Remove the bolts and the engine mount.

- Using the special tool, lower the engine from the vehicle.
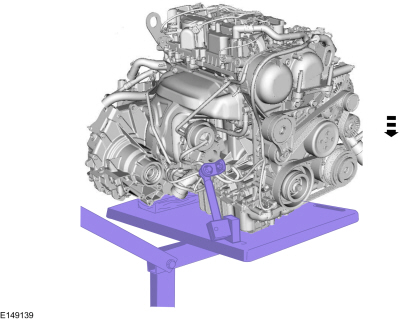
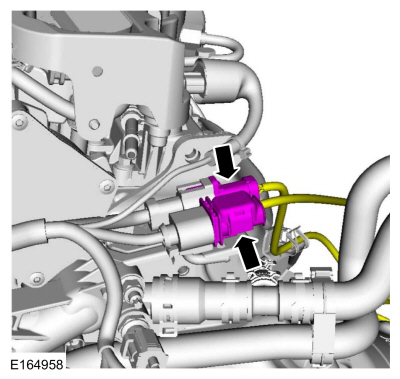
- Disconnect the electrical connectors.
- Using the special tool, remove the HO2S sensor. Disconnect the wiring harness retainer.
Use the special service tool: 303-476 (T94P-9472-A) Exhaust Gas Oxygen Sensor Socket.
Material: Motorcraft® Penetrating and Locking Fluid. / XL-1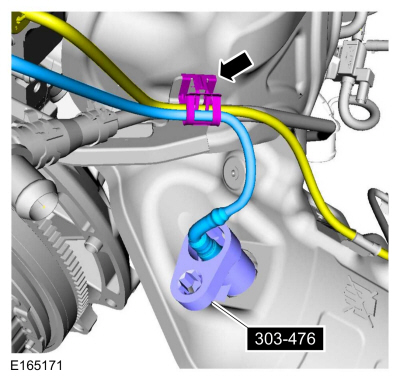
- Remove the bolts and the heat shield.
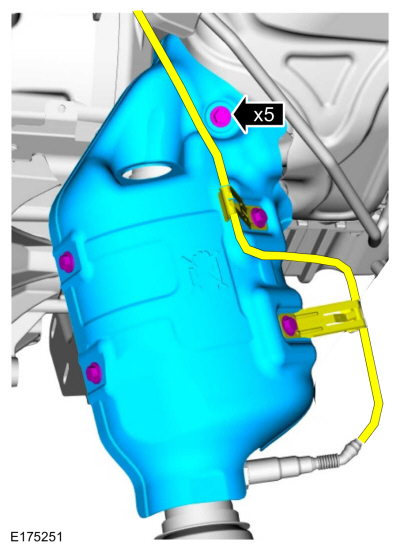
- Remove the catalytic converter bolts.
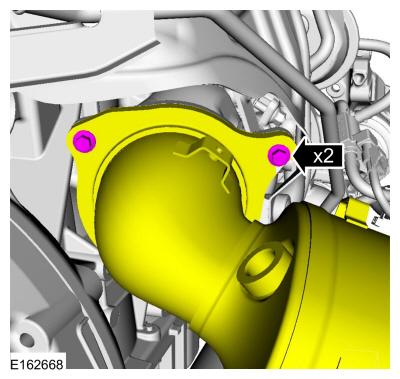
- Remove the nuts and the catalytic converter mounting bracket.
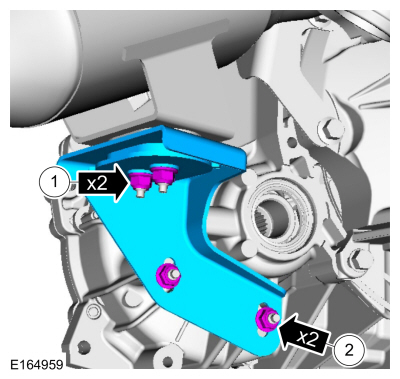
- Remove the bolt and the catalytic converter.

- Discard the catalytic converter gasket.
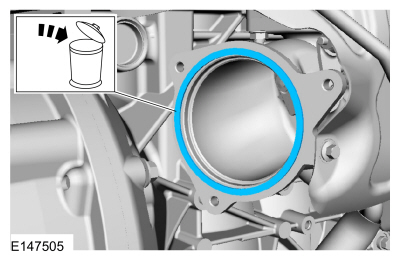
- Remove the bolts and the bracket.
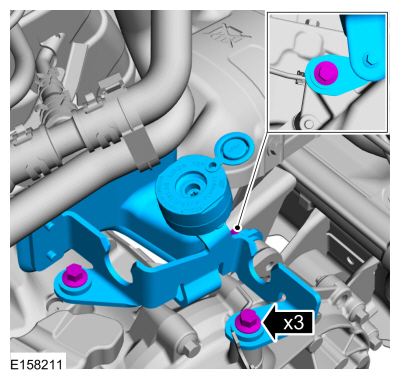
- Remove the nut and the starter solenoid terminal electrical connection.
- Remove the nut and the starter solenoid terminal electrical connection.
- Loosen the clamp and disconnect the coolant hose, then set it aside. Remove the bolts and the starter.
Use the general equipment: hose clamp removal/installation tool.
- Disconnect the wiring harness retainer. Disconnect the electrical connector.

- Release the retainer and remove the coolant hose.
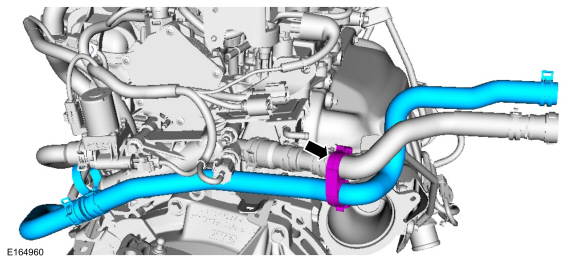
- Install the engine lifting bracket and bolts.
Install the special service tool: 303-1502 Engine Lifting Device.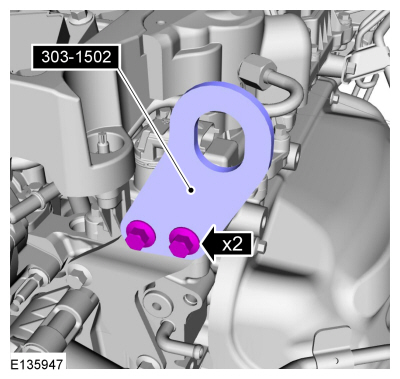
- Install the engine floor crane.
Install the special service tool: 300-OTC1819E 2200 lb Floor Crane, Folding.
- Remove the special service tool: 300-OTC1585AE Powertrain Lift.
- Remove the transmission bolts.
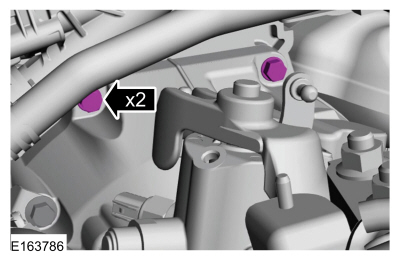
- Remove the transmission bolts.
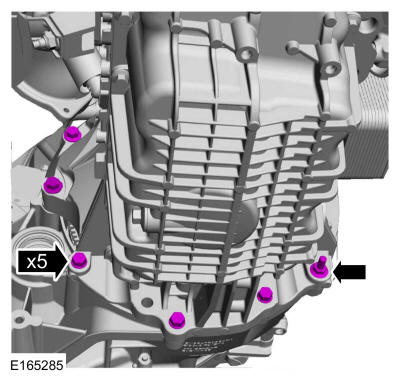
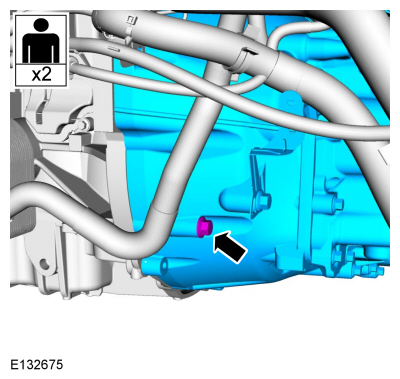
- Remove the transmission-to-engine attaching bolt and remove the transmission from the engine.
Test yourself
A quick Ford Fiesta quiz: every answer comes with an explanation and a link to the manual page.
Was this page helpful?