Engine Mechanical System
Lubrication System
In this manual: Engine Mechanical System
28steps
~168min
4/5difficulty
Done 0 of 28
Contents:
Engine Oil Replacement
Special Service Tool
| Tool Name / Number | Illustration | Description |
| Oil filter wrench 09263 - 2E000 |
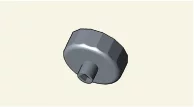 |
Used for removing and installing oil filter |
Engine Oil And Filter Replacement
|

|
- Drain engine oil.
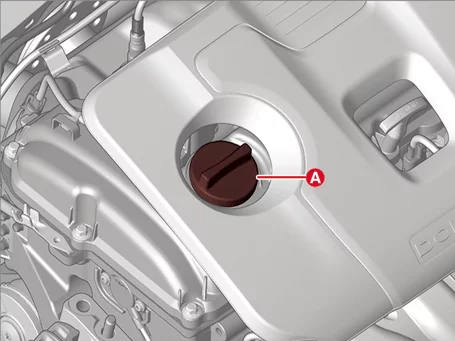
- Open the oil filler cap (A).
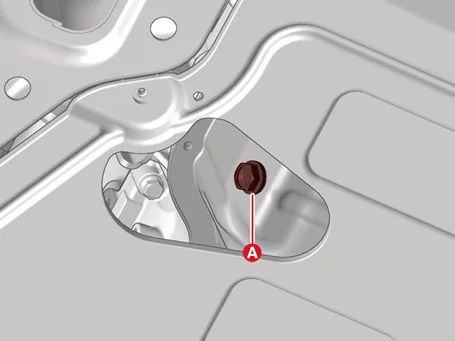
- Remove the oil drain plug (A), and drain the oil into a container.
- Open the oil filler cap (A).
- Replace the oil filter.
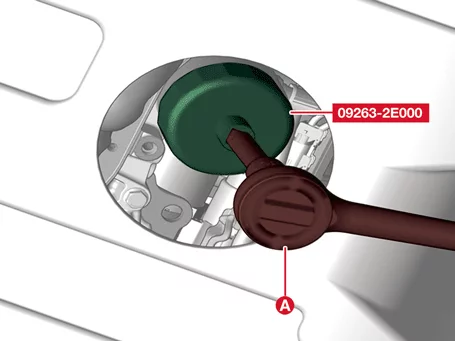
- Remove the oil filter by using SST (09263 - 2E000) and wrench (A).

- Check and clean the oil filter installation surface.
- Check the part number of the new oil filter is as same as old one.
- Apply clean engine oil to the gasket of a new oil filter.
- Lightly screw the oil filter into place, and tighten it until the gasket contacts the seat.
- Install the oil filter by using SST (09263 - 2E000) and wrench.
Tightening torque : 11.8 - 15,7 N·m
- Remove the oil filter by using SST (09263 - 2E000) and wrench (A).
- Fill the engine oil.
- Install the oil drain plug (A) with the new gasket.
Tightening torque : 34.3 - 44 N·m
- Fill new engine oil through the oil filler hole. Remove the oil level gauge before adding oil.
Capacity Total : 4.5 ℓ (1.19 U.S.gal., 4.76 U.S.qt., 3.96 lmp.qt.) Oil Pan : 3.7 ℓ (0.98 U.S.gal., 3.91 U.S.qt., 3.26 lmp.qt.) Drain and refill including oil filter : 4.0 ℓ (1.06 U.S.gal., 4.23 U.S.qt., 3.52 lmp.qt.) - Install the oil filler cap (A).
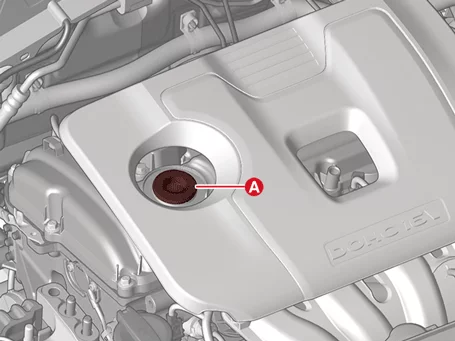
- Install the oil drain plug (A) with the new gasket.
- Start engine and check for leaks.
- Recheck the engine oil level.
- When rechecking the engine oil level, warm up the engine sufficiently and check the engine oil level.
- If sufficient warm-up is not performed, the engine oil level may be checked below the specified value.
- Start the engine and check for leaks around the oil filter cap and drain plug.
Engine Oil Inspection
Inspection
Engine oil- Check the condition of the engine oil. Check for oil discoloration, moisture inflow, and viscosity drop, If the engine quality is noticeably poor, change the oil.
- Check the engine oil level. After engine warm up stop the engine wait 5 minutes then check the oil level. Oil level should be between the "L" and "F" marks on the dipstick. If low check for leakage and add oil up to the "F" mark.
Be careful not to over the "F" marks.
|
Oil Pan Components and Components Location
Component
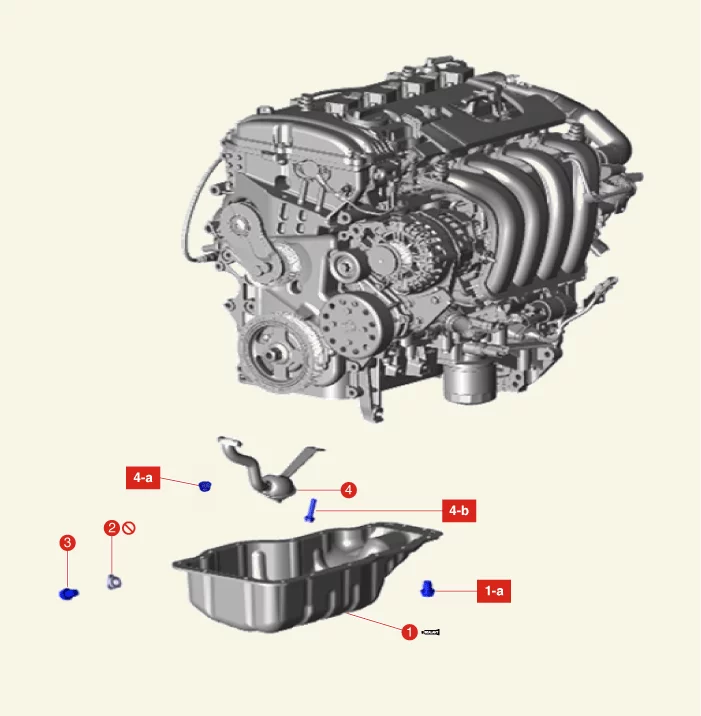
| 1. Oil Pan 1-a. 11.8 - 13,7 N·m 2. Oil Drain Plug Gasket 3. Oil Drain Plug |
4. Oil Screen 4-a. 11.8 - 13,7 N·m 4-b. 19.6 - 26 N·m |
Oil Pan Removal
Special Service Tool
| Tool Name / Number | Illustration | Description |
| Oil pan remover 09215 - 3C000 |
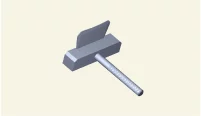 |
Removal of oil pan |
Removal
- Remove the engine room under cover. (Refer to Engine and Transaxle Assembly - "Engine Room Under Cover")
- Drain engine oil. (Refer to Lubrication System - "Engine Oil")
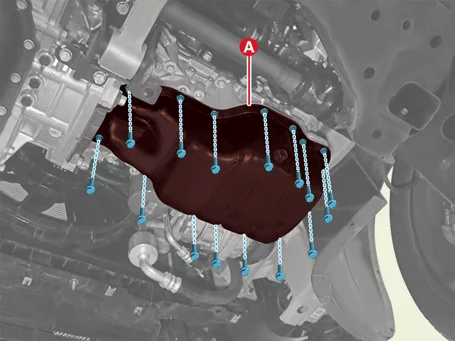
- Remove the cover (A) after removing bolt.
Tightening torque : 42.2 - 48 N·m
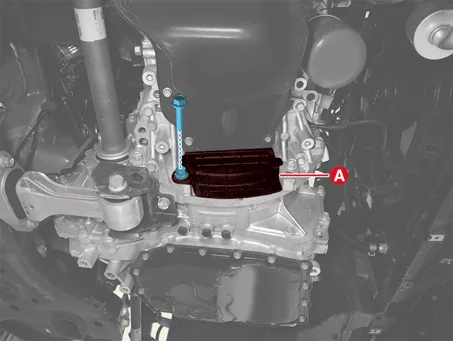
- Remove the oil pan bolts.
Tightening torque : 11.8 - 13,7 N·m
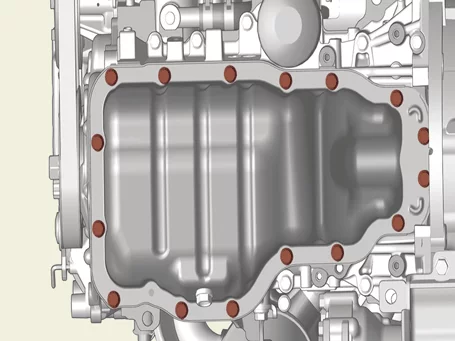
- Remove the oil pan using the SST (09215 - 3C000).
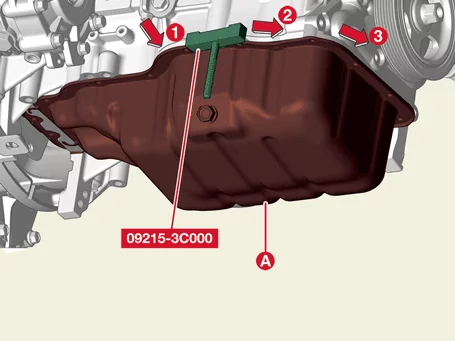

- Insert the SST between the oil pan and the lower crankcase by tapping it with a plastic hammer in the direction of
 arrow.
- After tapping the SST with a plastic hammer along the direction of
 arrow around more than 2/3 edge of the oil pan, remove it from the lower crankcase.
- If the special tool is pushed up and down while it is sandwiched between the oil pan and the lower crankcase (like a lever), the blade of the special tool will be damaged, so never use it while pushing it up or down.
- Be careful not to damage the contact surfaces of the lower crankcase and the oil pan.
- Insert the SST between the oil pan and the lower crankcase by tapping it with a plastic hammer in the direction of
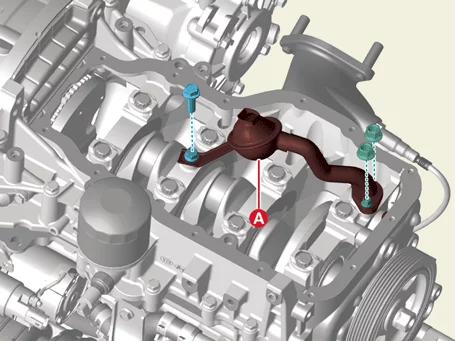
- Remove the oil screen (A) after removing bolt and nuts.
Tightening torque Bolt : 19.6 - 26 N·m Nuts : 11.8 - 13,7 N·m
Oil Pan Installation
Installation
- Install the oil screen (A) with a new gasket.
Tightening torque Bolt : 19.6 - 26 N·m Nuts : 11.8 - 13,7 N·m
- Install the oil pan.
- Before assembling the oil pan, remove the hardening sealant, foreign material, oil, dust, moisture remaining on the sealing surface and on the mating part.
- Assemble the oil pan within 5 minutes after applying sealant.
Bead width : 3.500 - 4.500 mm (0.1378 - 0.1772 in.) Sealant : Threebond 1217H or equivalent
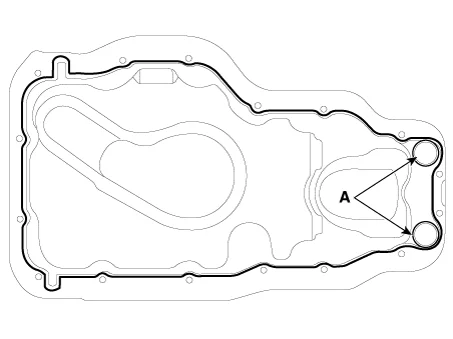
- sealant must not be protruded into the inside of oil pan.
- The sealant application must be inside the bolt groove.
- When applying sealant gasket on the lower crankcase, the sealant application line should be same with that of the oil pan.
- Assemble the oil pan (A) and then uniformly tighten the oil pan bolts in several passes.
Tightening torque : 11.8 - 13,7 N·m
After assembly, wait at least 30 minutes before filling the engine with oil.
- Fill the engine oil. (Refer to Lubrication System - "Engine Oil")
- Start engine and check for leaks.
Oil Pump Removal and Installation
Removal and Installation
- If oil pump change is necessary, replace timing chain cover and oil pump assembly. (Refer to Timing System - "Timing Chain Cover")
|
Oil Level Gauge & Pipe Removal and Installation
Removal
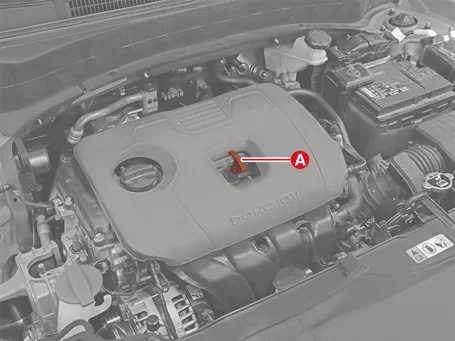
- Remove the oil level gauge (A).
Installation
- Install in reverse order of removal.
Oil Level Sensor Removal and Installation
Removal
- Disconnect the battery negative ( - ) terminal.
- Remove the engine room under cover. (Refer to Engine and Transaxle Assembly - "Engine Room Under Cover")
- Drain the engine oil. (Refer to Lubrication System - “Engine Oil”)
- Disconnect the oil level sensor connector.
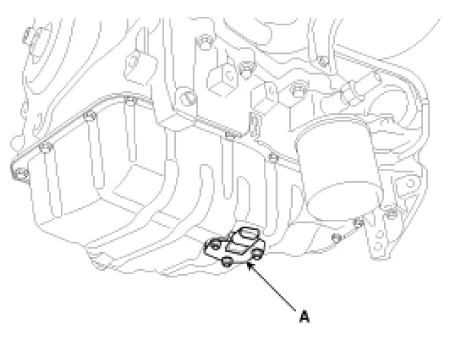
- Remove the oil level sensor (A) after removing the nuts.
Tightening torque : 8.8 - 9,8 N·m
Installation
- Install in the reverse order of removal
- Fill engine oil. (Refer to Lubrication System - "Engine Oil")
Was this page helpful?