Engine Mount Components
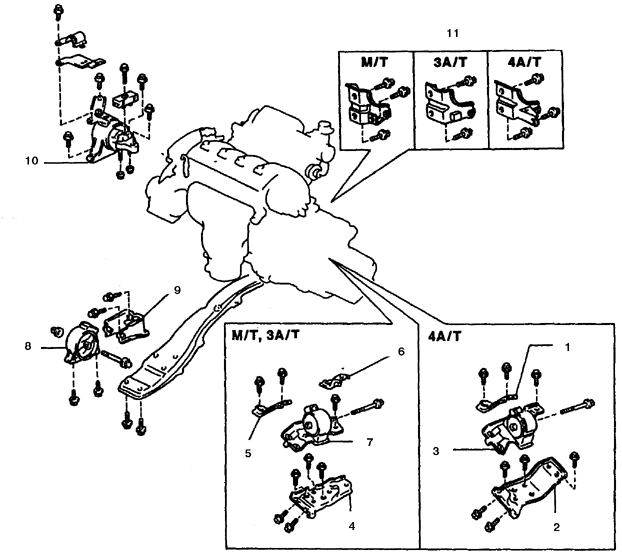
Engine Mount Components
1. Left mount bracket
2. Left mount bracket
3. Engine mount insulator, left
4. Left mount bracket
5. Left mount bracket (M/T)
6. Left mount bracket (3A/T)
7. Engine mount insulator, left (M/T, 3A/T)
8. Engine mount insulator, front right
9. Right mount bracket
10. Mount insulator, right
11. Right rear engine mount bracket
Engine mounts generally require no maintenance. However, if the engine mounts are damaged or aged, they must be replaced immediately. Otherwise, excessive loads from the powertrain during driving may cause failure or accelerated wear of other components.
Inspection
PROCEDURE
1. To check the condition of the mounts, slightly raise the engine to relieve the load on the mounts.
2. Raise the vehicle and support it on stands, then place a support under the engine oil pan. Place a large board between the pan and the support and carefully raise the engine to relieve the load on the mounts. Do not place the board under the drain plug.
* Do not perform any work under the engine while it is supported by a jack or stand!
3. Check the mount rubber for cracks, hardening, or separation from the metal parts. Sometimes the rubber may separate directly at the center of the lower part of the mount.
4. Check whether the mount plates move relative to the engine or crossmember (rock the mounts with a pry bar or large screwdriver). If movement is felt, lower the engine and tighten the mount fasteners.
5. To slow aging, apply a protective agent to the rubber parts of the mounts.
Replacement
PROCEDURE
1. Disconnect the battery ground cable, then raise the vehicle and support it on stands (if not already done). Relieve the engine mount load.
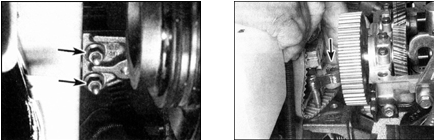
2. To remove the right mount, working from underneath, remove the two nuts (photo left) and one bolt (removed from above, photo right), then remove the upper section of the mount.
3. Remove the nuts securing the mount to the chassis and remove the mount.
4. To remove the rear engine mounts, pull out the rubber plugs from the longitudinal member to access the two nuts.
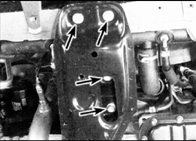
5. To remove the front engine mounts, remove the two nuts securing the resilient element to the frame side member, then the three nuts securing the resilient element to the frame.
6. Installation is the reverse of removal. Before assembly, apply thread-locking compound to the nut and bolt threads and tighten all threaded connections securely.
7. Replacement of the transmission-side mount is described in Subsection 7.1.5 and Subsection
Test yourself
A quick Toyota Corolla quiz: every answer comes with an explanation and a link to the manual page.