Toothed Belt
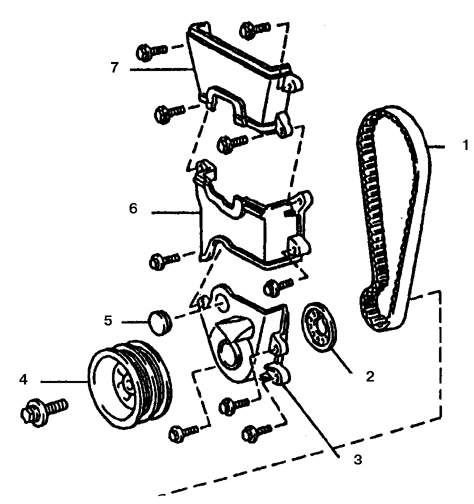
Timing belt covers, 1.6 and 1.8 L engines 1. Timing belt
2. Timing belt guide flange
3. Timing belt cover No. 1
4. Crankshaft drive pulley
5. Plug
6. Timing belt cover No. 2
7. Timing belt cover No. 3
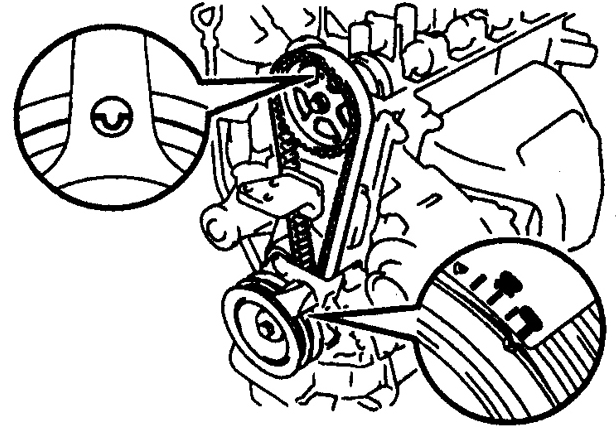
Camshaft sprocket position corresponding to TDC
Removal
PROCEDURE
1. Disconnect the battery ground terminal.
2. Chock the rear wheels and apply the parking brake.
3. Loosen the right front wheel nuts, raise the vehicle and support it on stands.
4. Remove the right front wheel and the bumper apron.
5. Remove the spark plugs.
6. Remove the drive belts (see subsection 2.6.4).

7. Remove the idler pulley (indicated by arrow) of the A/C compressor drive belt.
8. Remove the cruise control actuator (if equipped) and set it aside.
9. Remove the cylinder head cover (see subsection 3.1.1.3).
10. Place a support under the engine, with a wooden board placed beneath it, but not under the oil drain plug.
* If you plan to remove both the timing belt and the oil pan, support the engine from above with a hoist (see subsection 3.1.2.4.1).
11. Set the No. 1 piston to TDC on the compression stroke (see subsection 3.1.1.2).
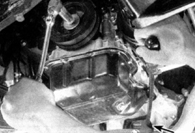
12. Pry out and remove the inspection hole cover. Secure the flywheel from rotating with a large screwdriver and ask an assistant to loosen the crankshaft pulley bolt.
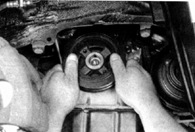
13. The crankshaft pulley should come off the crankshaft freely, without using a puller.
14. Remove two (on 1.3 L engines) or three (on 1.6 and 1.8 L engines) timing belt covers (see figure Timing belt covers, 1.6 and 1.8 L engines).
15. Remove the timing belt guide flange, paying attention to its correct orientation: the rolled edges of the flange must face outward.
16. If the belt will be reused, make alignment marks on the camshaft sprocket and on the belt, and mark an arrow on the belt indicating the direction of engine rotation.

17. Loosen the adjusting bolt of the tensioner roller, then push the roller inward and retighten the bolt. Remove the timing belt from the camshaft sprocket.
18. If the belt is being removed to replace the camshaft seal or to remove the cylinder head, it is not necessary to remove the belt from the camshaft sprocket or to unbolt the right engine mount.
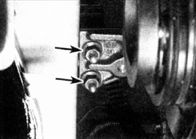
19. If the belt is being removed from the vehicle, unscrew the two nuts (indicated by arrows) securing the engine mount from underneath the vehicle, and the upper mount bolt.

20. Remove the upper bolt (indicated by the arrow) and lower the engine, then pull up the lower part of the engine mount (the rubber cushion may move) and pass the belt between the upper and lower sections of the engine mount. Do not remove the mount completely.
21. If the driven sprocket of the belt shows signs of wear or damage, remove the bolt and remove the sprocket from the exhaust camshaft (refer to Subsection 3.1.1.8). When loosening the bolt, hold the camshaft with a large wrench.
22. Remove the timing belt from the drive sprocket and take it out of the engine compartment. If the drive sprocket shows signs of wear or damage, or if the crankshaft front oil seal must be replaced, remove the drive sprocket. The drive sprocket should slide off easily. Otherwise, move the sprocket with two screwdrivers, after first covering the oil pump housing with a rag.
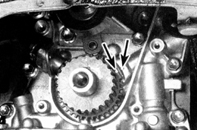
23. Mark the oil pump housing and the drive sprocket with paint in advance. This will make it possible to find the TDC position if the crankshaft pulley is not installed.
Condition Inspection
* Do not turn the belt inside out. Do not allow oil, coolant or gasoline to contact the belt. Do not hold the camshaft or crankshaft from turning with the timing belt when tightening the drive or driven sprocket bolts. When removing the timing belt, do not turn the camshaft or crankshaft more than a few degrees (if necessary for aligning the teeth).
The belt may break during engine operation due to contamination or excessive tension.
* If the belt breaks while the engine is running, serious damage may occur due to valves striking the pistons. In this case, check the valve clearances (refer to Subsection 2.1). Bent valves usually show increased clearances, which indicates the need to remove the cylinder head and perform repairs.
PROCEDURE
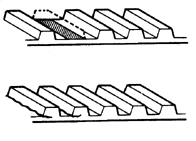
1. Check the timing belt for delamination or missing teeth. Such damage will cause accelerated wear of the distributor, oil pump, or both camshafts.
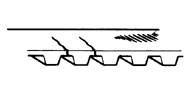
2. If the outer side of the belt has cracks or noticeable wear, check the condition of the drive and driven sprockets for scoring or chipping.
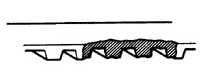
3. If only one side of the belt is worn, check the condition of the belt guide flange and the parallelism of the driven and drive sprockets.
4. If the belt condition is questionable, or if there are clear signs of damage, replace the belt. Before installing a new belt, find and eliminate the cause of its damage.
* Experienced drivers recommend replacing the belt whenever it is removed, regardless of the reason, since belt failure may cause engine failure and costly repairs. The manufacturer recommends replacing the belt every 100,000 km.

5. Loosen the tensioner bolt, remove the tensioner and spring. Check that the roller rotates freely and measure the free length of the spring (1). If the length is not within specification, replace the spring.
6. Install the tensioner and spring. On 1.3 L engines, also check the condition of the upper idler pulley. If there are clear signs of wear or damage, remove the bolt and replace the idler pulley. Tighten the pulley bolt to the specified torque.
Installation
PROCEDURE
1. Thoroughly clean the front of the engine at the timing belt area.
2. Check the alignment of the marks on the camshaft and crankshaft again (see figure: Driven sprocket position corresponding to TDC). If the exhaust camshaft driven sprocket was removed, install the sprocket so that the slot on the front camshaft bearing cap aligns with the center of the hole in the sprocket. Make sure the crankshaft drive sprocket is at TDC and the marks made earlier align.
3. Install the belt on the drive and driven sprockets. If a used belt is installed, make sure the marks made during removal are aligned.
4. Install the belt guide flange on the crankshaft so that the flanges face away from the belt.
5. Install the lower belt cover and the crankshaft pulley, and check the TDC marks alignment.
6. While tensioning the belt from the front of the vehicle, loosen the tensioner roller bolt and back it out 1/2 turn so that the spring force is applied to the roller.
7. Slowly turn the crankshaft clockwise two full revolutions, then tighten the tensioner roller bolt to the specified torque. Check belt tension by deflection on the radiator side, midway between the drive and driven sprockets, and compare the deflection with the specification.
8. Check the alignment of the installation marks again. With the crankshaft at TDC for No. 1 cylinder piston, the center of the hole in the camshaft driven sprocket must align with the mark (see figure: Driven sprocket position corresponding to TDC). If the marks do not align exactly, repeat the belt installation procedure.
* Do not start the engine until you are completely sure the belt is installed correctly. If valve timing and piston TDC do not match, serious damage may occur that requires costly repairs.
9. Install the remaining parts in the reverse order of removal.
10. Start the engine and check its operation.
Test yourself
A quick Toyota Corolla quiz: every answer comes with an explanation and a link to the manual page.