Garage door opener
In the Toyota Prius, the HomeLink system allows programming of the garage door opener to control various devices such as garage doors, gates, entry doors, door locks, home lighting systems, security systems, and more. This feature consolidates remote control functions into the vehicle, providing convenience and integration with home automation systems.
HomeLink programming procedure
The programming procedures can also be found at the following URL.
For support, contact customer support at the following.
System components
The HomeLink wireless control system in your vehicle has 3 buttons which can be programmed to operate 3 different devices. Refer to the programming methods on the following pages to determine the method which is appropriate for the device.
- Vehicles with auto anti-glare inside rear view mirror
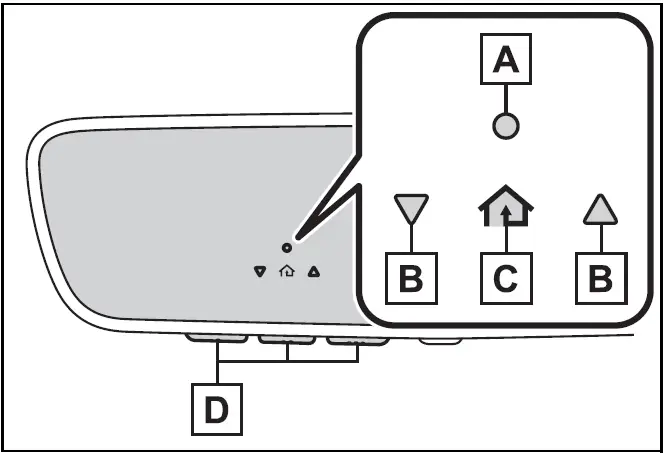
- HomeLink indicator light
- Garage door operation indicators
- HomeLink icon
Illuminates while HomeLink is operating.
- Buttons
- Vehicles with Digital Rearview Mirror
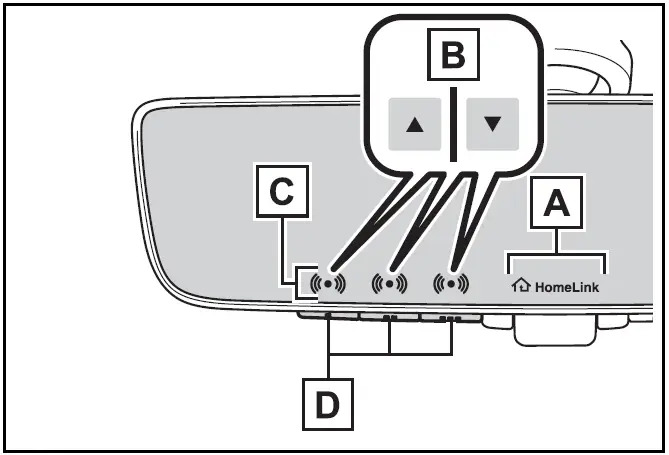
- HomeLink logo
Appears while HomeLink is operating.
When the HomeLink button is pressed, the logo disappears even while the HomeLink is operating.
- Garage door operation indicators
- HomeLink indicator light Illuminates above each button selected.
- Buttons
Codes stored in the HomeLink memory
- The registered codes are not erased even if the 12-volt battery cable is disconnected.
- If learning failed when registering a different code to a HomeLink button that already has a code registered to it, the already registered code will not be erased.
WARNING
When programming a garage door or other remote control device
The garage door or other device may operate, so ensure people and objects are out of danger to prevent potential harm.
Conforming to federal safety standards
Do not use the HomeLink compatible transceiver with any garage door opener or device that lacks safety stop and reverse features as required by federal safety standards.
This includes any garage door that cannot detect an interfering object. A door or device without these features increases the risk of death or serious injury.
When operating or programming HomeLink
Never allow a child to operate or play with the HomeLink buttons.
- Programming HomeLink
- Operating HomeLink
Programming HomeLink
Before programming HomeLink
- During programming, it is possible that garage doors, gates, or other devices may operate. For this reason, make sure that people and objects are clear of the garage door or other devices to prevent injury or other potential harm.
- It is recommended that a new battery be placed in the remote control transmitter for more accurate programming.
- Garage door opener motors manufactured after 1995 may be equipped with rolling code protection. If this is the case, you may need a stepladder or other sturdy, safe device to reach the "Learn" or "Smart" button on the garage door opener motor.
Programming HomeLink
Steps 2 through 4 must be performed within 60 seconds, otherwise the HomeLink indicator light will stop flashing and programming will not be successfully completed.
- Vehicles with Digital Rearview Mirror: Press the HomeLink button or menu button
When the HomeLink button is pressed: Homelink Training Tutorial will be displayed to assist you programming the HomeLink.
When Homelink Training Tutorial is displayed, follow the instructions displayed.
When the menu button is pressed: Press the menu button  and select the "Set Up >". Homelink Training Tutorial will be displayed to assist you programming the HomeLink.
When Homelink Training Tutorial is displayed, follow the instructions displayed.
- Press and release the HomeLink button you want to program and check that the HomeLink indicator light flashes (orange).
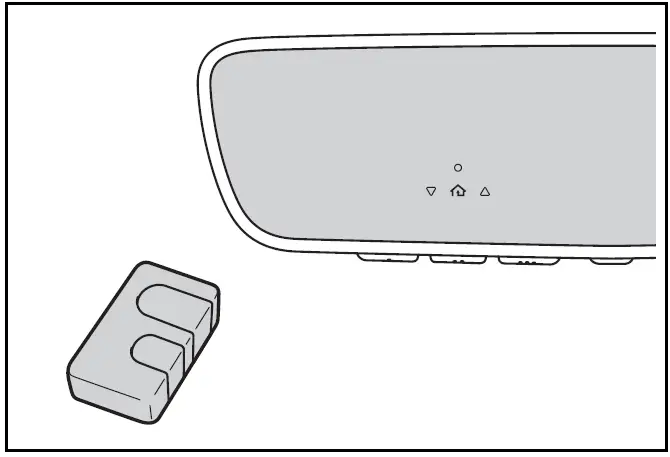
- Point the remote control transmitter for the device at the rear view mirror, 1 to 3 in.(25 to 75 mm) from the HomeLink buttons.
Keep the HomeLink indicator light in view while programming.
- Vehicles with auto anti-glare inside rear view mirror
- Vehicles with Digital Rearview Mirror
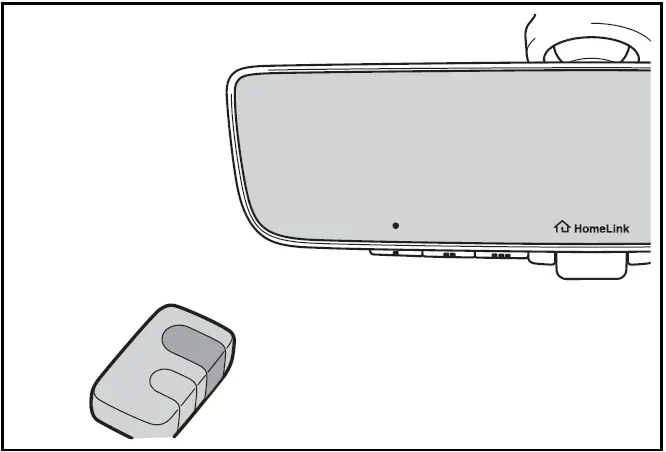
- Program a device.
- Vehicles with auto anti-glare inside rear view mirror

- Vehicles with Digital Rearview Mirror
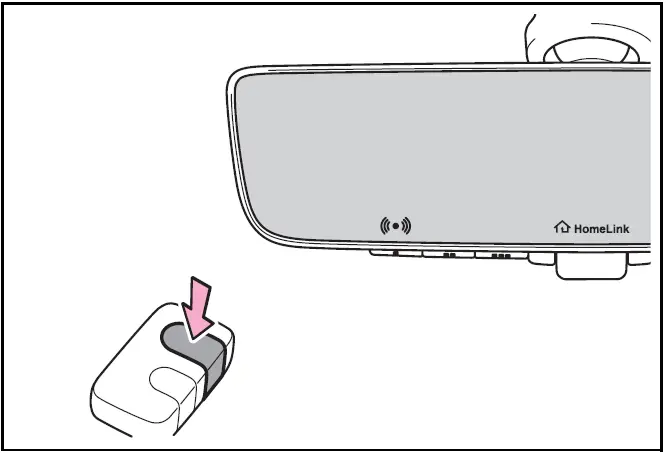
- Programming a device other than an entry gate (for U.S.A.owners)
Press and hold the remote control transmitter button until the HomeLink indicator light changes from slowly flashing orange to rapidly flashing green (rolling code) or continuously lit green (fixed code), then release the button.
- Programming an entry gate (for U.S.A. owners)/Programming a device in the Canadian market
Press and release the remote control transmitter button at 2 second intervals, repeatedly, until the HomeLink indicator light changes from slowly flashing (orange) to rapidly flashing (green) (rolling code) or continuously lit (green) (fixed code).
- Test the HomeLink operation by pressing the newly programmed button and observing the HomeLink indicator light:
- HomeLink indicator light illuminates: Programming of a fixed code device has completed.
The garage door or other device should operate when a HomeLink button is pressed and released.
- HomeLink indicator light flashes rapidly: The garage door opener motor or other device is equipped with a rolling code. To complete programming, firmly press and hold the HomeLink button for 2 seconds then release it.
- If the garage door or other device does not operate, proceed to "Programming a rolling code system".
- Repeat the steps above to program another device for any of the remaining HomeLink buttons.
Programming a rolling code system
Two or more people may be needed to complete rolling code programming.
- Locate the "Learn" or "Smart" button on the garage door opener motor in the garage.
This button can usually be found where the hanging antenna wire is attached to the unit. The name and color of the button may vary by manufacturer. Refer to the owner's manual supplied with the garage door opener motor for details.
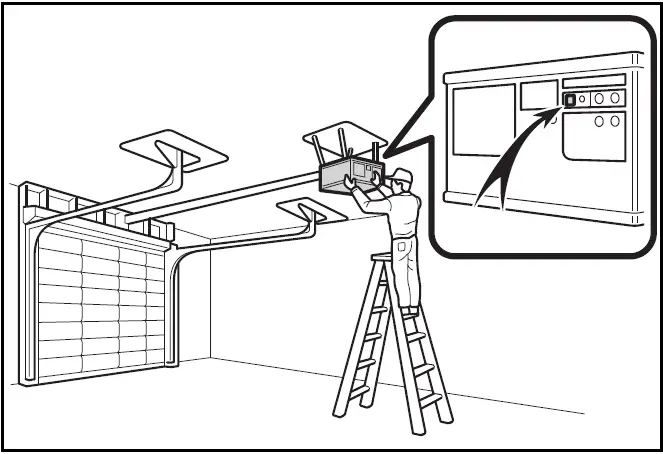
- Press and release the "Learn" or "Smart" button.
Perform step 3 within 30 seconds after performing step 2.
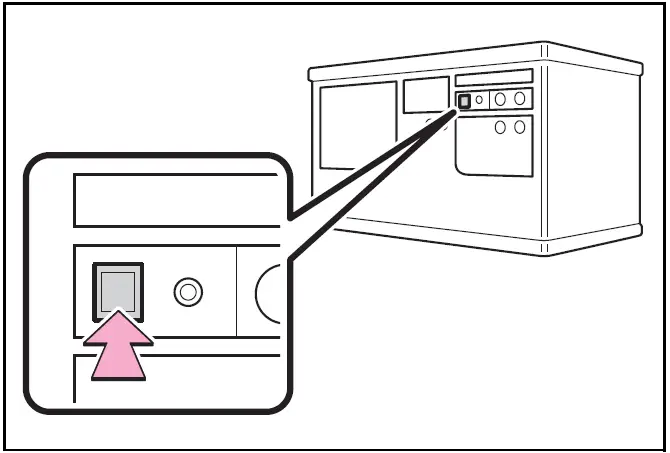
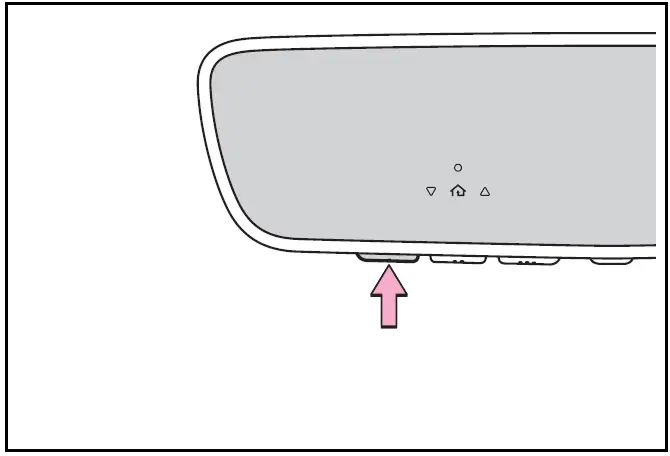
- Press and hold the desired HomeLink button (inside the vehicle) for 2 seconds and release it. Repeat this sequence (press/hold/release) up to 3 times to complete programming.
If the garage door opener motor operates when the HomeLink button is pressed, the garage door opener motor recognizes the HomeLink signal.
- Vehicles with auto anti-glare inside rear view mirror
- Vehicles with Digital Rearview Mirror
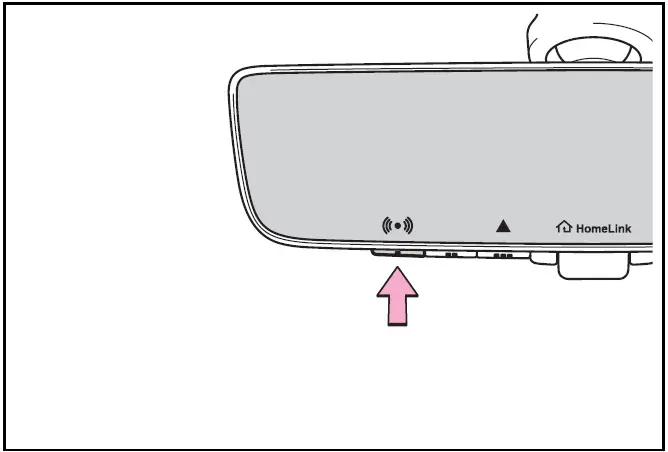
Enabling 2-way communication with a garage door (only available for compatible devices)
When enabled, 2-way communication allows you to check the status of the opening and closing of a garage door through indicators in your vehicle.
2-way communication is only available if the garage door opener motor used is a compatible device.
- Within 5 seconds after programming the garage door opener has been completed, if the garage door opener motor is trained to HomeLink, both garage door operation indicators will flash rapidly (green) and the light on the garage door opener motor will blink twice, indicating that 2-way communication is enabled.
If the indicators do not flash, perform steps 2 and 3 within the first 10 presses of the HomeLink button after programming has been completed.
- Press a programmed HomeLink button to operate a garage door.
- Within 1 minute of pressing the HomeLink button, after the garage door operation has stopped, press the "Learn" or "Smart" button on the garage door opener motor. Within 5 seconds of the establishment of 2-way communication with the garage door opener, both garage door operation indicators in the vehicle will flash rapidly (green) and the light on the garage door opener motor will blink twice, indicating that 2-way communication is enabled.
Reprogramming a single HomeLink button
When the following procedure is performed, buttons which already have devices registered to them can be overwritten:
- Press and hold the desired HomeLink button.
- When the HomeLink indicator starts flashing (orange), release the HomeLink button and perform "Programming HomeLink" step 1 (it takes 20 seconds for the HomeLink indicator to start flashing).
Before programming
- Install a new battery in the transmitter.
- The battery side of the transmitter must be pointed away from the HomeLink buttons.
Operating HomeLink
Press the appropriate HomeLink button. The HomeLink indicator light will turn on.
The status of the opening and closing of a garage door is shown by the garage door operation indicators.
- Vehicles with auto anti-glare inside rear view mirror
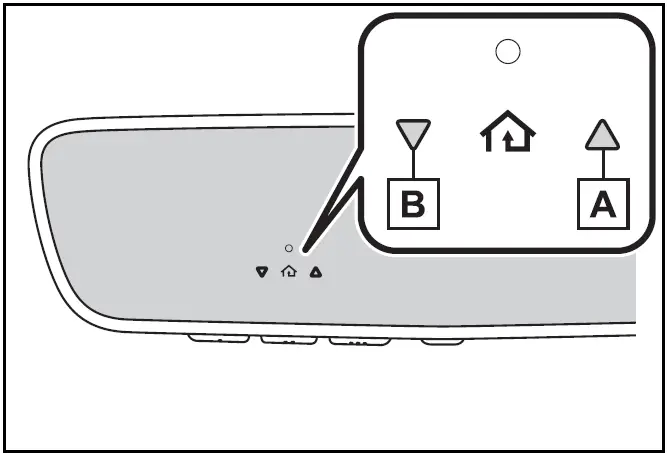
- Opening
- Closing
- Vehicles with Digital Rearview Mirror
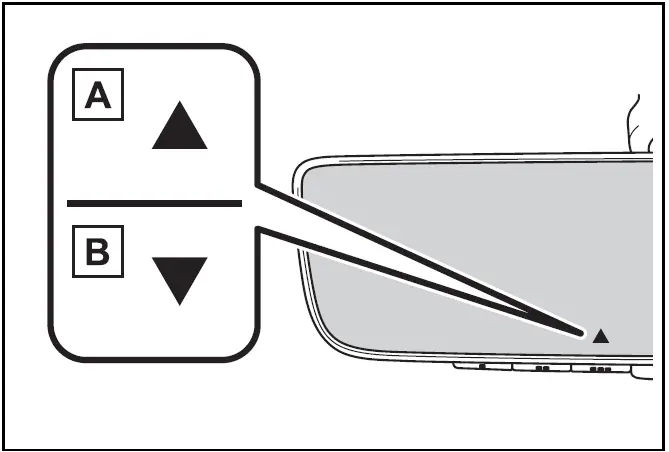
- Opening
- Closing
This function is only available if the garage door opener motor used is a compatible device.
Color / Status
Orange (flashing)/ Currently opening/ closing
Green / Opening/closing has completed
Red (flashing)/ Feedback signals cannot be received
The indicators can operate within approximately 820 ft. (250 m) of the garage door. However, if there are obstructions between the garage door and the vehicle, such as houses and trees, feedback signals from the garage door may not be received.
To recall the previous door operation status, press and release either HomeLink buttons  and
 or
 and
 (vehicles with auto anti-glare inside rear view mirror),
 and
 or
 and (vehicles with Digital Rear-view Mirror) simultaneously. The last recorded status will be displayed for 3 seconds.
Erasing the entire HomeLink memory (all three codes)
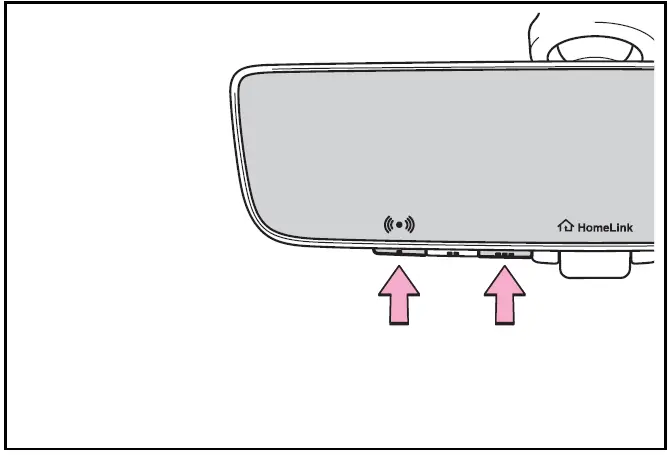
Press and hold the 2 outside buttons for 10 seconds until the HomeLink indicator light changes from continuously lit (orange) to rapidly flashing (green).
If you sell your vehicle, be sure to erase the programs stored in the HomeLink memory.
- Vehicles with auto anti-glare inside rear view mirror

- Vehicles with Digital Rearview Mirror