Powertrain
Solenoid. Removal and Installation
In this manual: Powertrain
8steps
~48min
2/5difficulty
Done 0 of 8
Special Service Tools / General Equipment
Long-Nose Pliers
Removal
- Using the scan tool, Solenoid Identification (IDN) Function, obtain the solenoid base part number and stamping number.
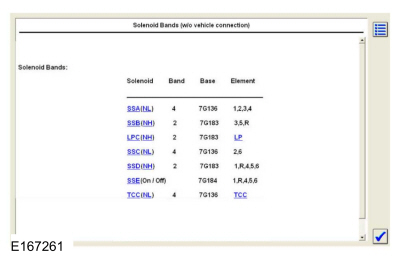
- Remove the transmission internal wiring harness bracket.
Refer to: Transmission Internal Wiring Harness Bracket (307-01A Automatic Transmission — 6-Speed Automatic Transmission — 6F35, Removal and Installation). NOTICE: Solenoids are calibrated at the factory and are not all the same. Failure to install the solenoids into the ports they were originally in may result in transmission damage or harsh shifting.
- Line Pressure Control (LPC) Solenoid 7G383 (High Variable Bleed)
- Shift Solenoid C (SSC) 7G136 (Low Variable Bleed)
- TCC Solenoid 7G136 (Low Variable Bleed)
- Shift Solenoid E (SSE) 7G484 (Normally Closed [OFF])
- Shift Solenoid A (SSA) 7G136 (Low Variable Bleed)
- Shift Solenoid B (SSB) 7G383 (High Variable Bleed)
- Shift Solenoid D (SSD) 7G383 (High Variable Bleed)

- Remove the solenoid retaining pin(s) and the solenoid(s) from the solenoid body.
Use general equipment: Long-nose pliers.
Installation
- Number
- Color
- Color
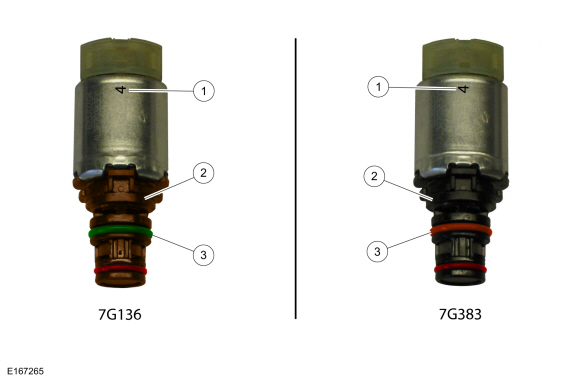
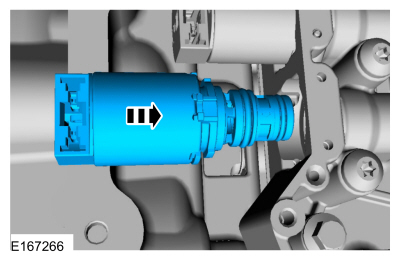
- Install the solenoid(s) into the solenoid body.
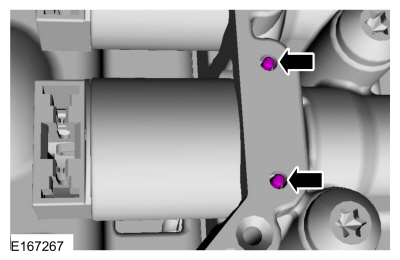
- Install the solenoid retaining pin (studs).
- Install the transmission internal wiring harness frame.
Refer to: Transmission Internal Wiring Harness Frame (307-01A Automatic Transmission - 6-Speed Automatic Transmission - 6F35, Removal and Installation).
Test yourself
A quick Ford Fusion quiz: every answer comes with an explanation and a link to the manual page.
Was this page helpful?