Powertrain
Transmission Overfill - General Procedures
In this manual: Powertrain
40steps
~305min
5/5difficulty
13special tools
Done 0 of 40
Special Service Tools / General Equipment
 |
100-001 (T50T-100-A) Slide hammer |
 |
205-153 (T80T-4000-W) Handle |
 |
205-990 Installer, Axle Seal TKIT-2012A-FL TKIT-2012A-RYAD |
 |
303-D011 (D80L-100-G) Drive Pin (3/16 inch diameter) |
 |
303-D019 (D80L-100-K) Collet, 3/4 to 7/8 inch |
 |
307-003 (T57L-500-B) Holding Fixture, Transmission |
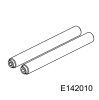 |
307-091 Handle, Torque Converter TKIT-2009TS-F |
 |
307-566 Torque Converter Retainer TKIT-2006C-FFMFLM TKIT-2006C-LM TKIT-2006C-RYAD |
 |
307-625 Support, Bench Mount TKIT-2008ET-FLM TKIT-2008ET-ROW |
 |
307-627 Installer, Converter Seal TKIT-2008ET-FLM TKIT-2008ET-RYAD |
 |
307-635 Protector, Turbine Shaft Seal TKIT-2008ET-FLM TKIT-2008ET-RYAD |
 |
307-718 Installer, Axle Seal TKIT-2013B-FL TKIT-2013B-RYAD |
 |
307-723 Installer, Turbine Seal TKIT-2014A-FL |
| Puller | |
Materials
| Name | Specification |
|---|---|
| Motorcraft® Ultra Silicone Sealant TA-29 |
WSS-M4G323-A8 |
Repair
- Remove the transmission.
Refer to: Transmission - 1.5 L EcoBoost (118 kW/160 L hp) - I4 (307-01A Automatic Transmission - 6-Speed Automatic Transmission - 6F35, Removal and Installation).
Refer to: Transmission - 2 L EcoBoost (184 kW/250 L hp) - MI4 (307-01A Automatic Transmission - 6-Speed Automatic Transmission - 6F35, Removal and Installation). - For component types and base part numbers, refer to
Refer to: Transmission Description (307-01A Automatic Transmission - 6-Speed Automatic Transmission - 6F35, Description and Operation). - Install the special tool.
Use the special service tool: 307-625 Fixture, Bench Mount.
- Install the transmission on the bench-mounted holding fixture.
Use the special service tools: 307-003 (T57L-500-B) Holding Fixture, Transmission, 307-625 Fixture, Bench Mount.
- Remove the special tool.
Use the special service tool: 307-566 Retainer, Torque Converter.
NOTICE: The torque converter is heavy. Take care not to drop it, as this may cause damage.
Using the special tools, remove the torque converter from the transmission.
Use the special service tool: 307-091 Handle, Torque Converter.
- Remove and discard the left halfshaft seal.

- Remove and discard the RH axle shaft seal.

- Remove the torque converter hub seal snap ring.

- Using a dent puller, remove the torque converter hub seal.
Use the general equipment: Puller
- Remove the torque converter housing bolts.

- Disconnect the torque converter housing from the transmission case.

- Remove the torque converter housing from the transmission case.

- Remove and discard the clutch feed seals.

- Clean and inspect the left transmission case bushing and the left axle shaft bushing surface for damage or excessive wear. If the left transmission case bushing or the left axle shaft shows signs of excessive wear or damage, install new components.
Refer to: Transmission Case (307-01A Automatic Transmission - 6-Speed Automatic Transmission - 6F35, Disassembly and Assembly of Sub-Assemblies).
NOTICE: Do not use metal scrapers, wire brushes, power abrasive discs or other abrasive means to clean sealing surfaces. These tools leave scratches and gouges that create leak paths.
Make sure the mating surfaces are clean and free of foreign material.
Refer to: Cleaning and Preparing RTV Sealing Surfaces (303-00 Engine System - General Information, General Procedures).

- Clean and inspect the left transmission case bushing and the left axle shaft bushing surface for damage or excessive wear. If the left transmission case bushing or the left axle shaft shows signs of excessive wear or damage, install new components.
- Inspect the torque converter housing and the differential ring gear for damage or excessive wear. If the differential ring gear shows signs of excessive wear or damage, replace the differential ring gear.
Refer to: Transmission Case (307-01A Automatic Transmission - 6-Speed Automatic Transmission - 6F35, Disassembly and Assembly of Sub-Assemblies).
NOTICE: Do not use metal scrapers, wire brushes, power abrasive discs or other abrasive means to clean sealing surfaces. These tools leave scratches and gouges that create leak paths.
Make sure the mating surfaces are clean and free of foreign material.
Refer to: Cleaning and Preparing RTV Sealing Surfaces (303-00 Engine System - General Information, General Procedures).

- Inspect the torque converter housing and the differential ring gear for damage or excessive wear. If the differential ring gear shows signs of excessive wear or damage, replace the differential ring gear.
- Assemble the special tools, then remove and discard the input shaft seal.
Use the special service tools: 100-001 (T50T-100-A) Slide Hammer, 303-D011 (D80L-100-G) Drive Pin (3/16 inch diameter), 303-D019 (D80L-100-K) Collet, 3/4 to 7/8 inch.
- Install the new input shaft seal on the special tool.
Use the special service tool: 307-723 Installer, Turbine Seal.
- Using the special tool, install the input shaft seal.
Use the special service tool: 307-723 Installer, Turbine Seal.
- Install 5 new clutch feed seals.

- Install the special tool on the input shaft.
Use the special service tool: 307-635 Protector, Turbine Shaft Seal.
Make sure the thrust washer and thrust bearing are installed correctly.- Thrust washer No. 13.
- Drive sprocket thrust bearing No. 11.

- Apply silicone to the transmission case sealing surface.
Material: Motorcraft® Ultra Silicone Gasket Maker / TA-29 (WSS-M4G323-A8)
- Install the torque converter housing on the transmission case.

- Install the torque converter housing bolts and the torque converter housing stud.
Torque: 24 lb-ft (32 N·m)
- Remove the special tool.
Remove the special service tool: 307-635 Protector, Turbine Shaft Seal.
- Install the new torque converter hub seal on the special tool.
Use the special service tool: 307-627 Installer, Converter Seal.
- Using the special tool, install the new torque converter hub seal.
Use the special service tool: 307-627 Installer, Converter Seal.
- Install the torque converter hub seal snap ring.

- Assemble the special tools. Install the new left axle shaft seal on the special tool.
Use the special service tools: 205-153 (T80T-4000-W) Handle, 205-990 Installer, Axle Shaft Seal.
- Using the special tools, install the new left axle shaft seal into the transmission case.
Use the special service tools: 205-153 (T80T-4000-W) Handle, 205-990 Installer, Axle Shaft Seal.
- Assemble the special tools and install the new right axle shaft seal onto them.
Use special service tools: 205-153 (T80T-4000-W) Handle, 205-990 Installer, axle shaft seal.
- Using the special tools, install the new right axle shaft seal.
Use special service tools: 205-153 (T80T-4000-W) Handle, 205-990 Installer, axle shaft seal.
- Assemble the special tools and install the new right axle shaft seal onto them.
Use special service tools: 205-153 (T80T-4000-W) Handle, 307-718 Installer, axle shaft seal.
- Using the special tools, install the new right axle shaft seal.
Use special service tools: 205-153 (T80T-4000-W) Handle, 307-718 Installer, axle shaft seal.
NOTICE: The torque converter is heavy. Take care not to drop it, as this may cause damage.
Using the special tools, install the torque converter.
Use special service tools: 307-091 Handle, torque converter.
- Install the special tool.
Use special service tool: 307-566 Retainer, torque converter.
- Remove the transmission from the bench-mounted holder.
Use special service tools: 307-003 (T57L-500-B) Holding fixture, transmission. , 307-625 Fixture, bench mount.
- Remove the special tool.
Use special service tool: 307-625 Fixture, bench mount.
- Install the transmission.
Refer to: Transmission — 1.5 L EcoBoost (118 kW/160 L hp) — I4 (307-01A Automatic Transmission — 6-Speed Automatic Transmission — 6F35, Removal and Installation).
Refer to: Transmission — 2 L EcoBoost (184 kW/250 L hp) — I4 (307-01A Automatic Transmission — 6-Speed Automatic Transmission — 6F35, Removal and Installation).
Test yourself
A quick Ford Fusion quiz: every answer comes with an explanation and a link to the manual page.
Was this page helpful?