Tie Rod
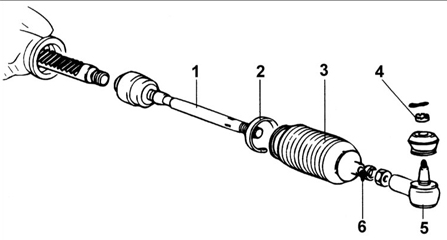
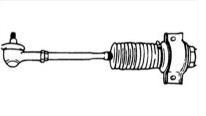
Tie rod
1 – tie rod;
2 – steel clamp;
3 – protective boot;
4 – nut, 16–34 N·m;
5 – tie rod end;
6 – clamp.
Removal
PROCEDURE
Remove the steering gear, pinion and tie rods from the vehicle as an assembly.
Disassembly
PROCEDURE
1. Secure the steering gear in a vise with soft jaw covers.
When securing the steering gear in a vise, wrap the steering gear in cloth and take care not to damage it when tightening the vise.
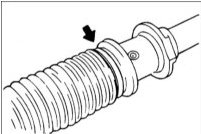
2. Loosen the clamp and remove the protective boot from the steering gear.
3. Using a chisel, loosen the nut securing the left tie rod.
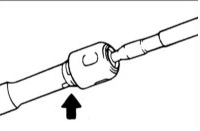
If the steering rack must be removed, remove the left steering tie rod.
4. Move the steering rack fully to the right and secure it in a vise with soft jaw covers. Loosen the lock and remove the left steering tie rod from the steering gear.
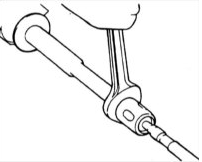
5. Remove the right steering tie rod by repeating steps 3 and 4.
Inspection
PROCEDURE
1. Inspect the steering tie rods and steering tie rod ends for damage or deformation.
2. Inspect the dust boots for damage or deformation.
3. Measure the torque required to rotate the ball stud of the ball joint.
Torque required to rotate the ball stud: 2–5 N•m
4. Check the operation of the steering tie rod ball joint and the axial play.
Assembly
PROCEDURE
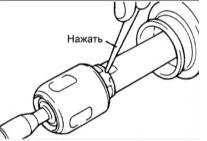
1. After installing the steering tie rods, tighten the nuts to the specified torque and bend the nut collar into the keyway.
Tightening torque: 80–100 N•m
2. Secure the steering tie rod dust boot with a metal clamp.
Install the dust boot clamp after adjusting the front wheel toe.
3. Measure the steering gear stroke.
Total steering gear stroke: 134 mm
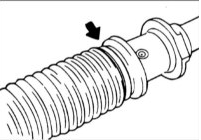
The total steering gear stroke determines the maximum steering angle of the front wheels.
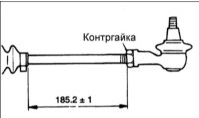
4. Adjust the steering tie rod length and tighten the lock nut.
Steering tie rod length: 185.2 mm
Tightening torque: 50–55 N•m
Installation
PROCEDURE
Install the steering gear and the steering tie rods as an assembly.
Test yourself
A quick Hyundai Accent quiz: every answer comes with an explanation and a link to the manual page.