Assembly
PROCEDURE
1. Before assembly, wash all parts in solvent.

2. Using Special Service Tool 09432–22000, press the bearing into the pinion.
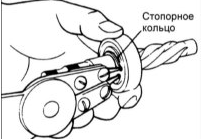
3. Install the snap ring on the pinion.
4. Apply grease to the rack, pinion, bushing, bearing and other sliding surfaces.
Recommended grease: SAE J310a, NLGI No. 2
Do not block the air passage in the housing bushing with grease.
5. After installing the rack into the steering gear housing, install the pinion into the hole, engaging it with the rack.
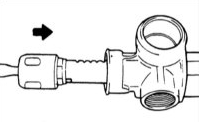
Make sure the rack is inserted into the steering gear housing from the left side.
Wipe off excess grease.
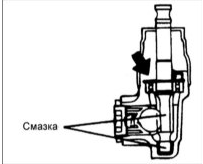
6. Select and install the appropriate snap ring to minimize the axial play of the pinion.
7. Before installing the O-ring, apply grease to its sealing lip.
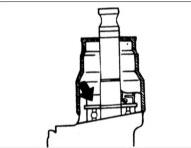
When installing, use a new O-ring.
8. Install the stopper, rubber seal and spring.
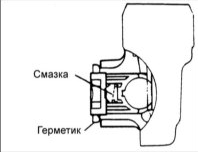
Apply grease to the cup-shaped part of the stopper.
9. Using Special Service Tool 09565–21000, screw in the plug.
Tighten the plug to 11 N·m, then turn it back 30°–60°. Secure the plug position with the locknut.
Locknut tightening torque: 50–70 N·m

Adjust the plug position with the steering gear in the neutral position.
Apply a layer of sealant between the locknut and the steering gear housing.
10. Install the tie rod end and protective boot. Secure the boot with new clamps.
11. Measure the pinion preload with the protective boot and grease installed, turning the pinion with Special Service Tool 09565–11100 one revolution every 4–6 seconds. Also measure the rack starting force.
Total pinion preload:
±180° or less from neutral position: 0.4–1.1 N·m
±180° or more from neutral position: 0.3–1.6 N·m
Rack starting force: 50–300 N
Measure the pinion preload over the entire stroke of the steering gear.

Installation
PROCEDURE
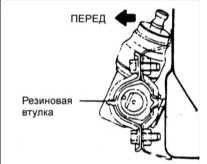
1. Install the rubber mounting bushing on the steering gear as shown in the illustration.
2. Install the pinion into engagement with the steering gear, and install the pinion assembly to the cross member.
Make sure the steering gear and pinion are not misaligned or damaged during installation. Take care not to overtighten the connections, as this distorts the steering gear and pinion and increases steering effort.
3. Tighten the connecting bolt.
Torque: 15–20 N·m
4. Secure the tie rods to the steering knuckle.
Tie rod ball joint stud nut tightening torque: 16–34 N·m
Align the nut slot with the cotter pin hole and tighten the nut to the specified torque.
5. Adjust the wheel alignment.
6. Make sure the protective boot is not twisted and secure it with the clamp.
Test yourself
A quick Hyundai Accent quiz: every answer comes with an explanation and a link to the manual page.