clutch actuator
Components and Components Location
COMPONENTS LOCATION
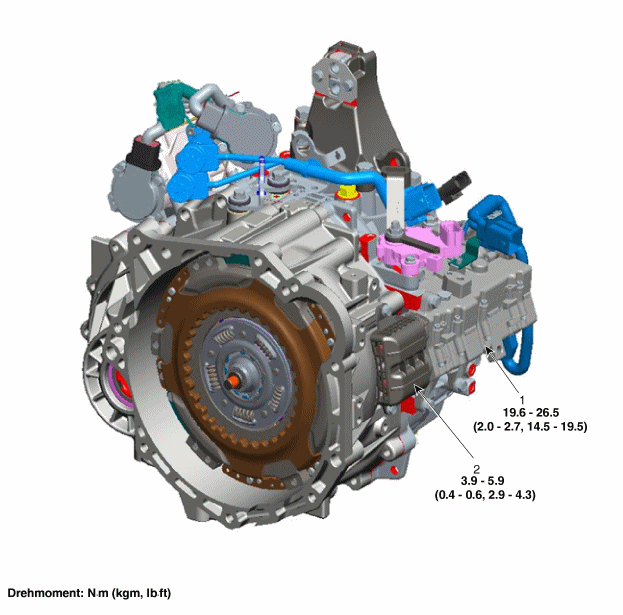
| 1. Clutch Actuator | 2. Fork Cover |
Specifications
SPECIFICATIONS
| Position | Condition | SPECIFICATIONS |
| Resistance (between lines) | Motor 1 | 60 mΩ ±10% |
| Motor 2 | 64 mΩ ±10% | |
| rated voltage | 12V | |
| OPERATING CONDITION | -40 to 125 ℃ | |
Description and Operation
Description
The clutch actuator uses signals from the Transmission Control Module (TCM) to control the clutch.
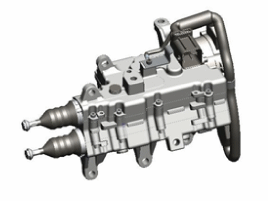
Schematic diagrams
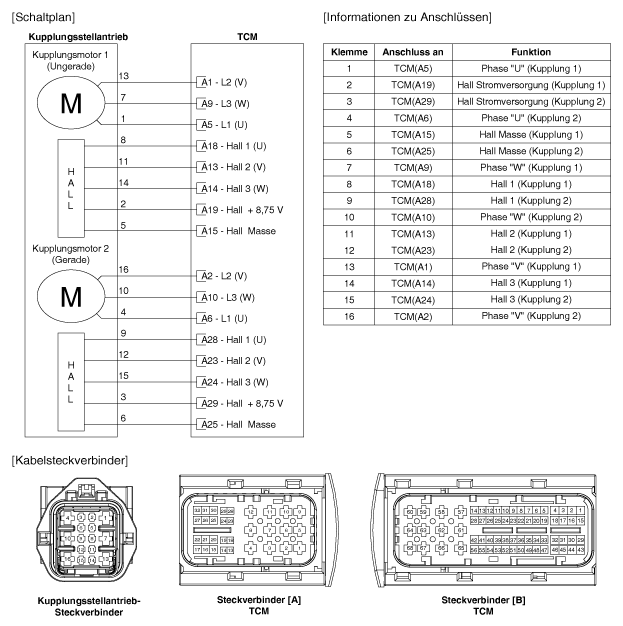
Circuit diagram
repair procedures
expansion
Remove the air cleaner assembly.
(Refer to Engine Mechanical - "Air Cleaner").
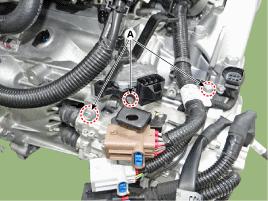
Loosen the locking screw (A) of the cable holder.
Tightening torque: 9.8 ~ 11.8 N·m
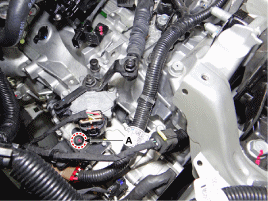
Loosen the clutch actuator mounting bolts (A).
Tightening torque: 19.6~26 N·m
Remove the under cover.
(Refer to Engine Mechanical - "Engine Under Cover")
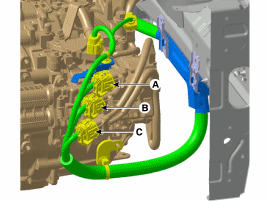
Disconnect the connectors (A, B, C) shown in the illustration below.
(A) Transmission actuator connector
(B) Transmission actuator solenoid connector
(C) Clutch actuator connector
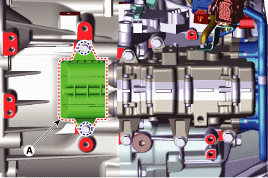
Remove the fork cover (A).
Tightening torque: 3.9~5.9 N·m
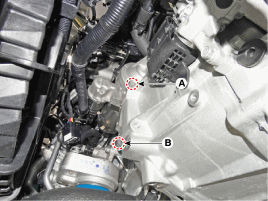
Remove the starter mounting bolt (A) and the lower mounting bolt (B).
Tightening torque: (A) 49.0~64 N·m (B) 42.2~54 N·m
| 8th. | Secure the clutch release fork after installing the special tools (09430-A5100, 09430-A5200). 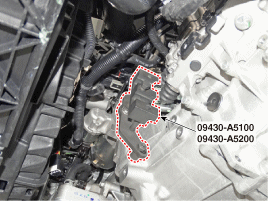 |
Remove the mounting screw.
(A): Cable Mounting Screw
(B): Clutch Actuator Bracket Mounting Screw
(C): Ground Mounting Screw
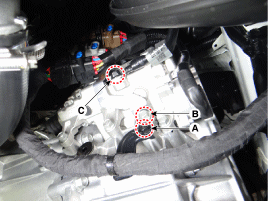
Loosen the screws and remove the clutch actuator (A).
Tightening torque: 19.6~26 N·m
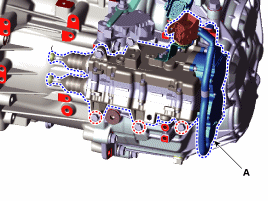
If necessary, remove the clutch actuator motor (A).
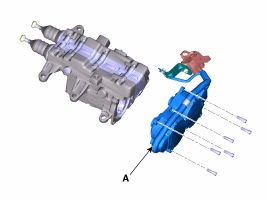
Installation
Installation is the reverse of removal.
INSPECTION
A. Rod Reset (if only the clutch actuator is replaced)
Remove the clutch actuator.
(Refer to Clutch Actuator - "Removal")
Install the clutch actuator (A), removed from the vehicle together with the nut (B), onto the special service tool (09430-C1302).
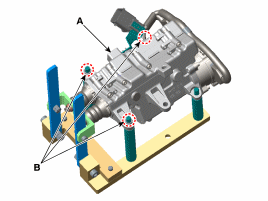
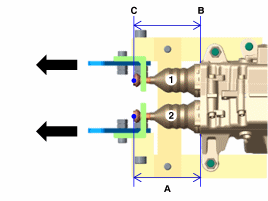
Measure and record the length of the old pushrod with the lever pulled.
Old rod length (A): the length of the rod from the base plane (C) to the rod end (B).
Clutch Actuator Rod 1
Clutch Actuator Rod 2
Remove the clutch actuator from the special service tool (09430-C1302).
After installing the new clutch actuator (A) on the special service tool (09430-C1302) with the nut (B).
Secure the rod (B) on the hook, then remove the rubber seal (A).
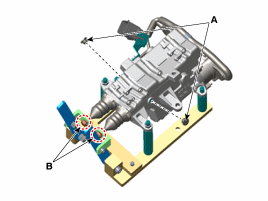
Values after measuring the length of each new rod (A) with the new clutch actuator lever pulled.
New rod length (A): the length of the rod from the base plane (C) to the rod end (B).
Clutch Actuator Rod 1
Clutch Actuator Rod 2
| 8th. | With the special service tool (09430-C1302) installed, adjust the clutch actuator vertically. |
Disconnect the clutch actuator hook (A) from the lever of the special service tool.
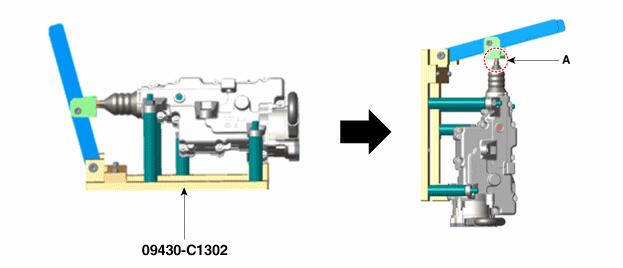
Compress the rod end (A) and release it when the nut (B) comes out. Check that the nut is visible.
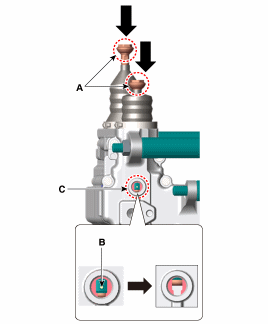
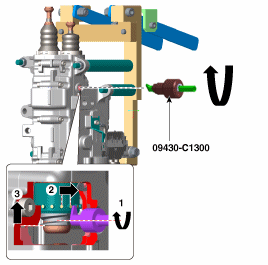
Insert the special service tool (09430-C1300) into the hole of the rubber seal.
Rotate the special service tool counterclockwise until the new clutch actuator rod length matches the "old rod length" measured in method No. 3.
Increase rod length (+): counterclockwise rotation / 1 turn (+0.25 mm / +0.009 in)
Decrease rod length (-): clockwise rotation / 1 turn (-0.25 mm / -0.009 in)
With the special service tool (09320-C1302) installed, remove the clutch actuator horizontally.
Install the clutch actuator (A) onto the lever of the special service tool.
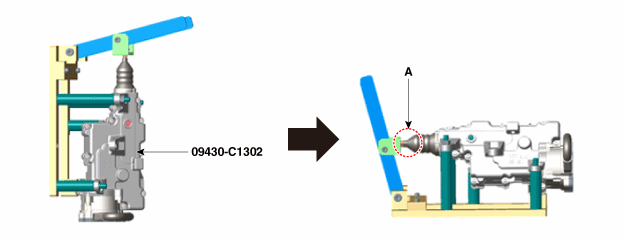
Make sure the "clutch actuator rod length" shown on the pulled lever matches the "old clutch actuator rod length" measured in step No. 3.
Rod length (A): the length of the rod from the base plane (C) to the rod end (B).
Clutch Actuator Rod 1
Clutch Actuator Rod 2
Install the rubber seal (A).
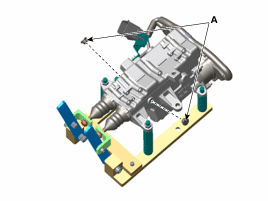
Remove the clutch actuator from the special service tool (09430-C1302).
B. Rod Length Initialization (if only the dual clutch unit is replaced)
Remove the clutch actuator.
(Refer to Clutch Actuator - "Removal")
Install the clutch actuator (A), removed from the vehicle together with the nut (B), onto the special service tool (09430-C1302).
Remove the seal cover (A) and secure the rod on the hook.
The initialization procedure is required when the measured rod length with the lever pulled on the removed clutch actuator is shorter than the initialization length.
Rod length (A): the length of the rod from the base plane (C) to the rod end (B).
(Initialization length: 71.5 to 72.5 mm / 2.81 to 2.85 in)
Clutch Actuator Rod 1
Clutch Actuator Rod 2
With the special service tool (09430-C1302) installed, adjust the clutch actuator vertically.
Disconnect the clutch actuator hook (A) from the lever of the special service tool.
Compress the rod end (A) and release it when the nut (B) comes out. Check that the nut is visible.
| 8th. | Insert the special service tool (09302-C1300) into the hole of the rubber seal. Adjust the clutch actuator rod length by rotating the clutch actuator counterclockwise. Increase rod length (+): counterclockwise rotation / 1 turn (+0.25 mm / +0.009 in) Decrease rod length (-): clockwise rotation / 1 turn (-0.25 mm / -0.009 in) 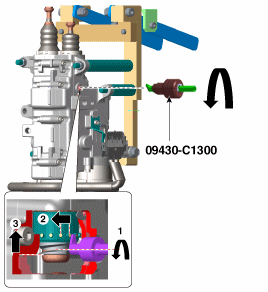 |
With the special service tool (09320-C1302) installed, remove the clutch actuator horizontally.
Engage the clutch actuator hook (A) on the lever of the special service tool.
While pulling the clutch actuator lever, make sure the "clutch actuator rod length" and the "clutch actuator rod initialization length" match.
Rod length (A): the length of the rod from the base plane (C) to the rod end (B).
(Initialization length: 71.5 to 72.5 mm / 2.81 to 2.85 in)
Clutch Actuator Rod 1
Clutch Actuator Rod 2
Install the rubber seal (A).
Remove the clutch actuator from the special service tool (09430-C1302).
Test yourself
A quick Kia Stonic quiz: every answer comes with an explanation and a link to the manual page.