Disassembly
Install soft protective pads on the vise jaws to prevent damage to the alternator components.
PROCEDURE
1. Secure the alternator in a vise and remove the three through bolts.
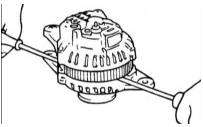
2. Insert the blades of two flat-blade screwdrivers between the front cover and the stator core and remove the cover.
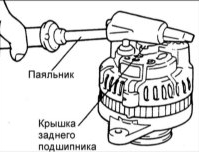
Do not insert the screwdrivers too deeply, as the stator winding may be damaged.
The rear cover may be difficult to remove because a ring retains the outer race of the rear bearing. To ease removal of the rear cover, heat it with a 200 W soldering iron. Do not use a hot air gun for heating, as the diode assembly may be damaged.
3. Secure the rotor in the vise on the pulley side.
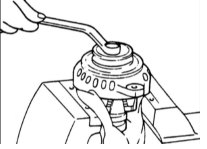
4. Remove the pulley nut, then remove the spring washer, pulley and spacer sleeve.
5. Remove the front cover and the two washers.
6. Remove the rotor from the vise.
7. Remove the brush holder, rectifier mounting screws and the B terminal nuts.
8. Remove the stator from the rear cover.
9. Separate the oil slinger from the brush holder.
10. Unsolder the three wires from the diodes and remove the stator.
Desolder for no more than 5 seconds, otherwise the rectifier diodes may be damaged.
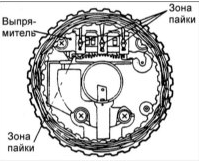
11. When separating the rectifier from the brush holder, unsolder the two plates soldered to the rectifier.
Check (75 A)
Test yourself
A quick Hyundai Accent quiz: every answer comes with an explanation and a link to the manual page.