Engine
Engine assembly installation
In this manual: Engine
12steps
~72min
3/5difficulty
Done 0 of 12
Install the engine in the reverse order of engine removal.
Pay attention to the following points:
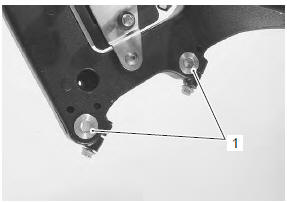
- before installing the engine, install the collars (1).
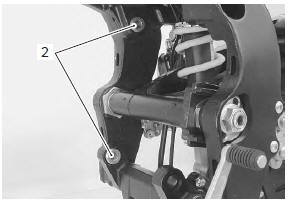
- Before installing the engine, install the engine mounting thrust adjusters (2).
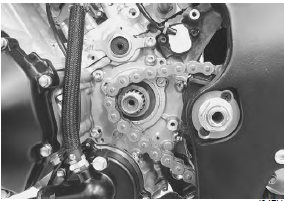
- Gradually raise the rear side of the engine assembly, and then put the drive chain on the driveshaft.
be careful not to catch the wiring harness between the frame and the engine.
- Install all engine mounting bolts and tighten them temporarily.
- Tighten the engine mounting thrust adjusters (2) to the specified torque.
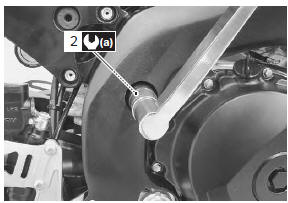
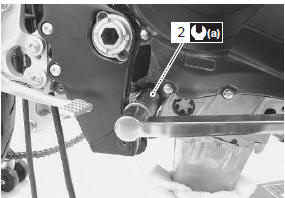
- Tighten the engine mounting thrust adjuster lock-nuts (3) to the specified torque with the special tool.
 (a): 09940–14990 (engine mounting
adjust wrench)
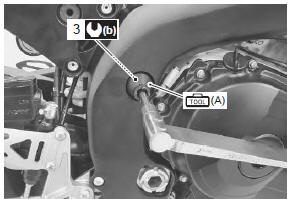
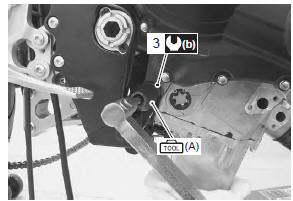
- Tighten all engine mounting bolts and nuts to the specified torque, as shown in the following illustration
Once the nuts have been removed, they are no longer of any use.
- Tighten the engine mounting pinch bolt to the specified torque, as shown in the following illustration.
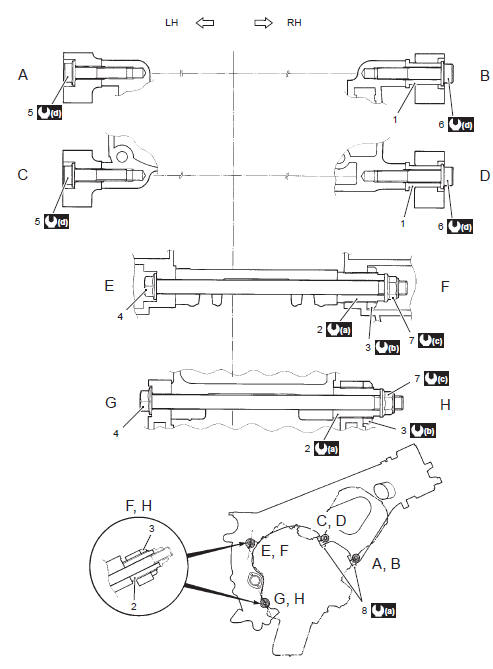
- Collar
- Engine mounting thrust adjuster
- Engine mounting thrust adjuster lock-nut
- Engine mounting bolt (220 mm)
- Engine mounting bolt (45 mm)
- Engine mounting bolt (55 mm)
- Engine mounting nut
- Engine mounting pinch bolt
 23
N·m (2.3 Kgf-m, 16.5 Lbf-ft) 45 N·m (4.5
Kgf-m, 32.5 Lbf-ft) 75 N·m (7.5
Kgf-m, 54.0 Lbf-ft) 55 N·m (5.5
Kgf-m, 40.0 Lbf-ft)
- Install the engine sprocket. Refer to “engine sprocket removal and installation” in section 3a .
- Install the exhaust pipe assembly and muffler. Refer to “muffler / muffler chamber / exhaust pipe removal and installation” in section 1k .
- Install the radiator. Refer to “radiator / cooling fan motor removal and installation” in section 1f .
- Install the throttle body. Refer to “throttle body removal and installation” .
- Install the air cleaner box. Refer to “air cleaner box removal and installation” .
- After remounting the engine, route the wiring harness, cable and hoses properly. Refer to “wiring harness routing diagram” in section 9a , “throttle cable routing diagram” and “water hose routing diagram” in section 1f .
- Pour engine coolant and engine oil. Refer to “cooling system inspection” in section 0b and “engine oil and filter replacement” in section 0b .
- After finishing the engine installation, check the following items.
- Throttle cable play refer to “throttle cable play inspection and adjustment” in section 0b .
- Throttle valve synchronization refer to “throttle valve synchronization” (page 1d- 16).
- Clutch cable play refer to “clutch cable play inspection and adjustment” in section 0b .
- Drive chain slack refer to “drive chain inspection and adjustment” in section 0b .
- Engine oil and coolant leakage refer to “cooling circuit inspection” in section 1f .
Test yourself
A quick Suzuki GSX-R 1000 quiz: every answer comes with an explanation and a link to the manual page.
Was this page helpful?