Engine
Engine top side assembly
In this manual: Engine
~6min read
Assemble the engine top side in the reverse order of disassembly. Pay attention to the following points:
Cylinder head- Install the dowel pins and a new cylinder head gasket (1) to the cylinder.
Caution use a new gasket to prevent gas leakage.
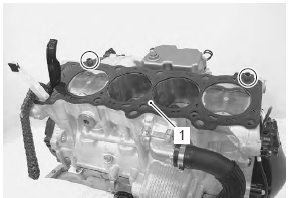
- Place the cylinder head on the gasket.
- when installing the cylinder head, keep the cam chain taut.
- Apply engine oil to the washer and thread portion of the cylinder head bolts (m10) before tightening them.
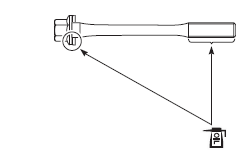
- Tighten the cylinder head bolts (m10) to the specified torque with a torque wrench sequentially and diagonally.
- Additionally tighten the cylinder head bolts with the specified angles diagonally using an angular torque gauge.

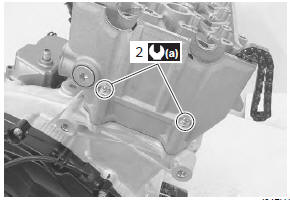
- After firmly tightening the cylinder head bolts (m10), tighten the cylinder head bolts (m6) (2).
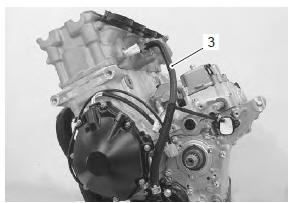
- Connect the water bypass hose (3).
Camshaft
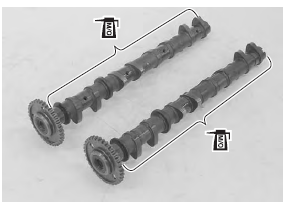
- The camshafts are identified by the embossed letters.
In: intake camshaft ex: exhaust camshaft
- before placing the camshafts on the cylinder head, apply molybdenum oil to their journals, cam faces and holders.
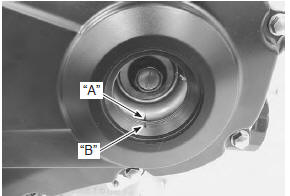
- Turn the crankshaft clockwise and align the line “a” on the ckp sensor rotor to the slit “b” of cap hole thread while keeping the cam chain pulled upward.
- pull the cam chain upward, or the chain will be caught between crankcase and cam drive sprocket.
- To adjust the camshaft timing correctly, be sure to align the line “a” with slit “b” and hold this position when installing the camshafts.
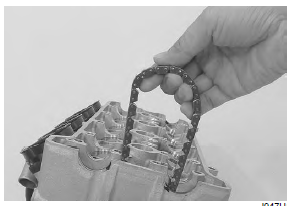
- Pull the cam chain lightly.
- Turn the exhaust camshaft so that the arrow is aligned with the gasket surface of the cylinder head.
before installing the camshaft, check that the tappets are installed correctly.
- Bind the cam chain and the sprocket with a proper clamp (1) to prevent the cam chain disengagement while installing the camshaft journal holders.
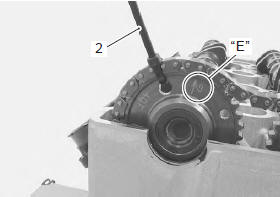
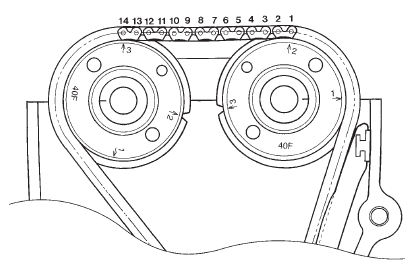
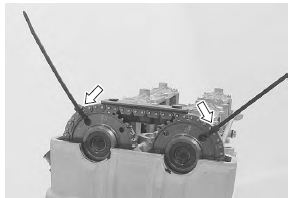
- The other arrow marked “2” “d” should now be pointing straight up. Starting from the roller pin that is directly above the arrow marked “2” “d”, count out 14 roller pins (from the exhaust camshaft side going towards the intake camshaft side).
- Engage the 14th roller pin “e” on the cam chain with the arrow marked “3” on the intake camshaft sprocket.
- Bind the cam chain and the sprocket with a proper clamp (2) to prevent the cam chain disengagement while installing the camshaft journal holders.
the cam chain should now be on all three sprockets. Be careful not to move the crankshaft until the camshaft journal holders and cam chain tension adjuster are secured.

- Install the dowel pins.
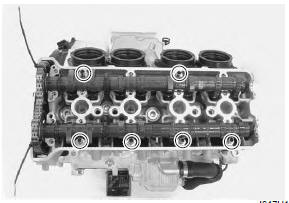
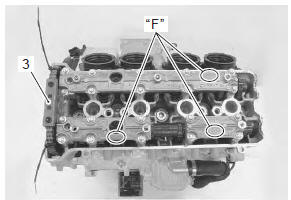
- Install the camshaft journal holders and cam chain guide no. 2 (3).
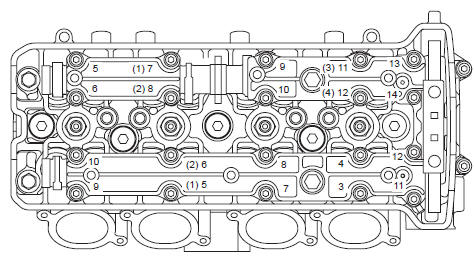
- Have the camshaft journal holders seated evenly by tightening the camshaft journal holder bolts lightly, in the ascending order of numbers.
- damage to head or camshaft journal holder thrust surfaces may result if the camshaft journal holders are not drawn down evenly.
- Each camshaft journal holder is identified with a cast-on letter “f”.
- The ascending order of numbers are indicated on the camshaft journal holders.
- Tighten the camshaft journal holder bolts in ascending order of numbers to the specified torque.
Take special care not to use other types of bolts.
- Remove the clamps.
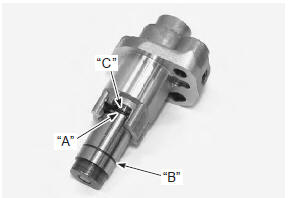
Cam chain tension adjuster
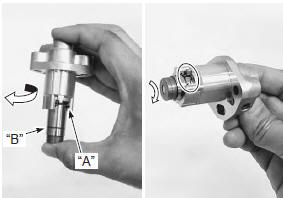
- Holding the cam chain tension adjuster as shown in the figure, compress the plunger by turning the adjuster body until the outer circlip “a” reaches the groove “b”.
In such case, it needs to be disassembled.
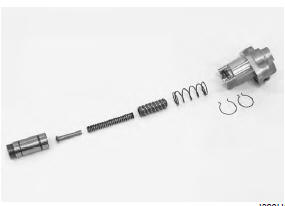
- Hook the outer circlip “a” into the groove “b”, then turn the plunger head clockwise more than 90° to make a little play in the inner thread mechanism.
- Fit a new gasket (1).
Caution use a new gasket to prevent oil leakage.
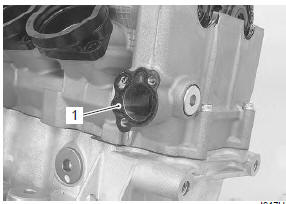
- Install the cam chain tension adjuster (2).
- Remove the cam chain tension adjuster service cap (3) and gasket (4).

- Unhook the outer circlip “a” from its groove by pushing the stepped part (5) of the plunger head with a screwdriver.
- Rotate the crankshaft (some turns) and recheck the valve timing.
make sure that the adjuster works properly by checking no slack at point “d”.
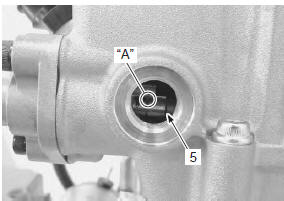
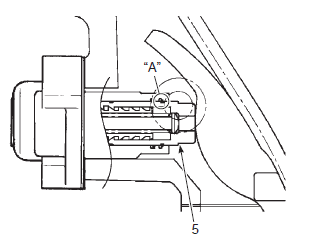

Note
the cam chain tension adjuster can be serviced with the engine installed in the frame.
- Tighten the cam chain tension adjuster service cap (6) to the specified torque.
Caution use a new gasket to prevent oil leakage.
Tightening torque cam chain tension adjuster service cap (b): 23 N·m- Tighten the valve timing inspection cap (7) to the specified torque.
Caution use a new o-ring to prevent oil leakage.
Tightening torque valve timing inspection cap (c): 11 N·m
Cylinder head cover
- Check and adjust the valve clearance. Refer to “valve clearance inspection and adjustment” in section 0b .
- Pour engine oil in each oil pocket on the cylinder head.
- Install the dowel pins and o-rings.
Caution replace the o-rings with new ones.
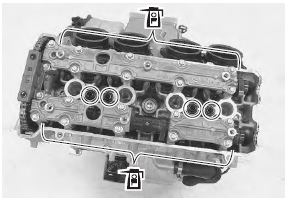
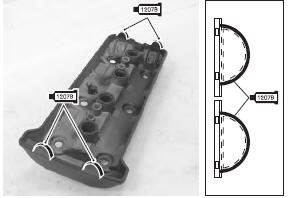
- Install new gaskets to the cylinder head cover.
- Apply bond to the cam end cap points of the gasket as shown.
 : Sealant 99000–31140 (suzuki
bond no.1207B or equivalent)
Caution use new gaskets to prevent oil leakage.
- Place the cylinder head cover on the cylinder head.
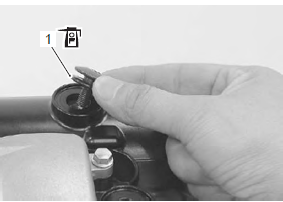
- Fit a new gasket (1) to each head cover bolt.
Caution use new gaskets to prevent oil leakage.
- Apply engine oil to both sides of the gaskets.
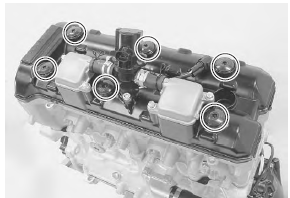
- Tighten the cylinder head cover bolts to the specified torque in two steps.
- Install the spark plugs. Refer to “ignition coil and spark plug removal and installation” in section 1h .
Test yourself
A quick Suzuki GSX-R 1000 quiz: every answer comes with an explanation and a link to the manual page.
Was this page helpful?