Engine
Cylinder head disassembly and assembly
In this manual: Engine
12steps
~72min
3/5difficulty
Done 0 of 12
Refer to “engine top side disassembly” .
Refer to “engine top side assembly” .
Caution identify the position of each removed part.Organize the parts in their respective groups (i.E., Intake, exhaust, no. 1 Or no. 2) So that they can be installed in their original locations.
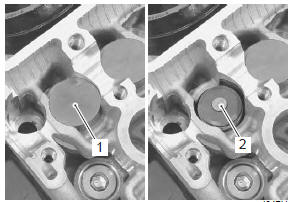
Disassembly- Remove the tappet (1) and shim (2) by fingers or magnetic hand.
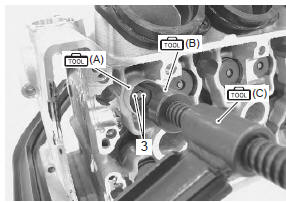
- Insert the special tool (a) between the valve springs and cylinder head.
- Using the special tools, compress the valve springs and remove the two cotter halves (3) from the valve stem.
be careful not to damage the tappet sliding surface with the special tool.
Special tool (a): 09919–28620 (sleeve protector)
 (b): 09916–14522 (valve lifter
attachment)
 (c): 09916–14510 (valve lifter)
 : 09916–84511 (tweezer)
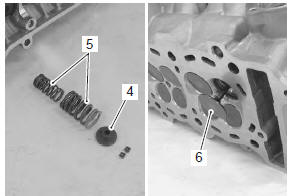
- Remove the valve spring retainer (4) and valve springs (5).
- Pull out the valve (6) from the combustion chamber side.
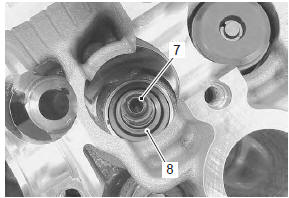
- Remove the oil seal (7) and spring seat (8).
- Remove the other valves in the same manner as described previously.
- Remove the ect sensor (9).
- Remove the thermostat cover (10).
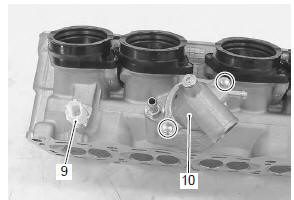
- Remove the thermostat (11).
- Remove the bypass hose union (12).
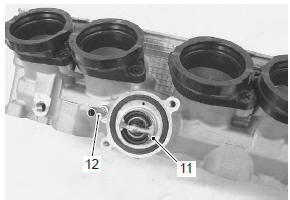
- Remove the oil jet (13).

- Remove the intake pipes (14).

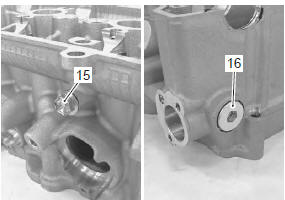
- Remove the oil gallery plug (15).
- Remove the cam chain tension adjuster service cap (16).
Assembly
Assembly is in the reverse order of disassembly. Pay attention to the following points:
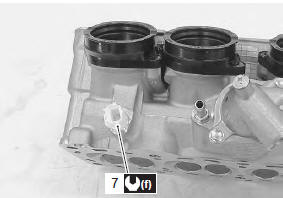
- tighten the cam chain tension adjuster service cap (1) and oil gallery plug (2) to the specified torque.
Caution replace the gaskets with new ones.
Tightening torque cam chain tension adjuster service cap (a): 23 N·m oil gallery plug (cylinder head) (b): 10 N·m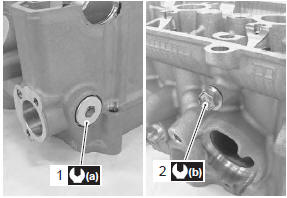
- Apply grease to o-rings of the intake pipes.
Caution replace the o-rings with new ones.
 : Grease 99000–25010 (suzuki
super grease “a” or equivalent)
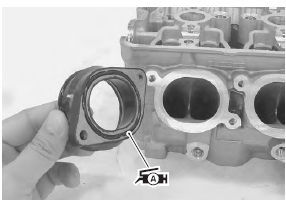
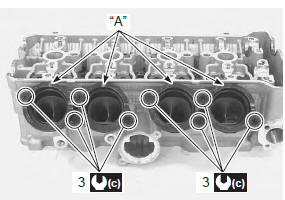
- Install the intake pipes with the up mark “a” facing top side.
- Tighten the intake pipe bolts (3) to the specified torque.
- Apply engine oil to the o-ring and install the oil jet.
Caution use new o-ring to prevent oil pressure leakage

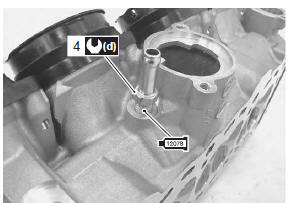
- Apply bond to the thread part of bypass hose union (4) and tighten it to the specified torque.
 : Sealant 99000–31140 (suzuki
bond no.1207B or equivalent) Tightening torque bypass hose union (d): 12 N·m
- Install the thermostat (5)
Note the air bleeder hole “b” of the thermostat faces upside.
- Tighten the thermostat cover bolts (6) to the specified torque.

- Tighten the ect sensor (7) to the specified torque.
- take special care when handling the temperature sensor. It may cause damage if it gets a sharp impact.
- Replace a gasket with a new one.
- Install the valve spring seat (8).
- Apply molybdenum oil to the oil seal (9), and press-fit it into the position.
Caution do not reuse the removed oil seal.
M/o: molybdenum oil (molybdenum oil solution)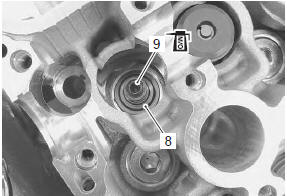
- Insert the valve, with its stem coated with molybdenum oil solution all around and along the full stem length without any break.
when inserting the valve, take care not to damage the lip of the oil seal.
M/o: molybdenum oil (molybdenum oil solution)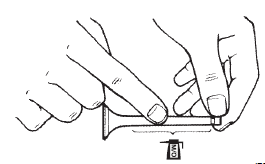
- Install each valve spring with the small-pitch portion “c” facing cylinder head.
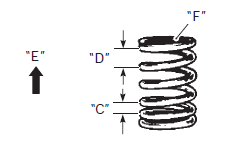
Small-pitch portion Large-pitch portion Upward Paint
- Put on the valve spring retainer (10), and using the special tools, press down the springs, fit the cotter halves to the stem end, and release the lifter to allow the cotter halves to wedge in between retainer and stem.
- be sure to restore each spring and valve to their original positions.
- Be careful not to damage the valve and valve stem when handling them.
- Be careful not to damage the tappet sliding surface with the special tool.
 (a): 09916–14510 (valve lifter)
 (b): 09916–14522 (valve lifter
attachment)
 (c): 09919–28620 (sleeve protector)
 : 09916–84511 (tweezer)
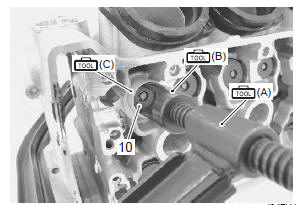
- Be sure that the rounded lip “g” of the cotter fits snugly into the groove “h” in the stem end.
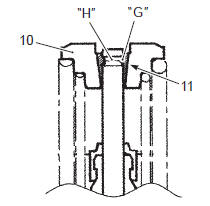
Valve spring retainer Cotter
- Install the other valves and springs in the same manner as described previously.
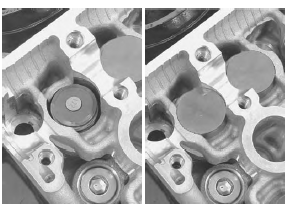
- Install the tappet shims and the tappets to their original positions.
- apply engine oil to the stem end, shim and tappet before fitting them.
- When seating the tappet shim, be sure the figure printed surface faces the tappet.
Test yourself
A quick Suzuki GSX-R 1000 quiz: every answer comes with an explanation and a link to the manual page.
Was this page helpful?