Engine
Engine assembly removal
In this manual: Engine
30steps
~180min
4/5difficulty
Done 0 of 30
Before taking the engine out of the frame, wash the engine using a steam cleaner. Engine removal is sequentially explained in the following steps:
- remove the side cowlings. Refer to “exterior parts removal and installation” in section 9d (page 9d- 6).
- Remove the front seat. Refer to “exterior parts removal and installation” in section 9d (page 9d- 6).
- Disconnect the battery (–) lead wire (1).
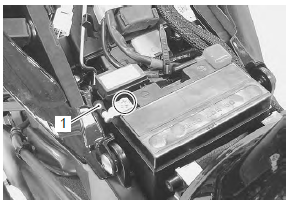
- Jack up the motorcycle and fix it for safety.
- Drain engine oil. Refer to “engine oil and filter replacement” in section 0b .
- Drain engine coolant. Refer to “engine oil and filter replacement” in section 0b .
- Lift and support the fuel tank. Refer to “fuel tank removal and installation” in section 1g (page 1g- 9).
- Remove the air cleaner box. Refer to “air cleaner box removal and installation” .
- Remove the throttle body assembly. Refer to “throttle body removal and installation” (page 1d- 10).
- Remove the oil cooler and hoses. Refer to “oil cooler / oil cooler hose removal and installation” in section 1e .
- Remove the radiator assembly. Refer to “radiator / cooling fan motor removal and installation” in section 1f .
- Disconnect the water/air bleed hose (2) and radiator inlet hose (3).

- Remove the horn (4) and radiator heat guard (5).
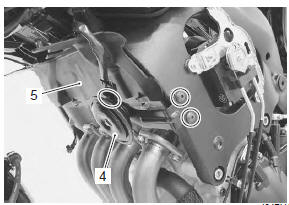
- Remove the radiator/oil cooler mounting bracket (6).
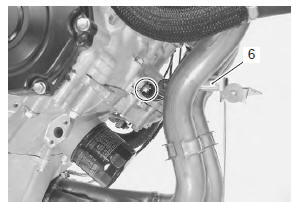
- Remove the exhaust system components. Refer to “muffler / muffler chamber / exhaust pipe removal and installation” in section 1k .
- Remove the clamp (7).
- Disconnect the oil pressure switch lead wire coupler (8), generator lead wire coupler (9) and ect sensor coupler (10).
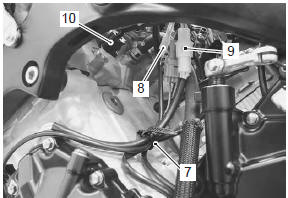
- Disconnect the gp switch lead wire coupler (11).
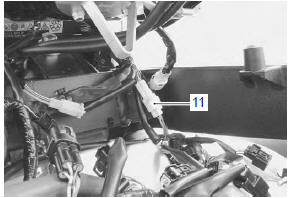
- Disconnect the starter motor lead wire (12) and engine ground lead wire (13).

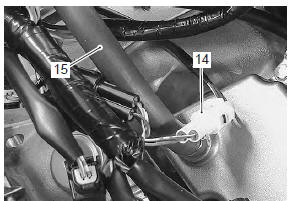
- Disconnect the ckp sensor lead wire coupler (14).
- Remove the crankcase breather (pcv) hose (15).
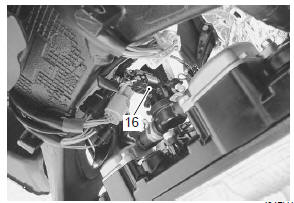
- Disconnect the pair solenoid valve coupler (16).
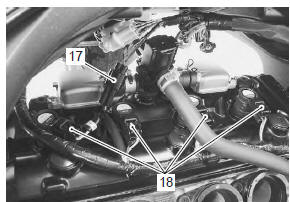
- Disconnect the cmp sensor lead wire coupler (17) and ignition coil couplers (18).
- Remove the ignition coils.
- do not remove the ignition coil before disconnecting its coupler.
- Do not pry up the ignition coil/plug cap with a screwdriver or a bar to avoid its damage.
- Be careful not to drop the ignition coil/plug cap to prevent its short or open circuit.
- Remove the engine sprocket cover (19). Refer to “engine sprocket removal and installation” in section 3a .
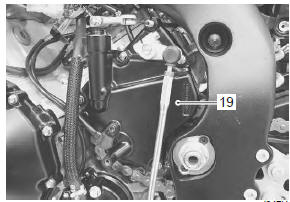
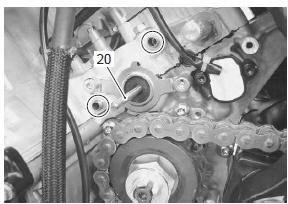
- Remove the dowel pins and clutch push rod (20).
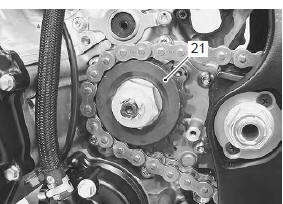
- Remove the engine sprocket (21). Refer to “engine sprocket removal and installation” in section 3a .
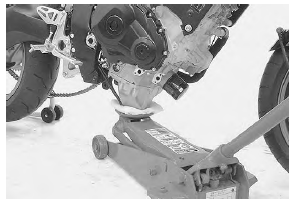
- Support the engine using an engine jack.
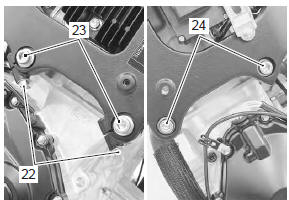
- Loosen the engine mounting pinch bolts (22) (rh).
- Remove the engine mounting bolts (23) (rh).
- Remove the engine mounting bolts (24) (lh).
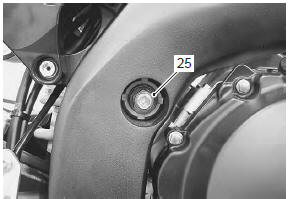
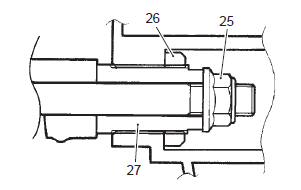
- Remove the engine mounting nut (25).
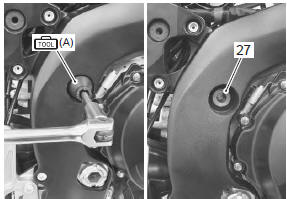
- Remove the engine mounting thrust adjuster locknut (26) with the special tool.
- Loosen the engine mounting thrust adjuster (27) fully.
 (a): 09940–14990 (engine mounting
adjust wrench)
Note do not remove the engine mounting bolt at this stage.
- Remove the engine mounting nut (28).
- Loosen the engine mounting thrust adjuster lock-nut (29) with the special tool.
- Loosen the engine mounting thrust adjuster (30) fully.
 (a): 09940–14990 (engine mounting
adjust wrench)
Note do not remove the engine mounting bolt at this stage.
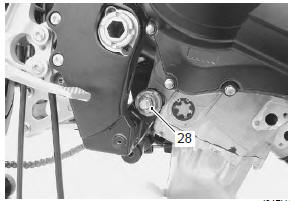

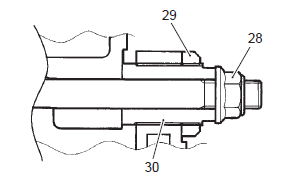
- Remove the engine mounting bolts and gradually lower the front side of the engine. Then, take off the drive chain from the driveshaft.
- Remove the engine assembly.
Test yourself
A quick Suzuki GSX-R 1000 quiz: every answer comes with an explanation and a link to the manual page.
Was this page helpful?