Engine
Crankshaft journal bearing inspection and selection
In this manual: Engine
4steps
~24min
2/5difficulty
Done 0 of 4
Refer to “engine bottom side disassembly” (page 1d- 49).
Refer to “engine bottom side assembly” .
Inspection- Inspect each upper and lower crankcase bearing for any damage.
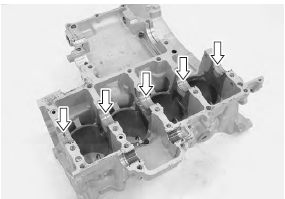
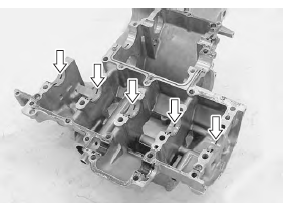
- Set the crankshaft onto the upper crank case.
- Install the plastigauge onto each crankshaft journal.
 (a): 09900–22301 (plastigage (0.025 –
0.076 Mm))
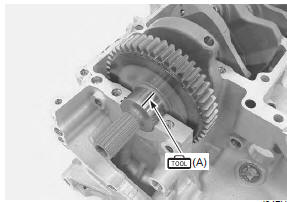
- Mate the lower crankcase with the upper crankcase.
- Tighten the crankshaft journal bolts (m9). Tighten each bolt a little at a time to equalize the pressure in the following two steps.
Note do not rotate the crankshaft when a piece of plastigauge is installed.
Tightening torque crankshaft journal bolt (m9): 18 N·m then turn in 50°
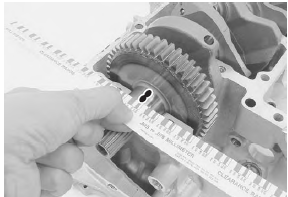
- Remove the lower crankcase and measure the width of compressed plastigauge using the envelope scale. This measurement should be taken at the widest part of the compressed plastigauge. If the oil clearance exceeds the service limit, select the specified bearings from the bearing selection table.
Selection
- Check the corresponding crankcase journal i.D.
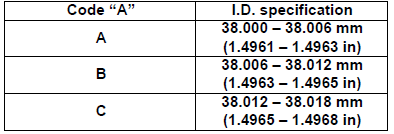
Codes “a” ([a], [b] or [c]), which are stamped on the rear of the upper crankcase.
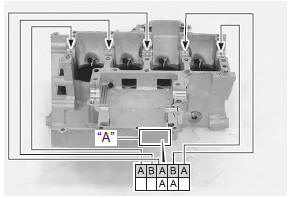
Crankcase journal i.D. Specification
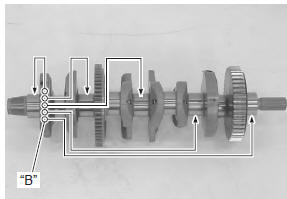
- Check the corresponding crankshaft journal o.D.
Codes “b” ([a], [b] or [c]), which are stamped on the crankshaft.
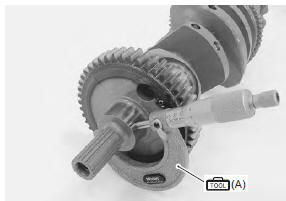
- Measure the crankshaft o.D. With the special tool. If any of the measurements are out of specification, replace the crankshaft.

Special tool
 (a): 09900–20202 (micrometer (25 –
50 mm))
- Select the specified bearings from the bearing selection table
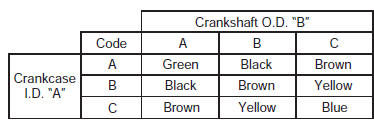
Bearing thickness specification
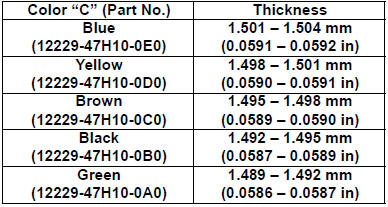
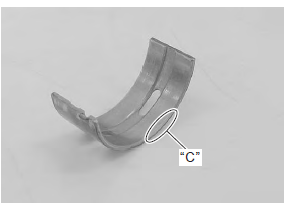
Color code
Test yourself
A quick Suzuki GSX-R 1000 quiz: every answer comes with an explanation and a link to the manual page.
Was this page helpful?