Removing and installing radio
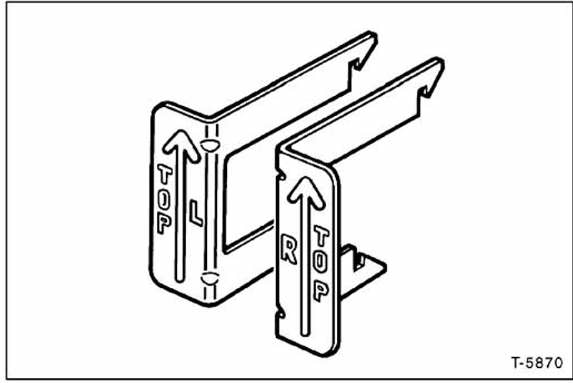
Factory-installed radios are fitted with a slide-in mounting bracket that allows quick removal and installation of the radio. However, this is only possible with the Fiat special tool 1860897000. The tool consists of 2 slide-in parts marked "L" for the left side and "R" for the right side. The arrows on the handles must point upward when inserted.
Caution: the radio cannot be removed by pulling on the cassette compartment. The specified tool is absolutely required. RemovalDisconnect the battery negative (-) cable. Warning: this erases electronic memories, such as engine operating values. Observe the notes in the chapter "Remove and install battery".
Removing the radio is easier from the passenger side.

Push the radio to the left by hand so the slot on the right becomes slightly larger. Insert the right-hand part "R" of the special tool until it audibly engages in the retaining springs.
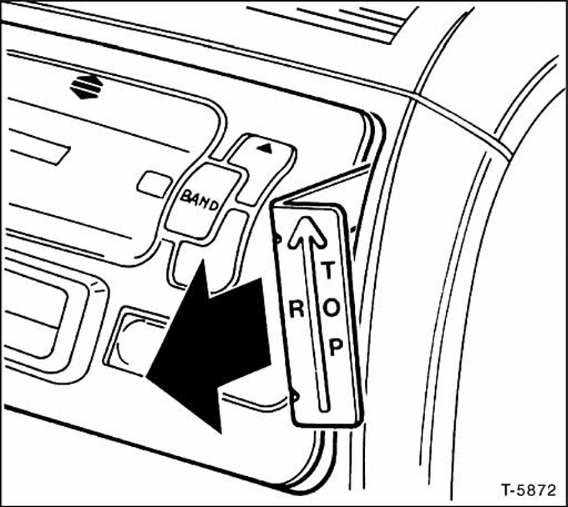
Pull the radio out slightly on the right side using the tool.

Push the radio to the right by hand so the slot on the left becomes slightly larger. Insert the left-hand part "L" of the special tool until it audibly engages in the retaining springs.
Pull the radio out slightly on the left until it is parallel.

Pull the radio out evenly by the tool handles until the tool parts can be unhooked from the spring clips.
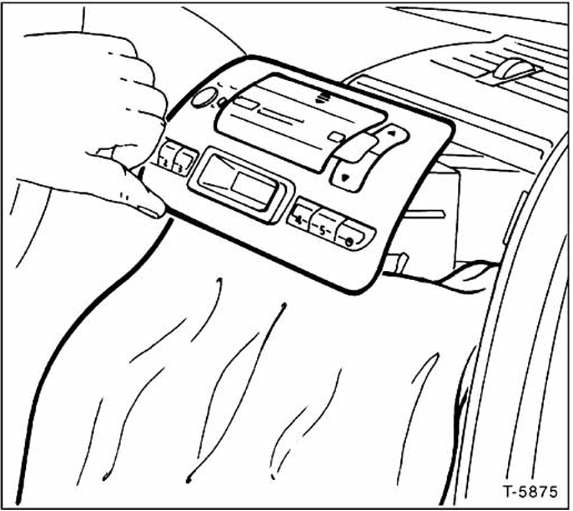
To avoid damaging the trim panel, place a thick cloth under the radio and pull the radio out completely.
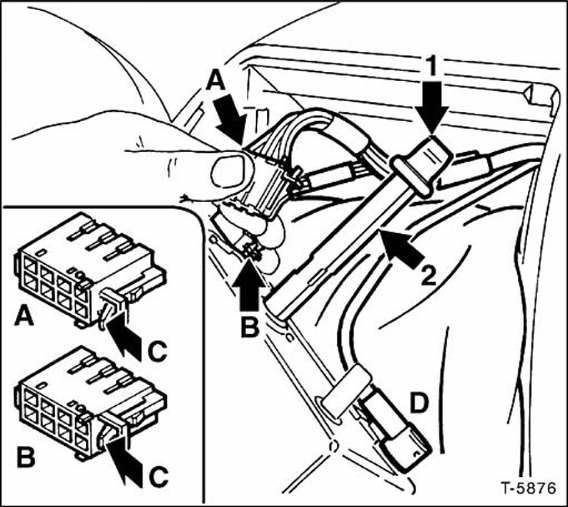
Disconnect antenna cable - D -.
Remove connectors - A - and - B - as follows: press the connector towards the radio and press off the retaining springs - C - (detail).
Remove the radio completely. Note: if the rubber grommet - 1 - gets stuck in the bracket on the cross member, pull the rubber grommet out and fit it onto the centering pin - 2 -.
Connect electrical connectors and antenna to the rear of the radio. Note: cover the trim panel with a cloth to avoid scratches.
Check that the rubber grommet is seated on the centering pin; fit it if necessary.
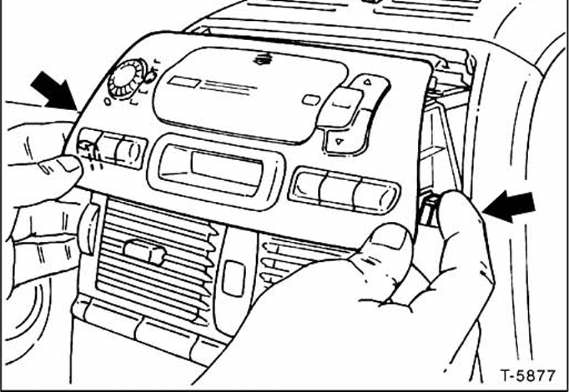
Slide the radio evenly into the dashboard, pressing the two lower springs in with your fingers so the trim panel is not scratched. When sliding in the radio, make sure the centering pin engages in the retaining hole of the cross member.
Press the radio into the instrument panel until the retaining springs audibly engage. Press only against the radio trim panel, not against the control buttons.
Connect the battery negative cable (-).
Switch on the radio and check its function. If the radio is equipped with a keycode anti-theft system, re-enter the keycode. After power is restored, the unit will only work again once the correct keycode has been entered; see the radio owner's manual.
Set the clock.
Test yourself
A quick Fiat Bravo quiz: every answer comes with an explanation and a link to the manual page.