Removal and Installation - Crankshaft Pulley
Special Service Tools / General Equipment
 |
303-1416 Tool, Crankshaft Damper Holder TKIT-2008ET-FLM |
 |
303-1699 Tool, Crank Sensor Alignment |
 |
303-465 Camshaft Timing Tool TKIT-1994-LMH/MH2 TKIT-1994-FX/FMX/FLMX |
 |
303-507 Timing Pin, Crankshaft TDC TKIT-2001N-FLM TKIT-2001N-RYAD |
| Floor Jack | |
| Wood block | |
Removal
NOTICE: Do not loosen or remove the crankshaft pulley bolt without first installing the special tools as specified in this procedure. The crankshaft pulley and crankshaft sprocket are not keyed to the crankshaft. The crankshaft, crankshaft sprocket and pulley are connected to each other by friction. For this reason the crankshaft sprocket can also come loose if the pulley bolt is loosened. Before any repair requiring loosening or removal of the crankshaft pulley bolt, the crankshaft and camshafts must be locked with the special service tools, otherwise serious engine damage may occur.
NOTICE: During engine repair procedures, cleanliness is extremely important. Any foreign material, including any material created while cleaning gasket surfaces, that enters the oil passages, coolant passages or oil pan may cause engine failure.
- Remove the RH front fender splash shield.
Refer to: Fender Splash Shield (501-02 Front Body Panels, Removal and Installation). - Remove the valve cover.
Refer to: Valve Cover (303-01C, Removal and Installation). - Remove the bolts and the CKP sensor.

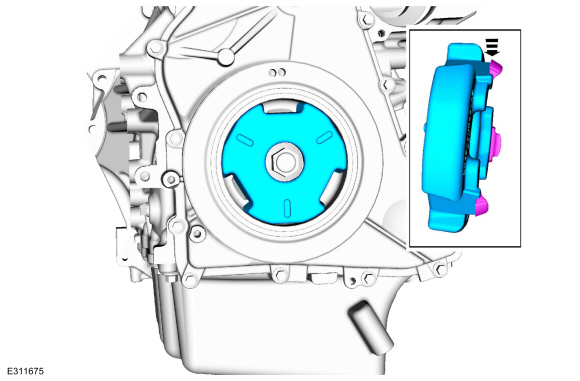
- Release the retainers and remove the crankshaft pulley cover.
Using the crankshaft pulley bolt, rotate the crankshaft clockwise to position the No. 1 piston at TDC.- The hole in the crankshaft pulley must be at the 6 o'clock position.
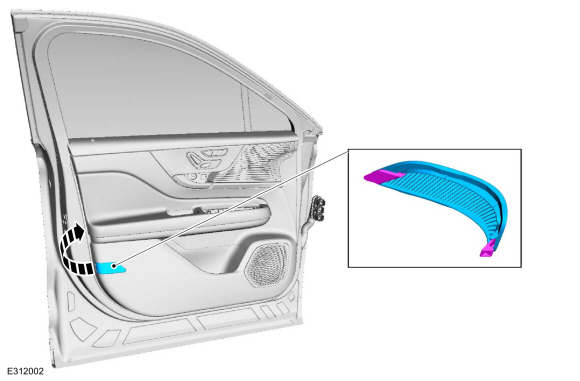
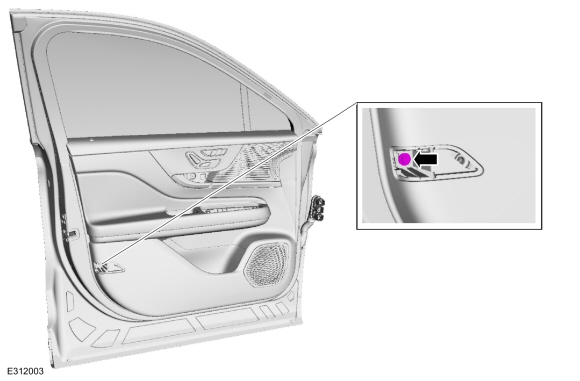
- Remove the engine plug bolt.

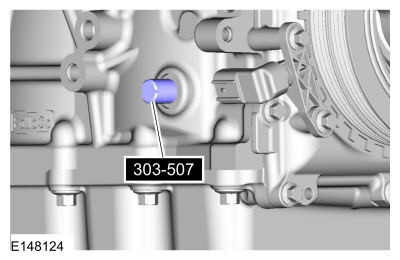
- Install the special service tool: 303-507 Timing Pin, Crankshaft TDC.
- Slowly rotate the crankshaft clockwise until the crankshaft balance weight contacts the crankshaft TDC timing pin. The engine is now at TDC.
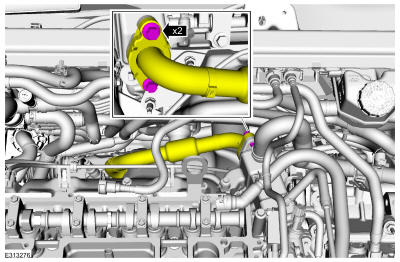
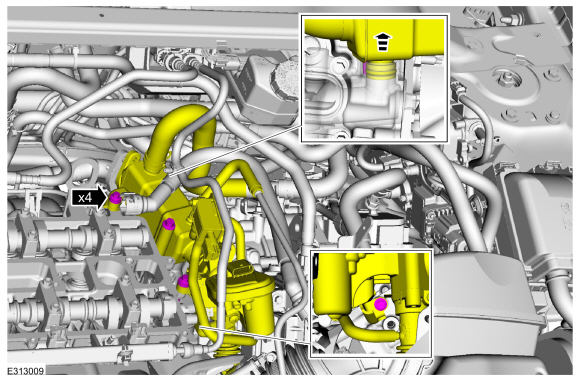
- Remove the bolts and set the EGR cooler inlet tube aside.
- Remove and discard the EGR cooler intake tube gasket.

- Remove the bolts and set the EGR cooler aside.
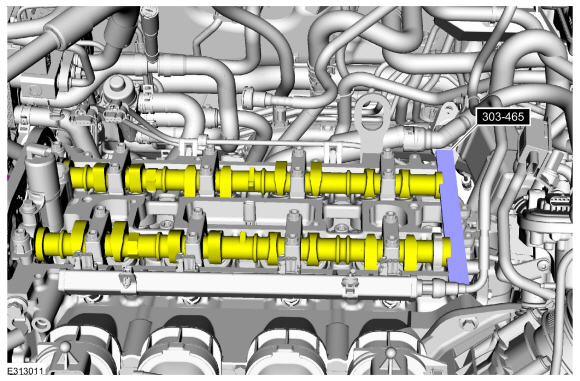
- Install the Special Service Tool: 303-465 Camshaft Timing Tool.
- Place a jack and a wooden block under the front of the oil pan to support the engine.
Use common shop equipment: Jack trolley
Use common shop equipment: wooden block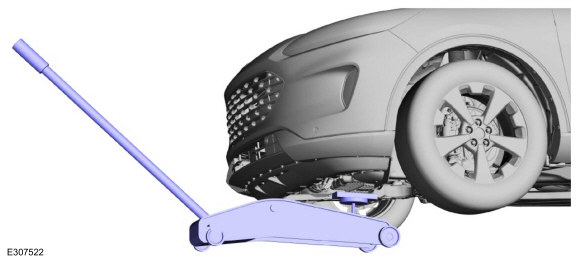
- Remove and discard the engine mount nuts.
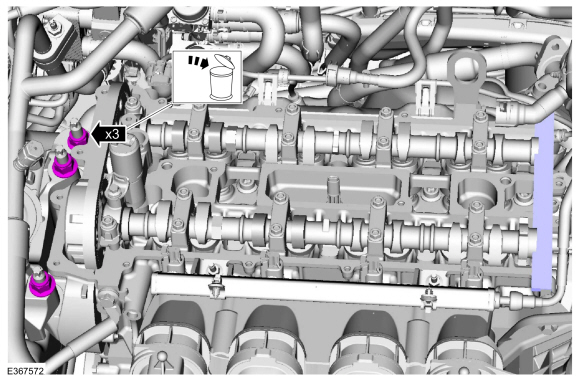
- Lower the engine 88.9 mm (3.5 in).
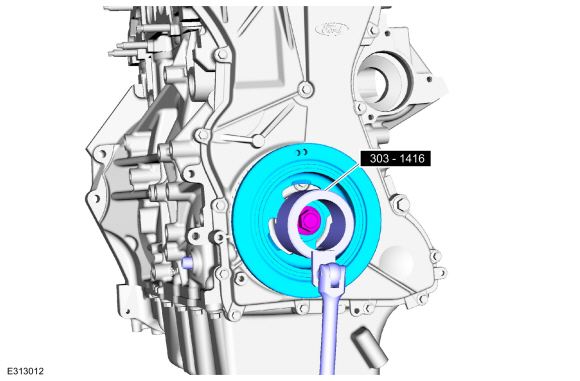
- Install the recommended tool: 303-1416 Crankshaft Damper Holding Tool. The shown tool or a commercially available equivalent may be used.
Use the special service tool: 303-507 Timing Pin, Crankshaft TDC.
Use the crankshaft damper holding tool and a suitable 1/2 inch hand-operated tool to hold the crankshaft pulley. Use an air impact wrench to loosen the crankshaft pulley bolt.- Remove and discard the crankshaft pulley bolt and washer.
- Remove the crankshaft pulley.
Use the special service tool: 303-1416 Crankshaft Damper Holding Tool.
Installation
- Lubricate the crankshaft pulley oil seal surface with clean engine oil and install the crankshaft pulley.
Refer to: Specifications (Engine 303-01C, Specifications).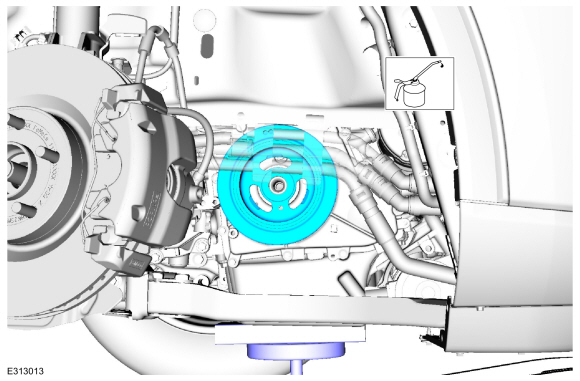
- Install the M6 bolt.

- Install a new crankshaft pulley bolt. Use the Crankshaft Damper Holding Tool and a suitable 1/2 inch hand-operated tool to hold the crankshaft pulley.
- Tighten the crankshaft pulley bolt in 2 stages.
Use the special service tool: 303-1416 Crankshaft Damper Holding Tool.
Torque:
Stage 1: 74 lb-ft (100 N·m)
Stage 2: 90°
- Remove the M6 bolt.
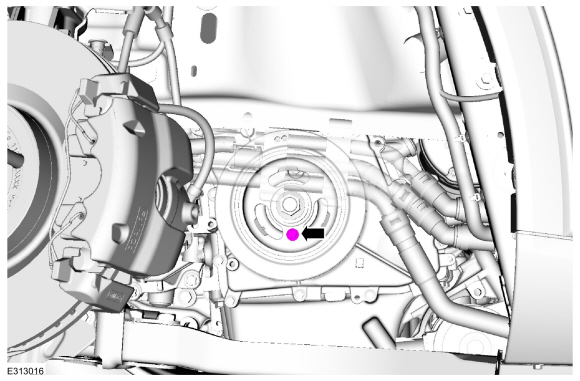
- Remove the special service tool: 303-507 Camshaft/Crankshaft TDC Pin.
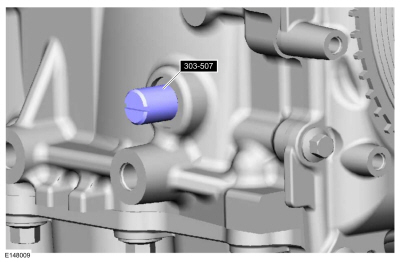
- Remove the special service tool: 303-465 Camshaft Timing Tool.
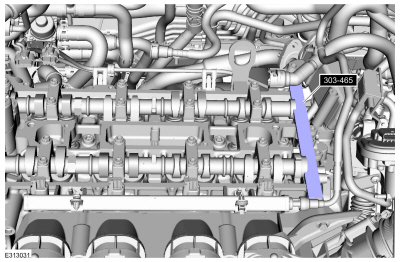
- Rotate the crankshaft clockwise one and three-quarter turns.

- Install the special service tool: 303-507 Timing Pin, Crankshaft TDC.
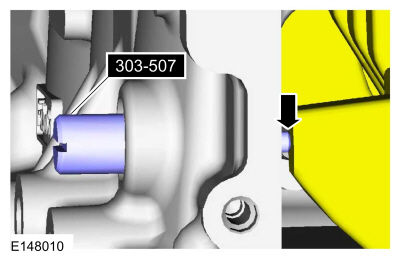
Install the M6 bolt and check the position of the crankshaft pulley.- If the bolt cannot be installed, the engine camshaft timing must be corrected by repeating this procedure.
- Install the Special Service Tool: 303-465 Camshaft Timing Tool.
- Remove the special service tool: 303-465 Camshaft Timing Tool.
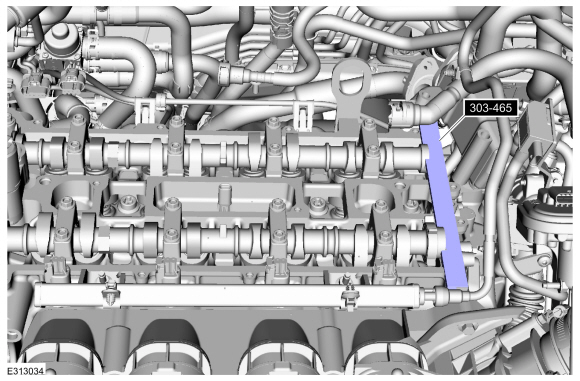
- Remove the M6 bolt.
- Install the CKP sensor and bolts.

- If the special service tool mark does not align with the TDC tooth marked on the crankshaft pulley, loosen the CKP sensor bolts and adjust the sensor until the tool can be installed, then tighten.
Use the recommended tool: 303-1699 Crankshaft Sensor Alignment Tool. The shown tool or a commercially available equivalent may be used.
Torque: 62 lb-in (7 N·m)
- Remove the special service tool: 303-1699 Crankshaft Sensor Alignment Tool.
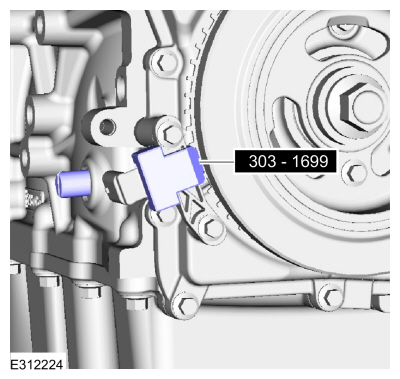
- Remove the special service tool: 303-507 Camshaft/Crankshaft TDC Pin.
- Install the engine plug bolt.
Torque: 177 lb-in (20 N·m)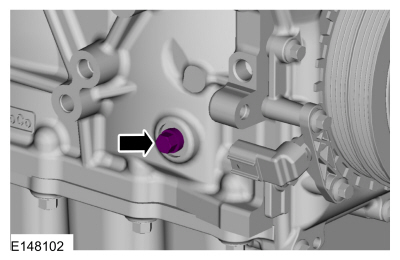
- Inspect the lugs of the crankshaft pulley cover for damage and replace if necessary.
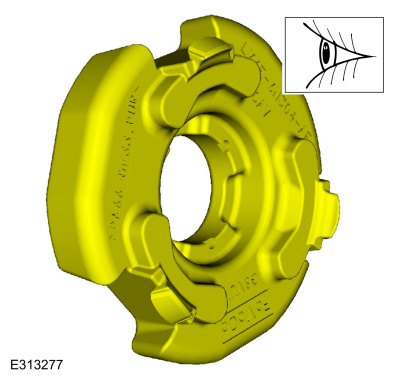
- Install the crankshaft pulley cover.
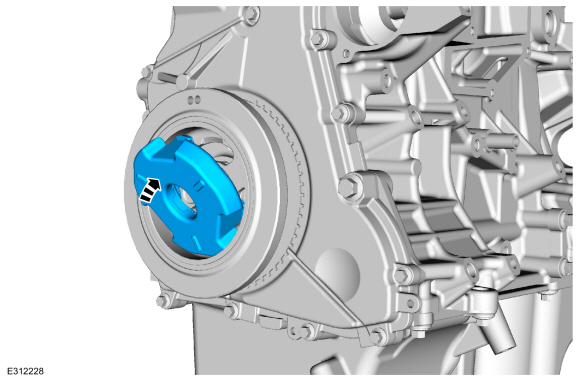
- Raise the engine.

- Install new engine mount nuts.
Torque: 81 lb-ft (110 N·m)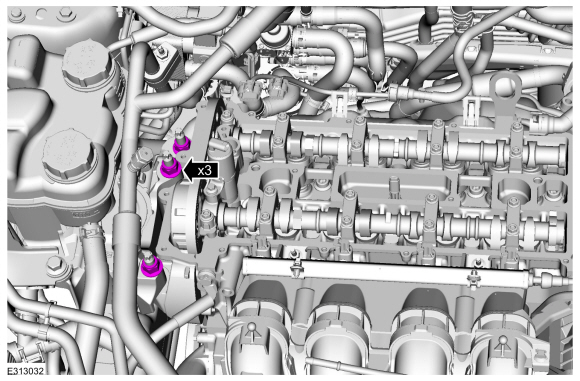
- Remove the jack and wooden block from under the engine.
Use common shop equipment: Jack trolley
Use common shop equipment: wooden block - Inspect the exhaust gas recirculation (EGR) cooler O-ring and replace if necessary.

- Lubricate the new EGR cooler O-ring with a small amount of engine oil.
- Install the EGR cooler.
Torque: 89 lb-in (10 N·m)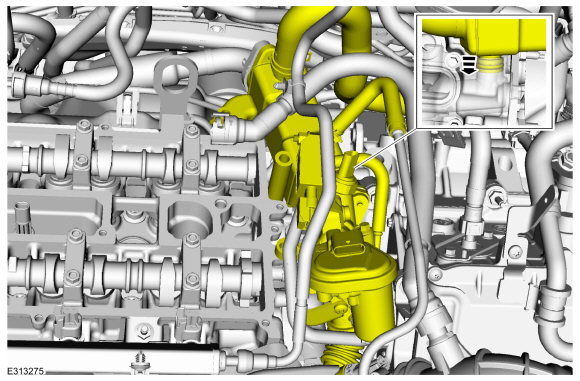
- Install the EGR assembly bolt and at this stage tighten the bolt by hand only.
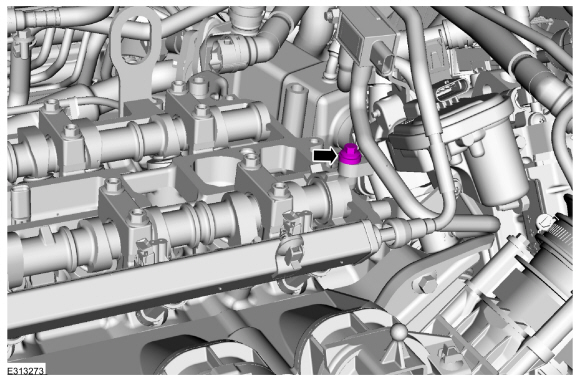
- Install the EGR assembly bolt.
Torque: 89 lb-in (10 N·m)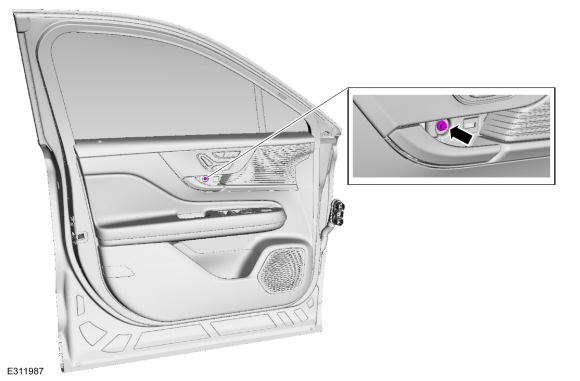
- Install the EGR assembly bolts and at this stage tighten the bolts by hand only.

- Tighten in the sequence shown.
Torque:
1: 89 lb-in (10 N·m)
2: 89 lb-in (10 N·m)
3: 18 lb-ft (25 N·m)
- This step is only necessary if the water outlet housing was removed or loosened.
Tighten in the sequence shown.
Torque:
Stage 1: 89 lb-in (10 N·m)
Stage 2: 45°
- Install a new EGR cooler inlet pipe gasket.
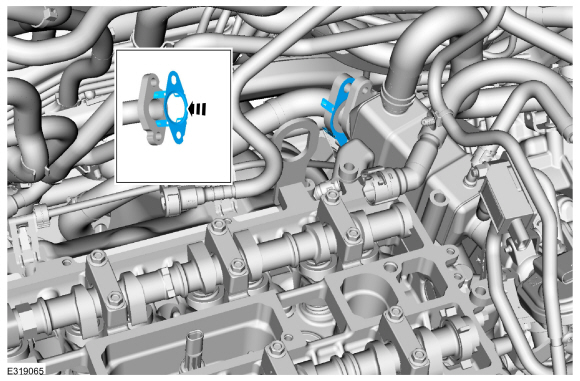
- Install the EGR cooler inlet pipe in position and hand-tighten the bolts. Torque: 22 lb-ft (30 N·m)
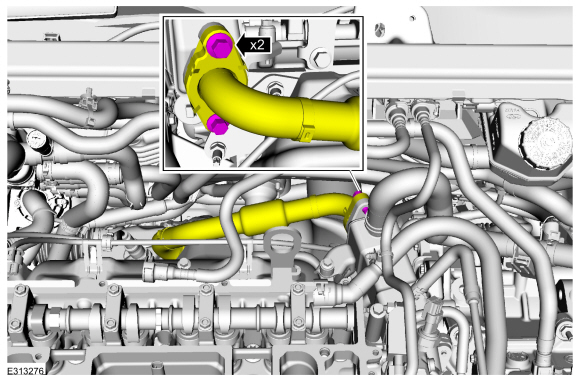
- Tighten in the sequence shown.
Torque:
1: 89 lb-in (10 N·m)
2: 18 lb-ft (24 N·m)
1: 18 lb-ft (24 N·m)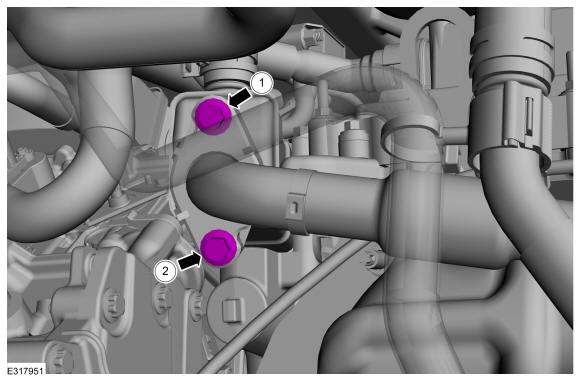
- Install the valve cover.
Refer to: Valve Cover (Engine 303-01C, Removal and Installation). - Install the RH front fender splash shield.
Refer to: Fender Splash Shield (501-02 Front Body Panels, Removal and Installation). - After completing the repair, perform a misfire monitor check. Perform the neutral profile correction procedure using the diagnostic scan tool.
Test yourself
A quick Ford Escape quiz: every answer comes with an explanation and a link to the manual page.