Powertrain
Removal - Engine
In this manual: Powertrain
69steps
~419min
5/5difficulty
1special tools
Done 0 of 69
Special Service Tools / General Equipment
 |
303-476 (T94P-9472-A) Socket, Exhaust Gas Oxygen Sensor TKIT-1994-LM/M TKIT-1994-F TKIT-1994-FLM/FM |
| Strap wrench | |
| Floor crane | |
| Adjustable mounting arm | |
| Oil Drain Equipment | |
| Hose Clamp Removal/Installation Tool | |
| Fluid Container | |
| Powertrain jack | |
| Wood block | |
Materials
| Name | Specification |
|---|---|
| Motorcraft® Penetrating and Locking Lubricant XL-1 |
- |
- Position the vehicle in NEUTRAL on the lift.
Refer to: Jacking and Lifting - Overview (100-02 Jacking and Lifting, Description and Operation). - Relieve the fuel system pressure.
Refer to: Fuel System Pressure Release (310-00C Fuel System – General Information, General Procedures). - Recover the A/C system refrigerant.
Refer to: Air Conditioning (A/C) System Recovery, Evacuation and Charging - 2.5 L Duratec - Hybrid (121 kW/164 L PS) (BG) (412-00 Climate Control System - General Information, General Procedures).
Refer to: Air Conditioning (A/C) System Recovery, Evacuation and Charging - 2.5 L Duratec - Hybrid (121 kW/164 L PS) (BG) (412-00 Climate Control System - General Information, General Procedures). - De-energize the high-voltage system.
Refer to: High-Voltage System Disabling (414-03A High-Voltage Battery, Mounting and Cables, General Procedures). - Disconnect the battery.
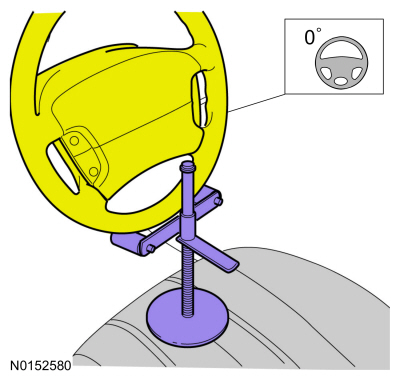
Refer to: Battery Disconnect and Connect (414-01 Battery, Mounting and Cables, General Procedures). - Using a holding device, hold the steering wheel in the straight-ahead position.
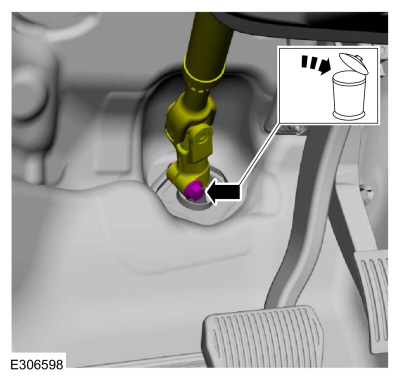
- Remove the bolt and discard it.
- Move the steering column shaft to the side.
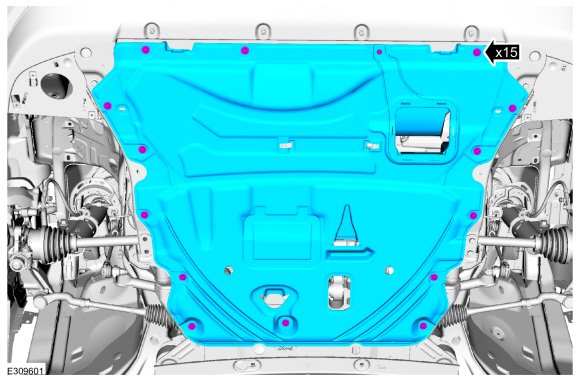
- Remove the brackets and the lower splash shield.
- Remove the front fender splash shields.
Refer to: Splash Shield - Fender (501-02 Front End Body Panels, Removal and Installation). - Drain the cooling system.
Refer to: Engine Cooling System Draining, Vacuum Filling and Bleeding (303-03C Engine Cooling – General Procedures). - Drain the electric drive cooling system.
Refer to: Cooling System Filling and Air Bleeding (303-03D Electric Transaxle Cooling - Hybrid Electric Vehicle (HEV), General Procedures). - Remove the drain plug and drain the engine oil.
Use the General Equipment: Oil Drain Equipment
- Install the drain plug.
Torque: 21 lb-ft (28 N·m)
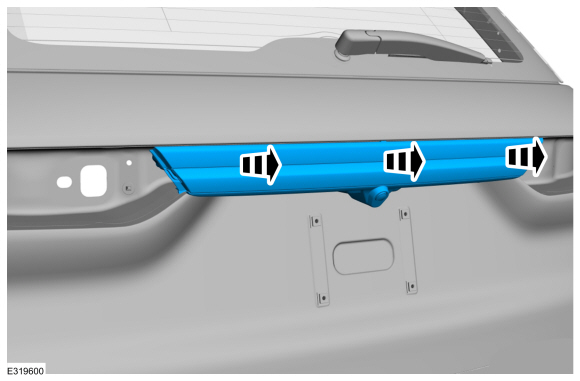
- Remove the drain plug and drain the engine oil.
- Remove the engine appearance cover nut.
- Place your hand under the engine outer cover at each grommet and push straight up to release each grommet from the stud.
- After all bushings are removed from the studs, remove the engine appearance cover from the engine.
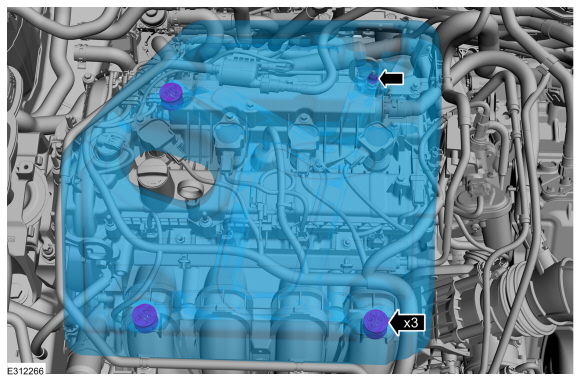
- Remove the degas bottle.
Refer to: Degas Bottle (303-03C Engine Cooling, Removal and Installation).
- Disconnect the fuel vapor and fuel supply tubes.
Refer to: Quick Release Coupling (310-00C Fuel System - General Information, General Procedures).
Refer to: Spring Lock Couplings (310-00C Fuel System - General Information, General Procedures).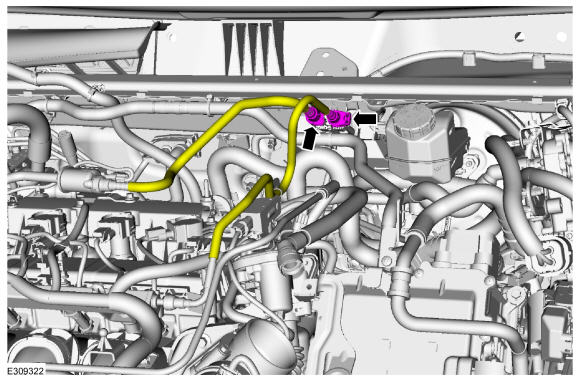
- Disconnect the coolant hoses.
Use the General Equipment: Hose Clamp Removal/Installation Tool.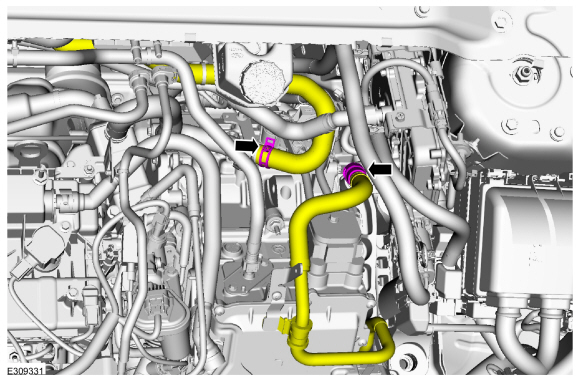
- Remove the bolt and set the ground wire aside.

- Install a commercially available lifting eye.
Torque: 39 lb-ft (53 N·m)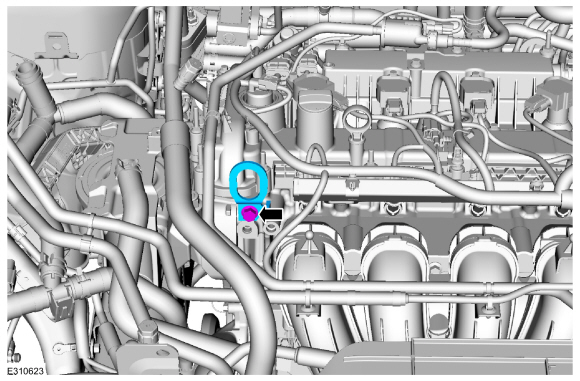
- If equipped.
Disconnect the engine block heater wiring harness clips.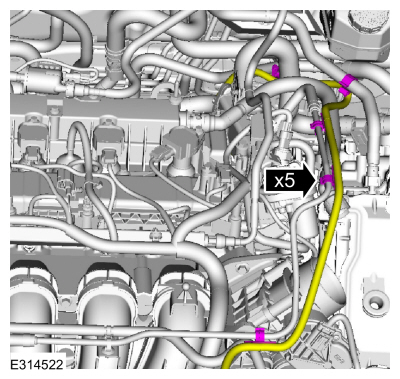
NOTICE: Apply tape to the ISC (Inverter System Controller) connectors to prevent contamination of the connector terminals.
Disconnect the coolant hoses and remove the pin-type retainers.
Use the General Equipment: Hose Clamp Removal/Installation Tool.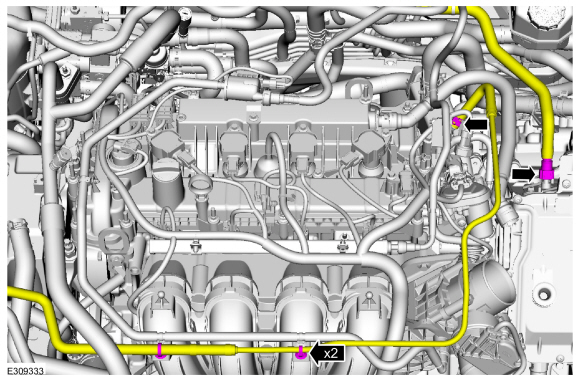
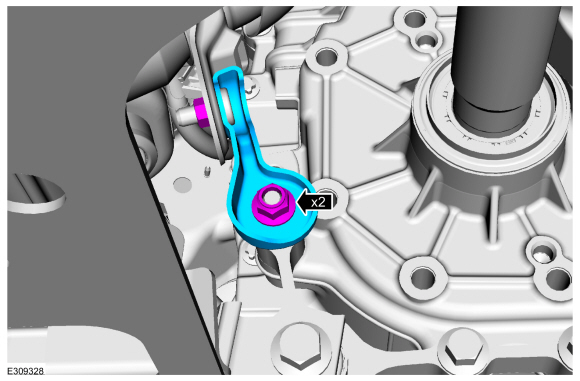
- Remove the nuts and the bracket.
NOTICE: Make sure the flex exhaust pipe is not twisted or bent by force.
Support the flex exhaust pipe with a support film or a suitable bar.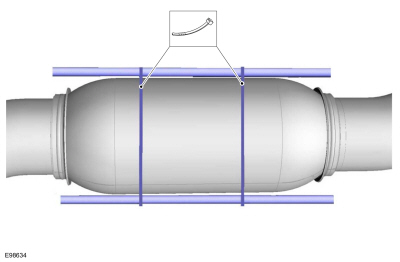
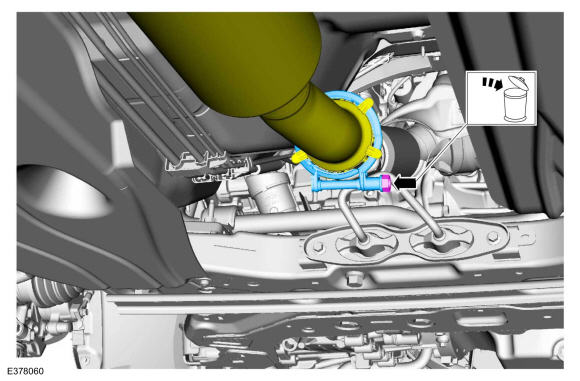
- Remove and discard the exhaust clamp.
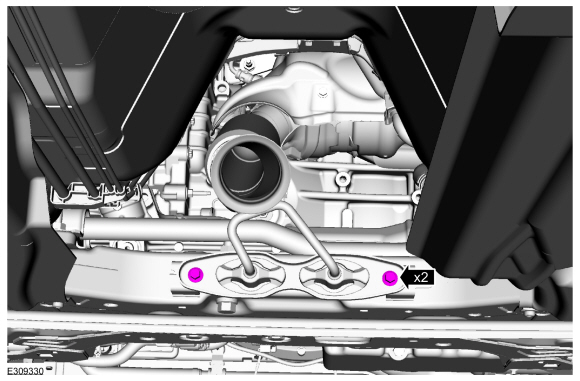
- Unscrew the exhaust manifold bracket mounting bolts.
- Remove the front bumper cover.
Refer to: Front Bumper Cover (501-19 Bumpers, Removal and Installation). - Remove the bolts.
- Remove and discard the bolts. Remove the right subframe mount bracket.
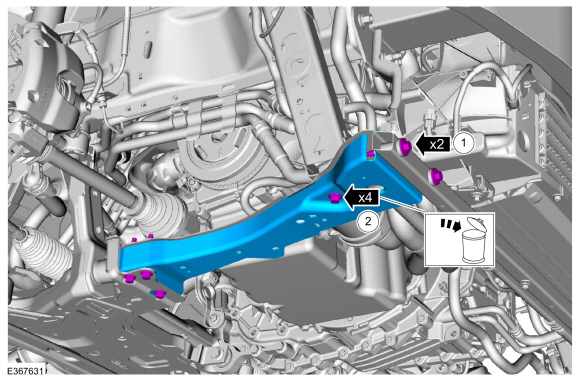
- Remove the bolts.
- Remove and discard the bolts. Remove the right subframe mount bracket.

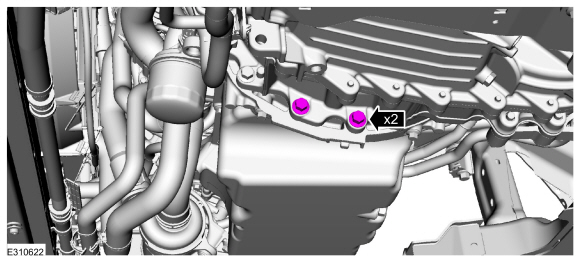
- Remove the transaxle with the engine bolts.
- If equipped with a block heater.
Install the block heater electrical connector cover.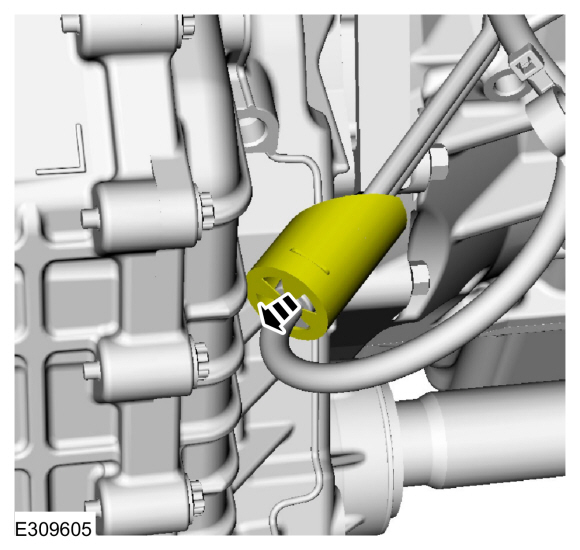
- If equipped with a block heater.
Disconnect the block heater electrical connector.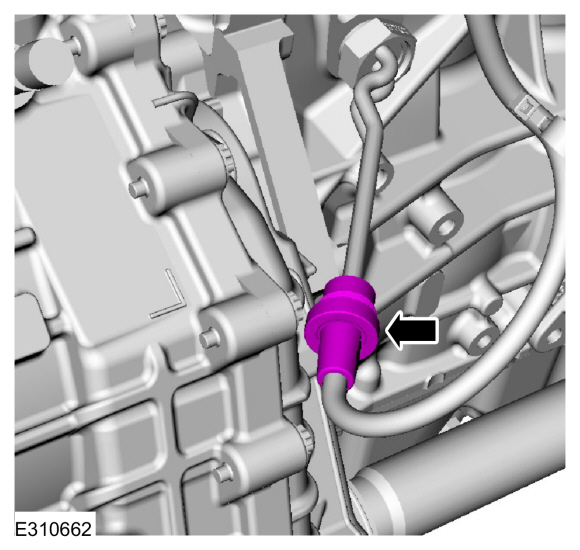
- Disconnect the coolant hose.
Use the general equipment: hose clamp removal/installation tool.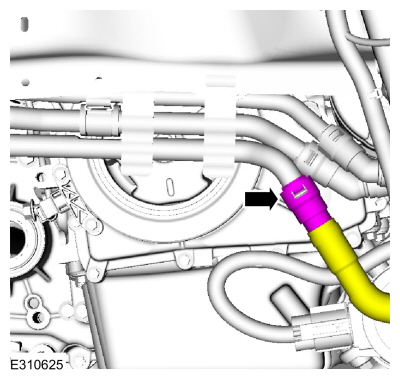
- Disconnect the coolant hose.
Use the general equipment: hose clamp removal/installation tool.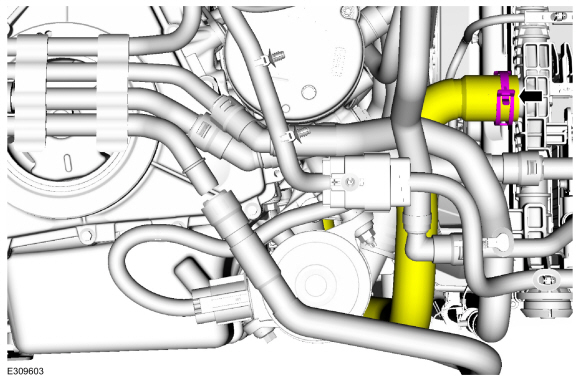
- If equipped.
Disconnect the oil cooler hose.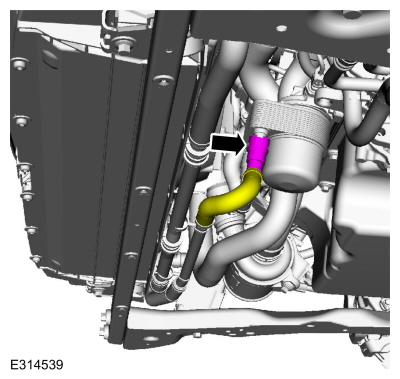
- Release the retainers and clamps, and remove the coolant hoses.
Use the General Equipment: Hose Clamp Removal/Installation Tool.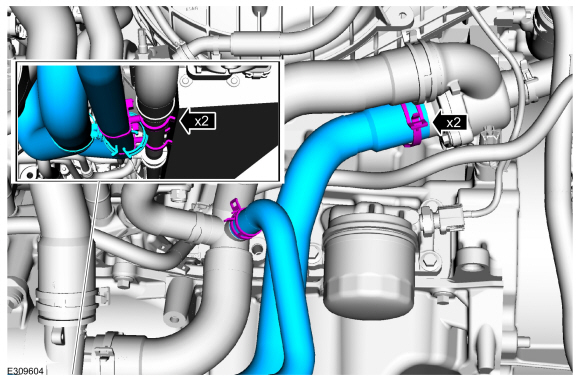
- Disconnect the coolant pump electrical connector and release the wiring harness clips.

- Disconnect the A/C electrical connectors and release the wiring harness clips.
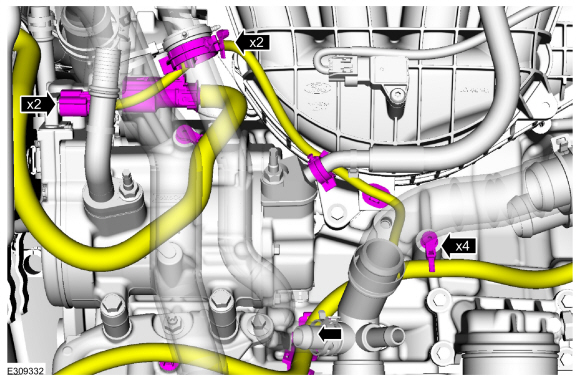
- Loosen the clamp and disconnect the upper radiator hose.
Use common service equipment: hose clamp removal/installation tool.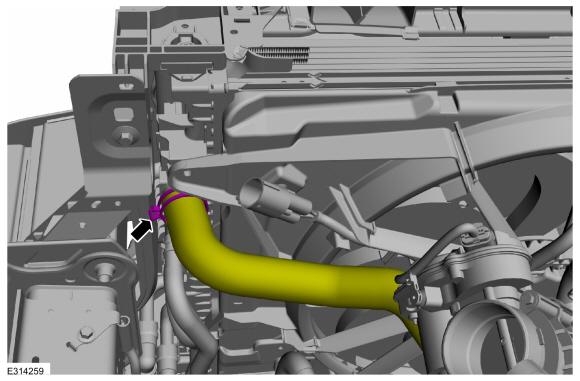
NOTICE: Apply tape to the ISC (Inverter System Controller) connectors to prevent contamination of the connector terminals.
Disconnect the transmission converter block electrical connectors and release the wiring harness clip.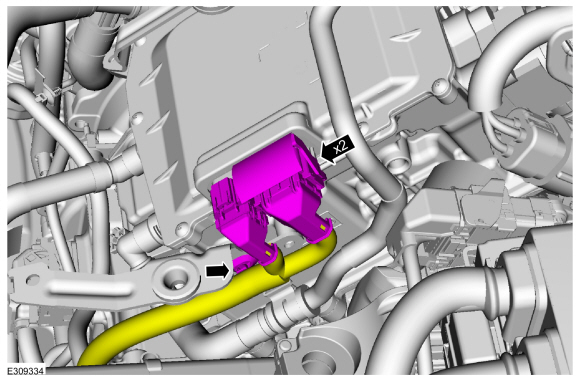
- Remove the ground wire nut, disconnect the transaxle electrical connector and remove the wiring harness brackets.
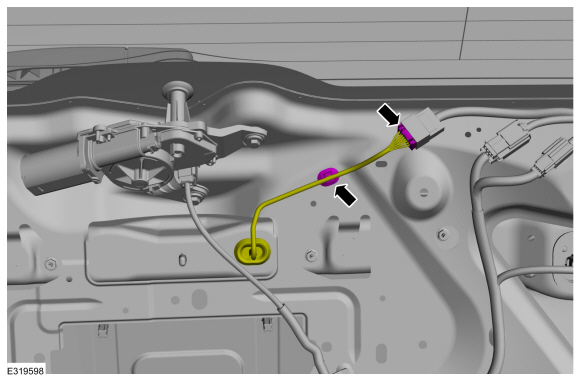
NOTICE: Apply tape to the ISC (Inverter System Controller) connectors to prevent contamination of the connector terminals.
Remove the bolts, disconnect the high voltage cable and disconnect the wiring harness bracket from the TCM.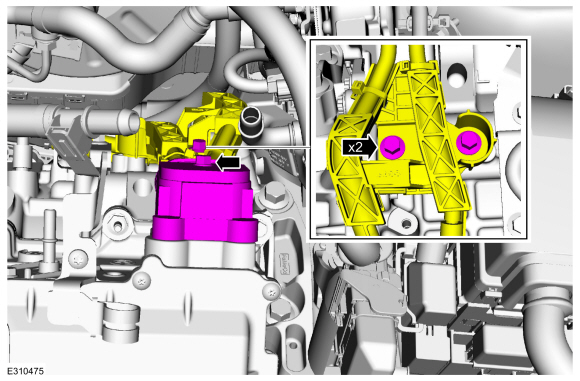
- Remove the bolts and the PCM cover.
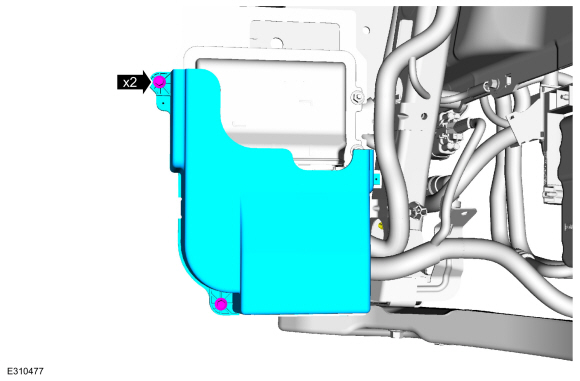
- Disconnect the electrical connectors and release the wiring harness clips.
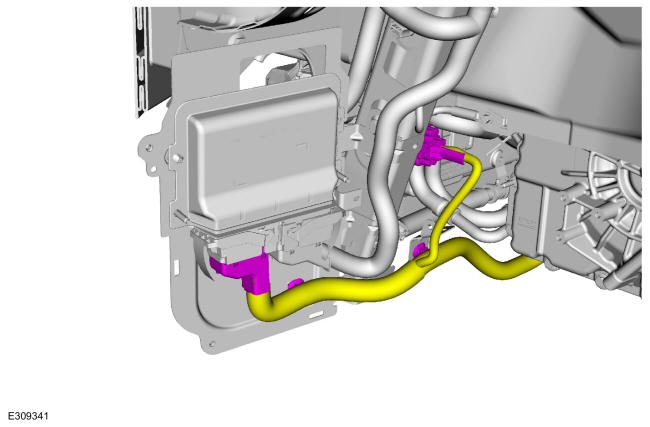
NOTICE: Place absorbent towels under the coolant pipes to prevent coolant from contacting the ISC (Inverter System Controller).
Disconnect the coolant hose.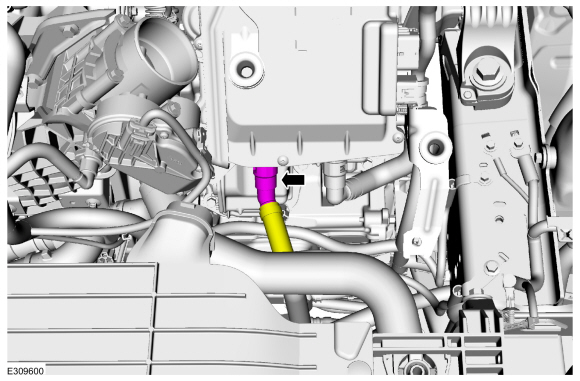
- Remove the bolt and move the transaxle coolant pipe aside.
Use common service equipment: fluid container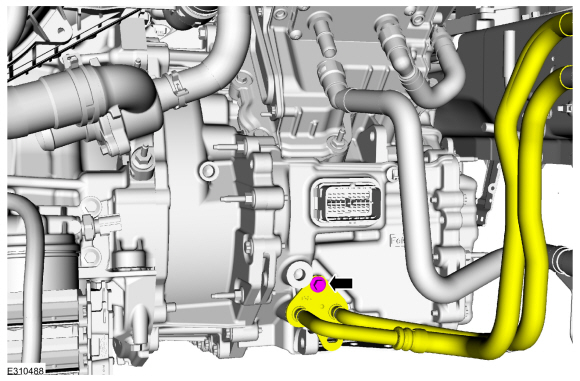
- Remove the nuts and move the A/C line aside.
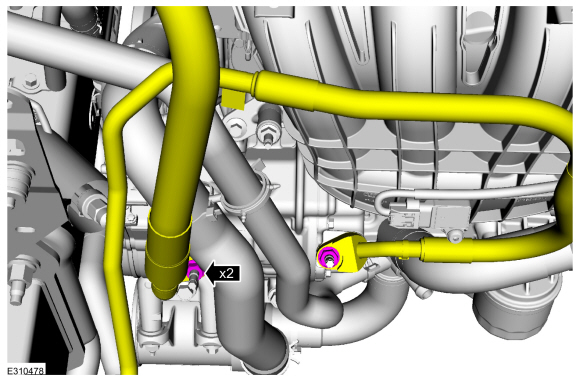
- Remove and discard the engine oil filter.
Use general service equipment: strap wrench.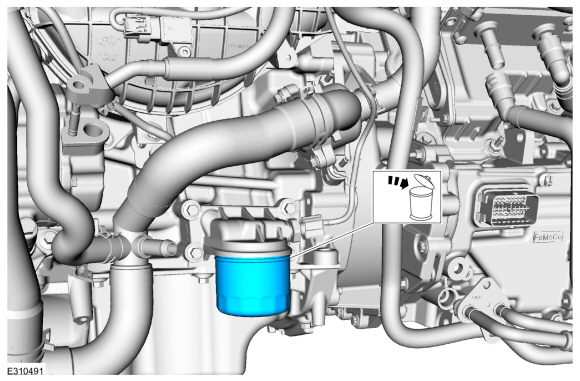
- Loosen the clamps and remove the coolant hoses.
Use common service equipment: hose clamp removal/installation tool.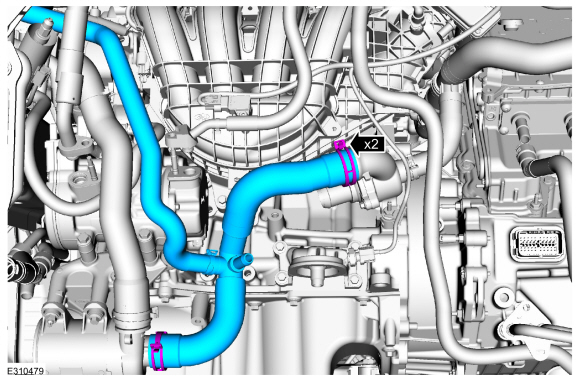
- Remove the half shafts.
Refer to: Front Half Shaft, LH (205-04 Front Half Shafts, Removal and Installation).
Refer to: Front Half Shaft, RH — 2.5 L Duratec — Hybrid (121 kW/164 L PS) (BG) (205-04 Front Drive Half Shafts, Removal and Installation). - Remove the stud and bolts, and the roll restrictor bracket.
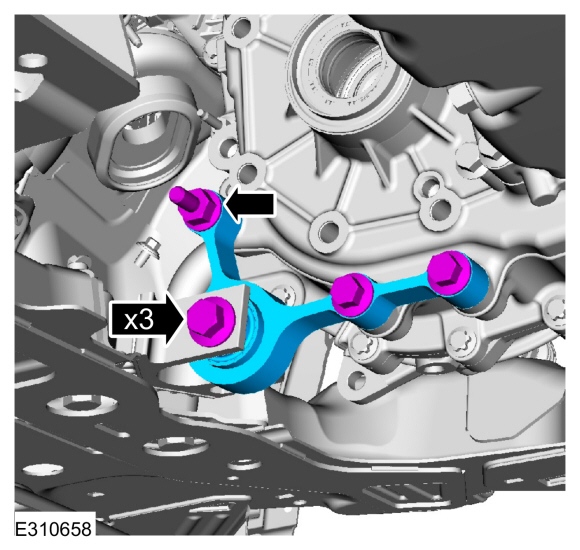
- Remove the front subframe.
Refer to: Front Subframe (502-00 Uni-Body, Subframe and Mounting System, Removal and Installation). - Using the engine support fixture and adjustable handle, secure the engine to the lift table.
Use common service equipment: power jack
Use common service equipment: adjustable mounting lever
Use common service equipment: wooden block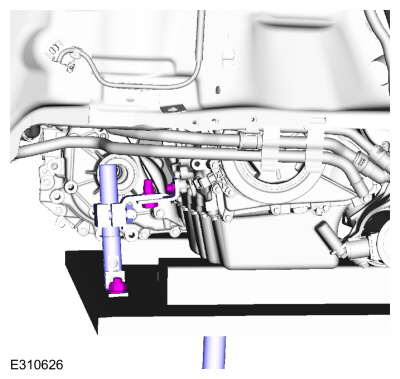
- Secure the engine to the lift table.
Use common service equipment: power jack
Use common service equipment: adjustable mounting lever
Use common service equipment: wooden block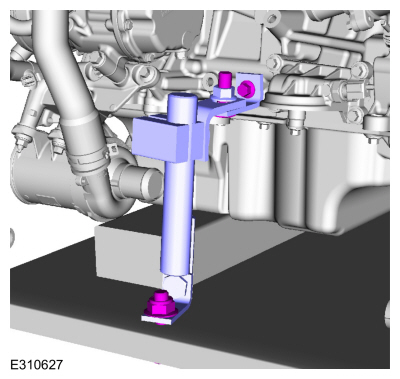
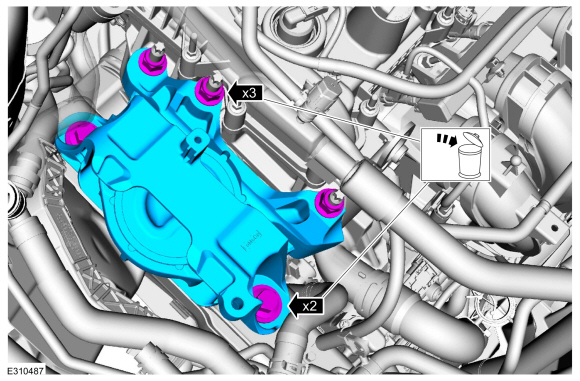
- Remove the bolts, nuts and engine mount.
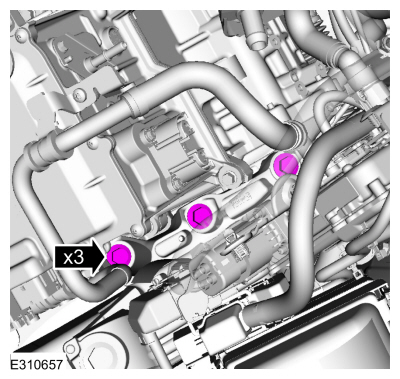
- Remove the transaxle mount insulator bolts.
- Lower the engine and transaxle from the vehicle.
Use common service equipment: power jack
Use common service equipment: adjustable mounting lever
Use common service equipment: wooden block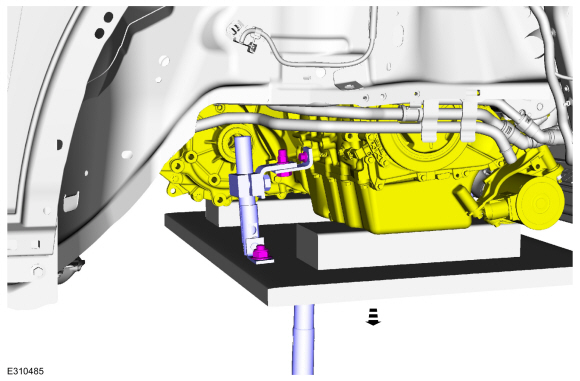
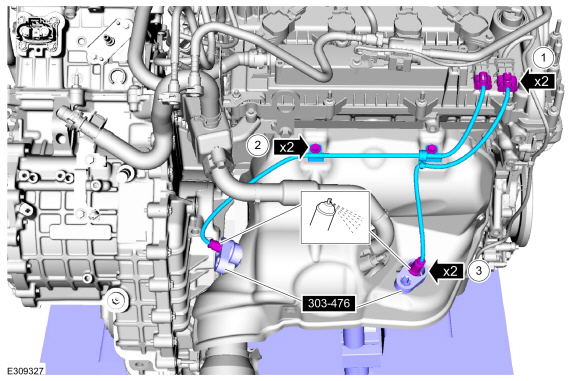
- Disconnect the HO2S electrical connector.
- Remove the bolts and the wire harness brackets.
- Remove the HO2S.
Use the special service tool: 303-476 (T94P-9472-A) Oxygen Sensor Socket.
Material: Motorcraft® Penetrating and Locking Lubricant / XL-1
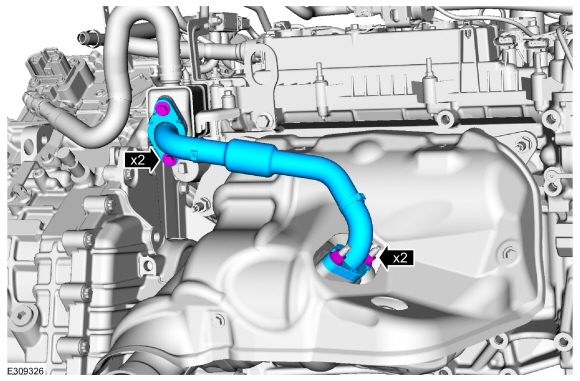
- Remove the nuts, bolts, and the exhaust gas recirculation (EGR) cooler inlet tube.
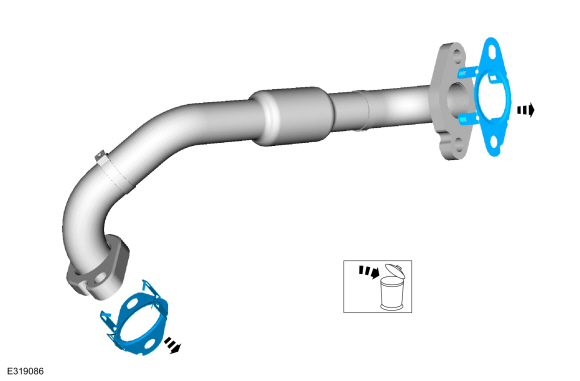
- Discard the EGR cooler inlet tube gaskets.
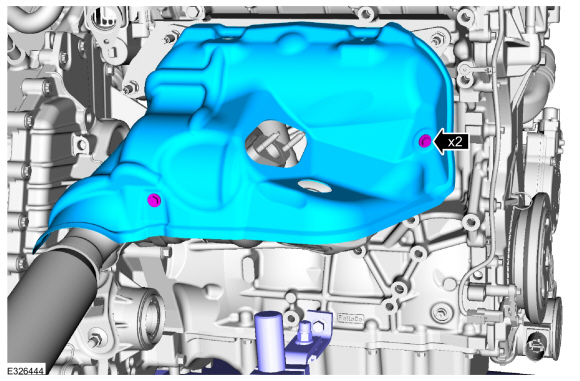
- Remove the bolts and the exhaust manifold heat shield.
- Remove the exhaust and nuts. Discard the nuts.
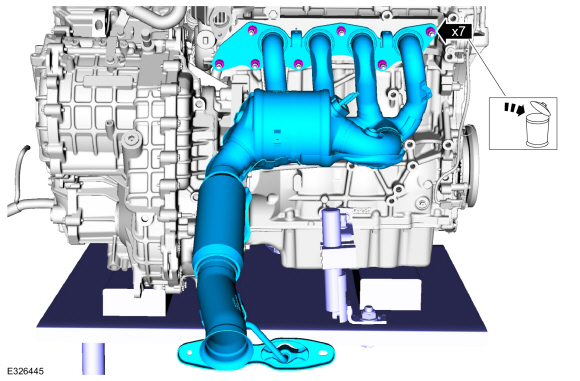
- Remove and discard the exhaust manifold gasket.
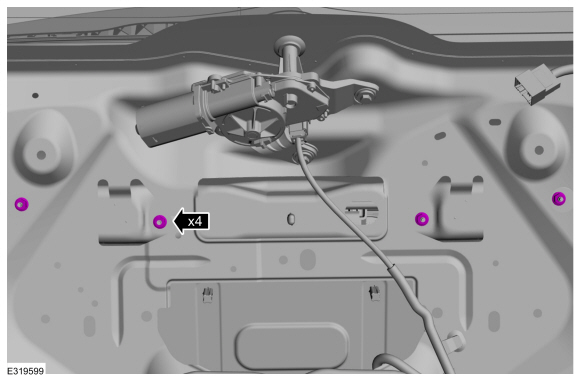
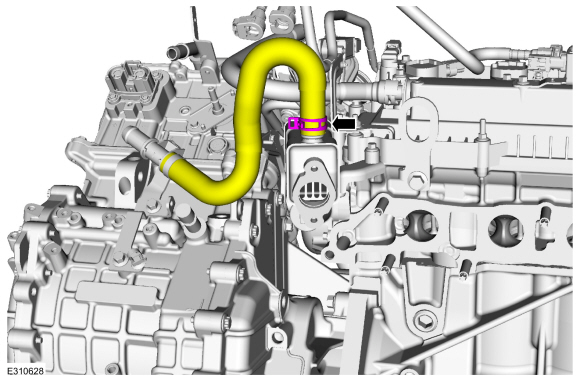
- Remove the hose from the EGR cooler.
- Using the floor crane, attach a commercially available quick-release link and chain.
Use common service equipment: floor crane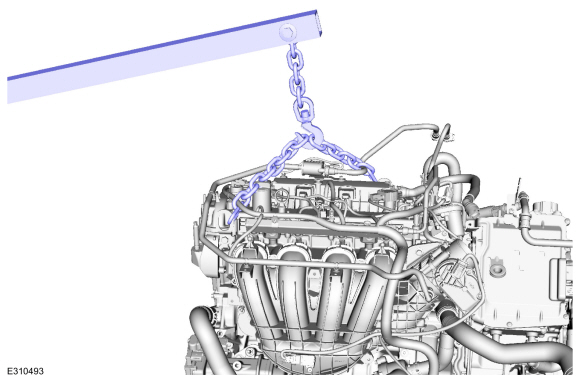
- Remove the right-side bolts from the engine.
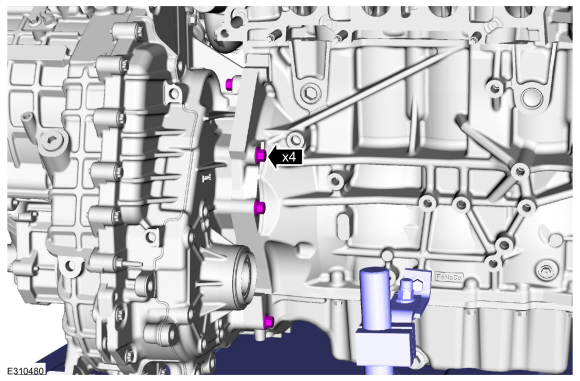
- Remove the LH engine bolts.
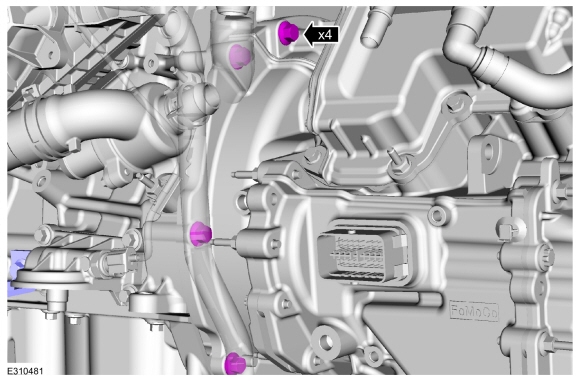
- Remove the LH adjustable mounting lever.
Use common service equipment: adjustable mounting lever - Remove the RH adjustable mounting lever.
Use common service equipment: adjustable mounting lever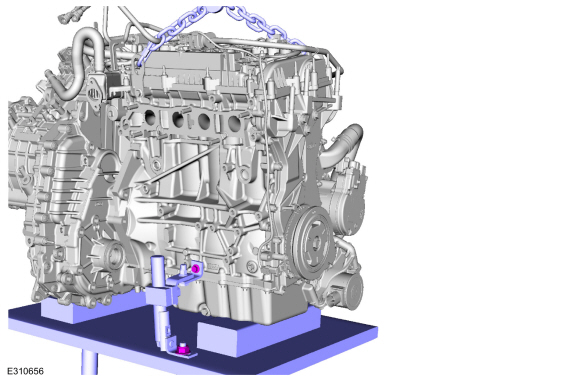
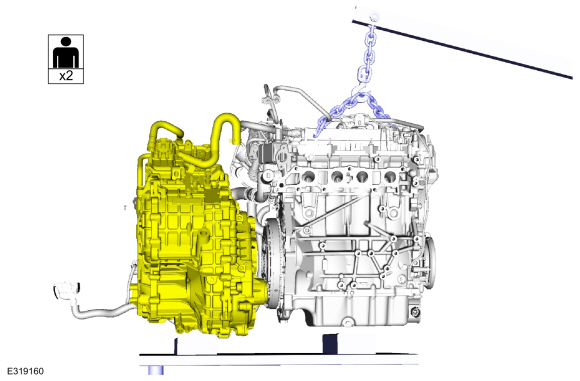
- Separate the engine from the transaxle.
Use common service equipment: floor crane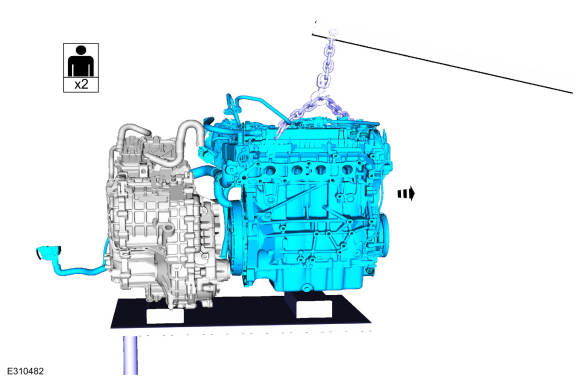
- If necessary, support the transaxle.
Test yourself
A quick Ford Escape quiz: every answer comes with an explanation and a link to the manual page.
Was this page helpful?