Removal and Installation of Rear Disc Brake Calipers
Remember that the dust generated during brake operation may contain asbestos, which is extremely harmful to human health. Never blow dust away with compressed air and never inhale it - wear a protective mask or respirator when servicing the brake assemblies. Never use gasoline or petroleum-based solvents to clean brake system components - use only specialized cleaning agents or methyl alcohol!
Calipers on both brake assemblies of one axle must be replaced at the same time.
REMOVAL
PROCEDURE
1. Loosen the wheel nuts. Raise the rear of the vehicle and support it on safety stands. Remove the rear wheels.
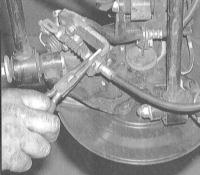
2. Release the parking brake lever, remove the retainer and disengage the parking brake cable from its bracket on the rear side of the brake caliper.

3. Disconnect the parking brake cable from the actuating lever on the caliper.
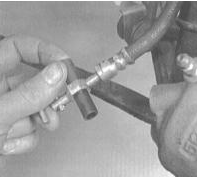
4. Unscrew the banjo bolt of the brake hose fitting on the caliper. Plug the openings using a pair of short pieces of rubber hose.
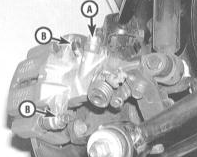
5. Unscrew the caliper mounting bolts.
6. Unscrew the caliper mounting bolts.
INSTALLATION
PROCEDURE
1. Installation is the reverse of removal. Be sure to replace the sealing washers (gaskets) on both sides of the brake hose banjo fitting at the caliper. A set of new gaskets is normally included in the repair kit. Tighten the caliper mounting bolts and the banjo bolt to the specified torque.
2. Bleed the brake circuit (refer to Brake System Bleeding). Check the brake line banjo fittings for signs of leaks.
3. Install the wheels, lower the vehicle to the ground and tighten the wheel nuts to the specified torque (refer to Specifications in the Maintenance and Adjustments chapter). Before driving the vehicle, check that the brakes function properly.
Test yourself
A quick Honda Accord quiz: every answer comes with an explanation and a link to the manual page.