Removal of Master Cylinder
A faulty master cylinder must be replaced. The manufacturer does not recommend attempting to repair the master cylinder.
PROCEDURE
1. The brake master cylinder is located in the engine compartment and is mounted on the brake booster assembly.
2. Remove as much brake fluid as possible from the master cylinder reservoir (use a syringe or rubber bulb).
3. Place rags under the fitting connections and prepare caps or plastic bags to seal the open ends of the brake lines to prevent dirt from entering the system.
Brake fluid is an aggressive chemical and will damage the paint finish if it contacts body panels. Before starting this procedure, cover the fenders and front panel with protective covers or old blankets.
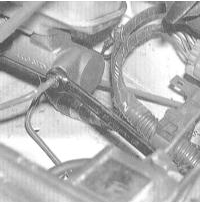
4. Loosen the brake line fitting nuts at the master cylinder. To avoid rounding the nut flats, use a special flare nut wrench. Gently pull the brake lines outward and separate them from the master cylinder fittings. Immediately cap the open ends of the tubes.
5. Remove the front strut brace.
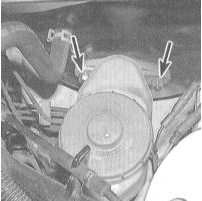
6. Disconnect the electrical connector of the brake fluid level sensor switch on the master cylinder reservoir, then remove the two mounting nuts and separate the master cylinder from the brake booster assembly. Remove the cylinder from the mounting studs and take it out of the engine compartment (be careful not to spill the brake fluid in the cylinder onto painted body panels).
Test yourself
A quick Honda Accord quiz: every answer comes with an explanation and a link to the manual page.