Rear Drum Brake Shoe Replacement
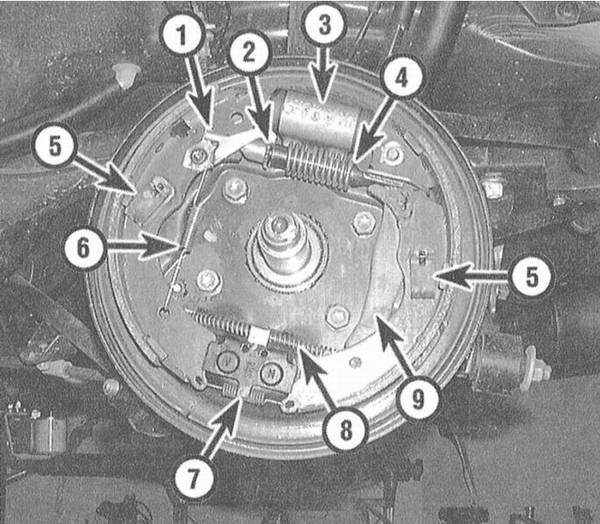
Right Rear Drum Brake Assembly
1 — Automatic adjuster lever
2 — Adjuster assembly
3 — Wheel cylinder
4 — Upper return spring
5 — Guide spring
6 — Automatic adjuster spring
7 — Lower return spring
8 — Parking brake cable
9 — Parking brake actuating lever
Brake shoes must be replaced on both brake assemblies at the same time. See also the warning at the beginning of the Disc Brake Caliper Removal and Installation section!
The return and guide springs must be replaced at the same time as the brake shoes, since under constant cyclic mechanical and thermal loads they stretch/sag over time and lose their specified tension, which leads to brake dragging and accelerated drum wear.
PROCEDURE
1. Loosen the rear wheel nuts. Raise the rear of the vehicle and support it on stands. Chock the front wheels. Remove the rear wheels and release the parking brake.
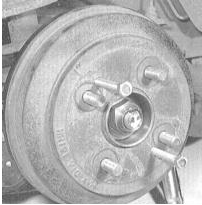
2. Remove the brake drum from the hub. The drum should come off fairly easily. If it sticks, carefully tap it with a soft-faced hammer, or screw a pair of M8 bolts into the threaded holes. If the drum still will not come off, push the brake shoes away from its friction surface. Remove the rubber plug from the brake backing plate, insert a screwdriver through the opening and use it to move the self-adjuster lever away from the adjusting star wheel. Using a second screwdriver, turn the star wheel until the drum is fully released.
3. Replacing the shoes is easier after removing the hub assembly from the axle spindle (remove the wheel bearing cover, remove the spindle nut and remove the washer). Refer to Chapter Suspension and Steering.
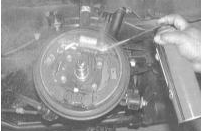
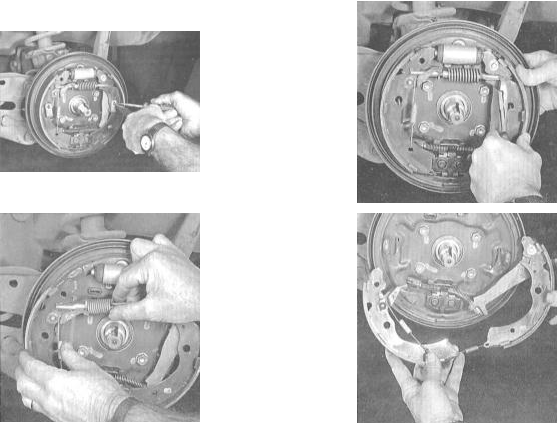
4. Following the instructions shown in the illustrations, inspect the components and replace the brake shoes. Follow the specified procedure strictly. Note that all four shoes of both brake assemblies must be replaced at the same time.


5. Before installing the drum, check it for scoring, grooves, signs of overheating and other defects. If serious damage is found that cannot be removed by polishing the drum with fine-grit sandpaper, the drum must be turned on a lathe (without exceeding the maximum allowable repair diameter).
The publishers of this Manual recommend turning brake drums regardless of their condition in order to remove all types of defects and eliminate out-of-round. If the drum cannot be turned without exceeding the maximum allowable inside diameter (stamped on the drum), replace the drum. If turning the drums is not possible, at a minimum, thoroughly clean their friction surfaces with fine-grit sandpaper.
6. Install the hub assembly with the wheel bearing, fit the washer and install a new spindle nut, tightening it to the specified torque. Refer to Specifications for Chapter Suspension and Steering.
7. Install the drum. Insert a screwdriver through the opening in the brake backing plate and, turning the adjuster star wheel, press the shoes against the drum friction surface, then turn the star wheel back slightly so that the drum rotates freely (preliminary adjustment).
8. Install the wheel, then lower the vehicle to the ground and tighten the wheel nuts to the specified torque. Refer to Specifications for Chapter Maintenance and Tune-Up.
9. Apply the brakes several times while driving forward and in reverse to perform automatic brake adjustment.
10. Before operating the vehicle, make sure the brakes function properly.
Test yourself
A quick Honda Accord quiz: every answer comes with an explanation and a link to the manual page.