Brake Disc Condition Inspection
This procedure applies equally to disc brake assemblies on both the front and rear wheels.
PROCEDURE
1. Loosen the wheel nuts, raise the vehicle and support it on stands. Remove the applicable wheel, then reinstall two wheel nuts onto the wheel studs, placing 3 mm thick washers under them to secure the brake disc (if the two disc retaining screws have not yet been removed, there is no need to install the nuts). When inspecting the rear brake disc, be sure to release the parking brake.
2. Remove the brake caliper (refer to Disc Brake Caliper Removal and Installation) and tie it aside to a suspension component with wire, without disconnecting the brake hose.
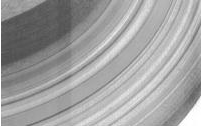
3. Visually inspect the condition of the friction surface of the disc. Minor defects can be removed using fine-grit sandpaper. Grooves deeper than 0.38 mm require the disc to be machined. Note that the disc must be inspected on both sides.

4. If brake pedal pulsation was noticed during braking, evaluate the lateral runout of the brake disc. Mount a dial indicator (DTI) of the plunger type approximately 12.7 mm from the outer edge of the disc.
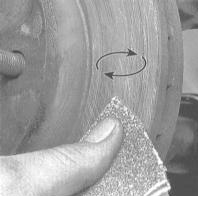
5. Zero the gauge and rotate the disc. The measured value must not exceed the permissible range specified in the Specifications; otherwise, the disc must be machined.
The authors of this Manual recommend machining the discs regardless of their condition in order to remove all surface defects. As a last resort, the disc may be limited to treatment with fine-grit sandpaper.
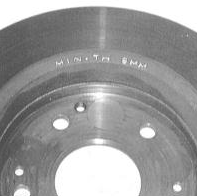
6. When machining the disc, pay particular attention to the minimum permissible thickness requirements in the Specifications. The minimum thickness marking is located on the end face of the disc.

7. Measure the disc thickness using a micrometer.
Test yourself
A quick Honda Accord quiz: every answer comes with an explanation and a link to the manual page.