Clock Setting
Press the button Select [Clock] using the tuning knob
 or press the button
 Select the menu using the tuning knob

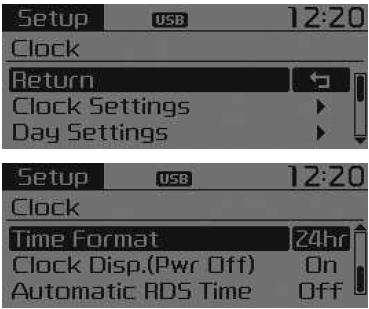
❈ Display and settings may differ depending on the selected audio source.
Clock Setting
This menu is used to set the time.
Select [Clock Settings] Make the setting using the tuning knob

 Press the tuning knob

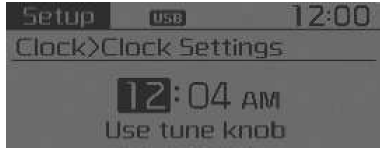
❈ Adjust the currently selected number to set the [hour], then press the knob to set the [minutes].
Date/Calendar Settings
This menu is used to set the date (DD/MM/YYYY). Select [Day Settings] Make the setting using the tuning knob

 Press the knob

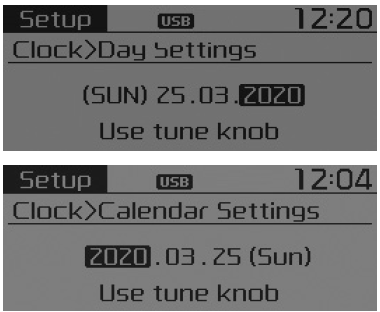
❈ Display and settings may differ depending on the selected audio source.
❈ Adjust the currently selected number to make the setting, then press the knob to move to the next item. (Set in the order Day/Month/Year)
Time Format
This function is used to set the audio system's time format to 12/24 hours.
Select [Time Format] Set 12/24Hr using the tuning knob

Clock Display (Power Off)
Select [Clock Disp.(Pwr Off)] Enable/disable using the tuning knob
 : Displays the time and date on the screen
 : Disables the function
Automatic RDS Time (for RDS-equipped models)
This option is used to set the time automatically in sync with RDS.
Select [Automatic RDS Time] Enable/disable using the tuning knob

 : Enables automatic time.
 : Disables the function
NOTE Since some local radio stations do not support RDS time synchronization, some RDS stations may not provide the correct time.
If the displayed time is incorrect, set it manually following the "Clock Setting" procedure on the previous page.
Phone Settings (Bluetooth® Wireless Technology models)
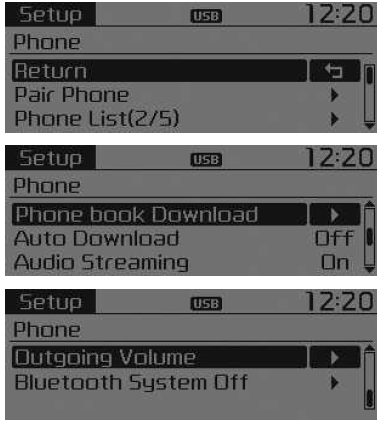
Press the button Select [Phone]
Phone Pairing
WARNING To pair a mobile phone with Bluetooth® Wireless Technology, authentication and connection are required first.For this reason, a mobile phone cannot be paired while driving.
Park the vehicle before pairing.Select [Pair Phone] Make the setting using the tuning knob

- Search for devices to pair on your mobile phone, then connect.
- Enter the passkey shown on the screen. (Passkey: 0000)
❈ The device name and passkey will be displayed on the screen for approximately 3 minutes. If pairing is not completed within 3 minutes, the mobile phone pairing process will be cancelled automatically. - Pairing completion is displayed.
❈ For some mobile phones, pairing will be performed automatically upon connection.
❈ Up to five Bluetooth® Wireless Technology mobile phones can be paired.
Phone List
Paired mobile phones are displayed (up to a maximum of 5).
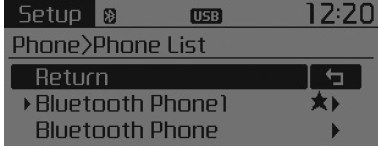
The symbol [ ] is displayed in front of the currently connected mobile phone.
Select the desired name to set the selected phone.
- Connecting a Phone. Select [Phone List]
 Select the mobile phone using the tuning knob
 Select [Connect Phone]
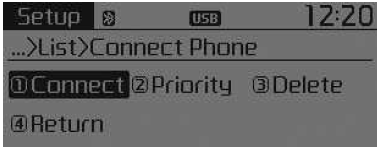
- Select a mobile phone that is not currently connected.
- Connect the selected phone.
- Connection completion is displayed.
❈ If a phone is already connected, disconnect it, then select a new phone to connect.
- Disconnecting a Connected Phone. Select [Phone List]
 Select the mobile phone using the tuning knob
 Select [Disconnect Phone]
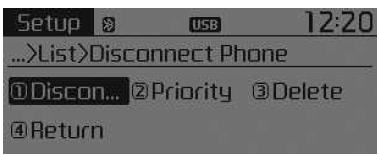
- Select the currently connected mobile phone.
- Disconnect the selected phone.
- Disconnection completion is displayed.
- Changing the Connection Sequence (Priority). This function is used to change the order (priority) of automatic connection of paired mobile phones.
 Select [Priority] using the tuning knob

 Select mobile phone priority No. 1
- Select [Priority].
- From the paired phones, select the desired phone for priority No. 1.
- The changed priority order is displayed.
❈ Once the priority is changed, the new priority No. 1 mobile phone will be connected.
- When priority No. 1 cannot be connected: the system automatically tries to connect to the most recently connected phone.
- When the most recently connected phone cannot be connected: the system tries to connect in the order of the phones in the list.
- Deleting. Select [Phone List]
 Select the mobile phone using the tuning knob

 Select [Delete]
- Select the desired phone.
- Delete the selected mobile phone.
- Deletion completion is displayed.
❈ When attempting to delete a currently connected phone, the phone is disconnected first.
WARNING
- When a mobile phone is deleted, its contacts will also be deleted.
- For stable Bluetooth® Wireless Technology communication, delete the mobile phone from the audio system and also delete the audio system from the devices paired with the mobile phone.
Downloading the Mobile Phone Phonebook
This function is used to download the mobile phone's phonebook and call history to the audio system.
Select [Phone book Download] Make the setting using the tuning knob

WARNING
- The download function may not be supported by some mobile phones.
- If another operation is performed while the phonebook is downloading, the download will be interrupted. Contacts already downloaded will be saved.
- When downloading a new phonebook, delete the previous one before starting the download.
Auto Download
When a mobile phone is connected, the new phonebook and call history can be downloaded automatically.
Select [Auto Download] / using the tuning knob
 tuning knob

Audio Streaming
Using the audio system, you can play the tracks (files) saved on your Bluetooth® Wireless Technology mobile phone.
Select [Audio Streaming] / using the tuning knob
 tuning knob

Outgoing Volume
This function is used to adjust the volume of your own voice so that it can be heard by the other party during Bluetooth® Wireless Technology calls.
Select [Outgoing Volume] Set the volume using the tuning knob

❈ The volume can also be adjusted during a call using the button .
Turning Off the Bluetooth® Wireless Technology System
This function is used when you do not want to use the Bluetooth® Wireless Technology system.
Select [Bluetooth System Off] Make the setting using the tuning knob

❈ If a phone is already connected, disconnect it, then turn off the Bluetooth® Wireless Technology system.
Using the Bluetooth® Wireless Technology System
To use the Bluetooth® Wireless Technology system when the system is turned off, follow the steps below.
- Turn on Bluetooth® Wireless Technology using the button

Press the button Guide Screen
❈ Switches to the screen where Bluetooth® Wireless Technology functions can be used and displays the guide.
- Turn on Bluetooth® Wireless Technology using the button

Press the button Select [Phone]
- A screen will appear asking whether or not to use Bluetooth® Wireless Technology.
- On the screen, select to turn on Bluetooth® Wireless Technology and display the guide.
❈ If the Bluetooth® Wireless Technology system is turned on, the system will automatically try to connect to the last Bluetooth® Wireless Technology mobile phone that was connected.
WARNING
- On some mobile phones, the Bluetooth® Wireless Technology connection may work intermittently.
- Turn the mobile phone's Bluetooth® Wireless Technology function off and on, then try connecting again.
- Turn the mobile phone off and on, then try connecting again.
- Remove the mobile phone battery, restart, then try connecting again.
- Restart the audio system and try connecting again.
- Delete all devices paired with the mobile phone and the audio system, then try to pair the mobile phone again.
System Settings
Press the button Select [System]
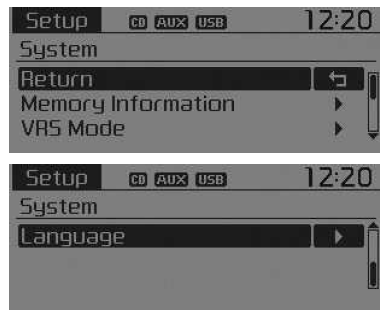
Memory Information (if equipped)
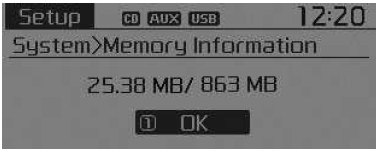
Displays the memory currently in use and the total system memory.
Select [Memory Information] OK The memory currently in use is displayed on the left and the total system memory on the right.
VRS Mode (if equipped)
This function is used to change the voice command feedback between Normal and Expert modes.
Select [VRS Mode] Make the setting using the tuning knob

- Normal: This mode is for beginner users and provides detailed instructions during voice command operation.
- Expert: This mode is for experienced users and omits some information during voice command operation. (When using Expert mode, voice instructions can be heard by using the [Help] or [Menu] commands.
❈ May vary depending on the selected audio source.
Language
This menu is used to set the display language and voice recognition language.
Select [Language] Make the setting using the tuning knob

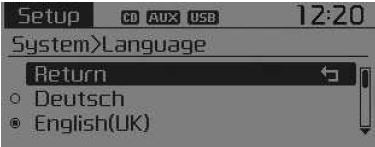
❈ After changing the language, the system will restart.
❈ Language support by region
Settings Type A-3, Type A-4 (Colombia model)
Display Settings
Press the button Select [Display] using the tuning knob
 or press the button

 Select the menu using the tuning knob
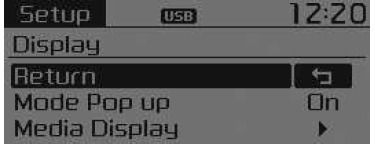
Pop-up Mode
[Pop-up Mode] Switches
 .
Selection mode
- In the On state, press
 o
 to display the mode switching pop-up screen.
Media display
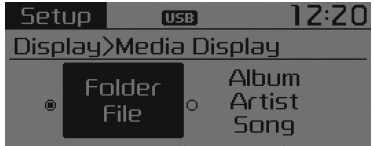
When an MP3 file is played, select the information to display from "Folder/File" or "Album/Artist/Track".
Audio settings
Press the button Select [Audio] using the
 tuning knob
 or press the button
 Select the menu using the tuning knob

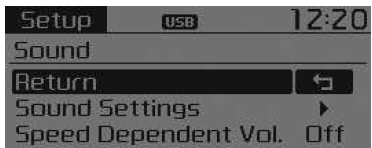
Audio settings
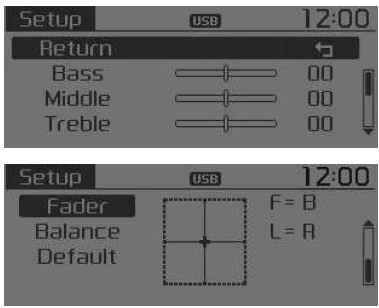
This menu is used to set the Bass, Mid, Treble, fader and balance.
Select [Sound Settings] Select the menu using the tuning knob

 Turn the tuning knob left or right to make the setting

- Bass, Mid, Treble: Adjusts the tone.
- Attenuator, Balance: Adjusts the attenuator and balance.
- Default: Restores the default settings.
❈ Return: While adjusting values, press the tuning knob again to return to the main menu.
Speed Dependent Volume
This function automatically adjusts the volume level according to vehicle speed.
Select [Speed Dependent Vol.] Set [Off/On] using the tuning knob

Clock Setting
Press the button Select [Clock] using the tuning knob
 or press the button
 Select the menu using the tuning knob

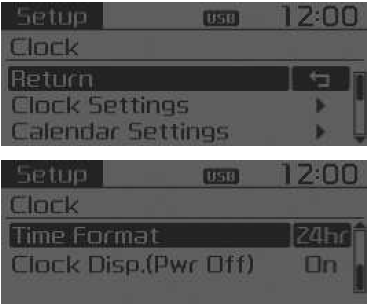
Clock Setting
This menu is used to set the time.
Select [Clock Settings] Make the setting using the tuning knob

 Press the tuning knob

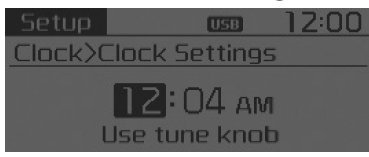
❈ Adjust the currently highlighted number to set [the hour], then press the tuning knob to set [the minute] and [AM/PM].
Calendar settings
This menu is used to set the date (MM/DD/YYYY). Select [Calendar Settings]. Make the setting using the tuning knob

 Press the knob

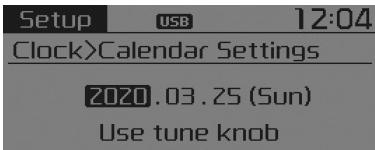
❈ Adjust the currently selected number to make the setting, then press the knob to move to the next item. (Set in the order Month/Day/Year.)
Time Format
This function is used to set the audio system's time format to 12/24 hours.
Select [Time Format] Set 12/24Hr using the tuning knob

Clock Display (Power Off)
Select [Clock Disp. (Pwr Off)]
 Using the tuning knob

 : Displays the time and date on the screen
 : Disables the function
Phone settings (models with Bluetooth® Wireless Technology)
Press the button Select [Phone]
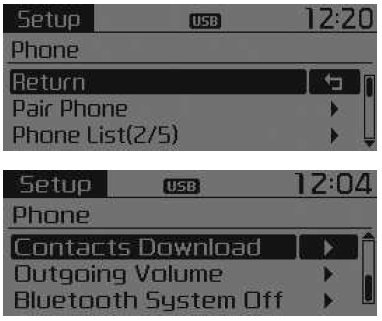
Phone Pairing
Select [Pair Phone] Make the setting using the tuning knob

For this reason, a mobile phone cannot be paired while driving.
Park the vehicle before pairing.- Search for devices to pair on your mobile phone, then connect.
[Non-SSP compatible device] [SSP: Secure Simple Pairing]
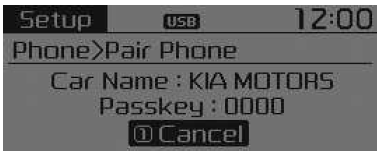
2. After a moment, a screen for entering the passkey is displayed.
Enter the passkey "0000" here to pair your Bluetooth® device with the vehicle audio system.
[SSP compatible device]
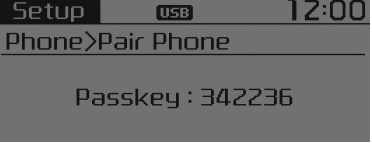
2. After a moment, a screen showing a 6-digit passkey is displayed. Now, check the passkey on your Bluetooth® Wireless Technology device and confirm.
❈ The device name and passkey will be displayed on the screen for about 3 minutes. If pairing is not completed within 3 minutes, the phone pairing process will be cancelled automatically.
3. Pairing completion is displayed.
❈ For some mobile phones, pairing will be performed automatically upon connection.
❈ Up to five Bluetooth® Wireless Technology mobile phones can be paired.
Phone List
Paired mobile phones are displayed (up to a maximum of 5).
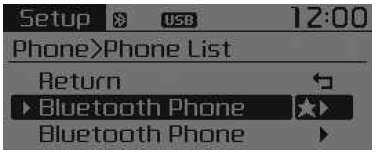
The symbol [ ] is displayed in front of the currently connected mobile phone.
Select the desired name to set the selected phone.
- Connecting a Phone. Select [Phone List]
 Select the mobile phone using the tuning knob
 Select [Connect Phone]
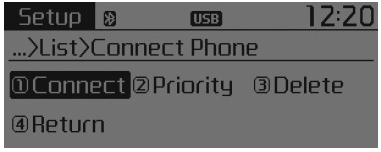
- Select a mobile phone that is not currently connected.
- Connect the selected phone.
- Connection completion is displayed.
❈ If a phone is already connected, disconnect it, then select a new phone to connect.
- Disconnecting a Connected Phone. Select [Phone List]
 Select the mobile phone using the tuning knob
 Select [Disconnect Phone]
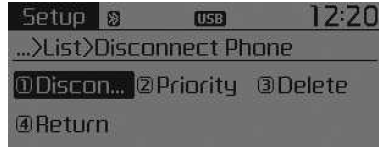
- Select the currently connected mobile phone.
- Disconnect the selected phone.
- Disconnection completion is displayed.
- Changing connection order (priority). This function is used to change the order (priority) of automatic connection of paired phones. Select [Phone List].
 Select [Priority] using the tuning knob
 Select mobile phone priority No. 1
- Select [Priority].
- From the paired phones, select the desired phone for priority No. 1.
- The changed priority order is displayed.
❈ Once the priority is changed, the new priority No. 1 mobile phone will be connected.
- When priority No. 1 cannot be connected: the system automatically tries to connect to the most recently connected phone.
- When the most recently connected phone cannot be connected: the system tries to connect in the order of the phones in the list.
- Deleting. Select [Phone List]
 Select the mobile phone using the tuning knob

 Select [Delete]
- Select the desired phone.
- Delete the selected mobile phone.
- Deletion completion is displayed.
❈ When attempting to delete a currently connected phone, the phone is disconnected first.
WARNING
- When a mobile phone is deleted, its contacts will also be deleted.
- For stable Bluetooth® Wireless Technology communication, delete the mobile phone from the audio system and also delete the audio system from the devices paired with the mobile phone.
Saving contacts
This function is used to download the mobile phone's phonebook and call history to the audio system.
Select [Contacts Download] Make the setting using the tuning knob

WARNING
- The download function may not be supported by some mobile phones.
- If another operation is performed while the phonebook is downloading, the download will be interrupted. Contacts already downloaded will be saved.
- When downloading a new phonebook, delete the previous one before starting the download.
Outgoing Volume
This function is used to adjust the volume of your own voice so that it can be heard by the other party during Bluetooth® Wireless Technology calls.
Select [Outgoing Volume] Set the volume using the tuning knob

❈ The volume can also be adjusted during a call using the button .
Turning Off the Bluetooth® Wireless Technology System
This function is used when you do not want to use the Bluetooth® Wireless Technology system.
Select [Bluetooth System Off] Make the setting using the tuning knob

❈ If a phone is already connected, disconnect it, then turn off the Bluetooth® Wireless Technology system.
Using the Bluetooth® Wireless Technology System
To use the Bluetooth® Wireless Technology system when the system is turned off, follow the steps below.
- Turn on Bluetooth® Wireless Technology using the button
 Press the button
 Guide Screen
❈ Switches to the screen where Bluetooth® Wireless Technology functions can be used and displays the guide.
- Turn on Bluetooth® Wireless Technology using the button

Press the button Select [Phone]
- A screen will appear asking whether or not to use Bluetooth® Wireless Technology.
- On the screen, select to turn on Bluetooth® Wireless Technology and display the guide.
❈ If the Bluetooth® Wireless Technology system is turned on, the system will automatically try to connect to the last Bluetooth® Wireless Technology mobile phone that was connected.
WARNING
- On some mobile phones, the Bluetooth® Wireless Technology connection may work intermittently.
- Turn the mobile phone's Bluetooth® Wireless Technology function off and on, then try connecting again.
- Turn the mobile phone off and on, then try connecting again.
- Remove the mobile phone battery, restart, then try connecting again.
- Restart the audio system and try connecting again.
- Delete all devices paired with the mobile phone and the audio system, then try to pair the mobile phone again.
System settings
Press the button Select [System]
 Select a menu using the tuning knob

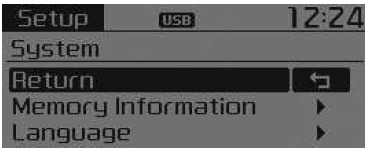
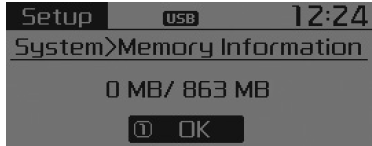
Memory information Displays the memory currently in use and the total system memory.
Select [Memory Information] OK. The memory currently in use is shown on the left and the total system memory on the right.
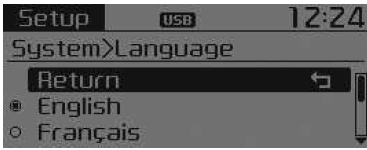
Language (if equipped)
This menu is used to set the display language and voice recognition language.
Select [Language] Make the setting using the tuning knob

❈ After changing the language, the system will restart.
❈ Language support by region: English, Français, Español
Settings Type A-3, Type A-4
Display Settings
Press the button Select [Display] using the tuning knob
 or press the button

 Select the menu using the tuning knob

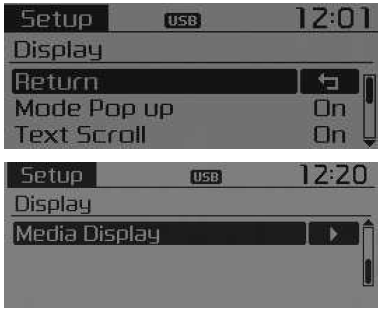
Pop-up Mode
[Pop-up Mode] Switches
 .
Selection mode
- In the On state, press
 o
 to display the mode switching pop-up screen.
Scroll Text
[Text Scroll] Text scroll
 : Keeps scrolling
 : Text scrolls only once.
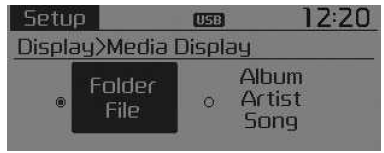
Media display
When an MP3 file is played, select the information to display from "Folder/File" or "Album/Artist/Track".
Audio settings
Press the button Select [Audio] using the tuning knob
 or press the button
 Select the menu using the tuning knob

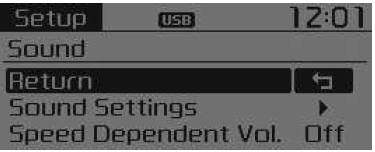
Audio settings
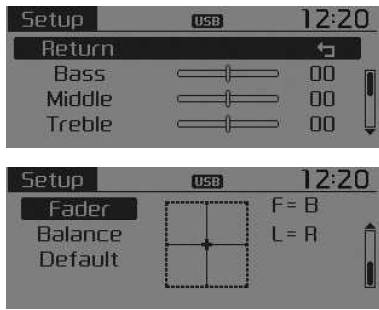
This menu is used to set the Bass, Mid, Treble, fader and balance.
Select [Sound Settings] Select the menu using the tuning knob

 Turn the tuning knob left or right to make the setting

- Bass, Mid, Treble: Adjusts the tone.
- Attenuator, Balance: Adjusts the attenuator and balance.
- Default: Restores the default settings.
❈ Return: While adjusting values, press the tuning knob again to return to the main menu.
Speed Dependent Volume
This function automatically adjusts the volume level according to vehicle speed.
Select [Speed Dependent Vol.] Set [Off/On] using the tuning knob

Clock setting
Press the button Select [Clock] using the tuning knob
 or press the button
 Select the menu using the tuning knob

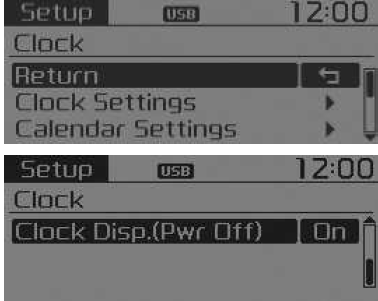
Clock Setting
This menu is used to set the time.
Select [Clock Settings]. Make the setting using the tuning knob Press the tuning knob

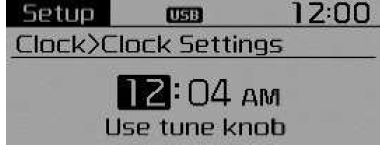
❈ Adjust the currently selected number to set the [hour], then press the knob to set the [minutes].
Calendar settings
This menu is used to set the date (YYYY/MM/DD). Select [Calendar Settings]. Make the setting using the tuning knob

 Press the knob

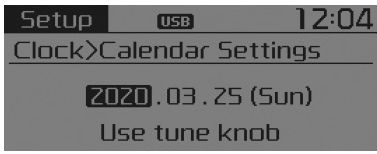
❈ Adjust the currently selected number to make the setting, then press the knob to move to the next item. (Set in the order Year/Month/Day.)
Clock Display (Power Off)
Select [Clock Disp. (Pwr Off)]
 Using the tuning knob

 : Displays the time and date on the screen
 : Turns the function off.
Phone settings (models with Bluetooth® Wireless Technology)
Press the button Select [Phone]
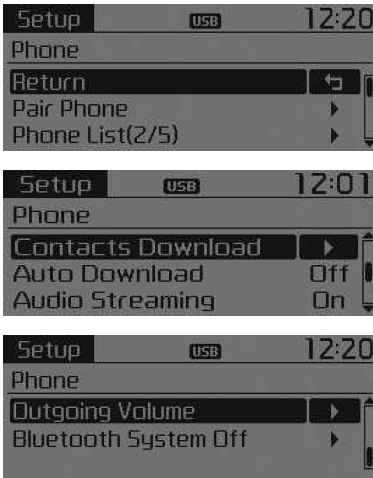
Phone Pairing
Select [Pair Phone] Make the setting using the tuning knob

For this reason, a mobile phone cannot be paired while driving.
Park the vehicle before pairing.- Search for devices to pair on your mobile phone, then connect.
- Enter the passkey shown on the screen. (Passkey: 0000)
❈ The device name and passkey will be displayed on the screen for approximately 3 minutes. If pairing is not completed within 3 minutes, the mobile phone pairing process will be cancelled automatically. - Pairing completion is displayed.
❈ For some mobile phones, pairing will be performed automatically upon connection.
❈ Up to five Bluetooth® Wireless Technology mobile phones can be paired.
Phone List
Paired mobile phones are displayed (up to a maximum of 5).
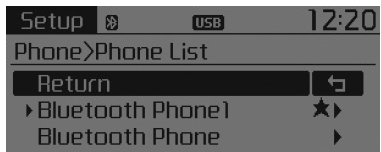
The symbol [ ] is displayed in front of the currently connected mobile phone.
Select the desired name to set the selected phone.
- Connecting a Phone. Select [Phone List]Select the mobile phone using the tuning knob
 Select [Connect Phone]
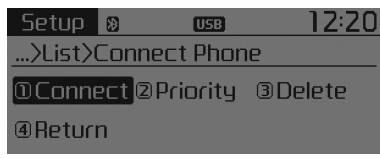
- Select a mobile phone that is not currently connected.
- Connect the selected phone.
- Connection completion is displayed.
❈ If a phone is already connected, disconnect it, then select a new phone to connect.
- Disconnecting a Connected Phone. Select [Phone List]
 Select the mobile phone using the tuning knob
 Select [Disconnect Phone]
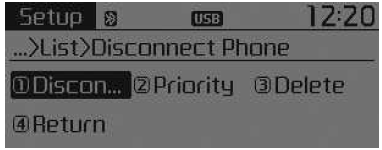
- Select the currently connected mobile phone.
- Disconnect the selected phone.
- Disconnection completion is displayed.
- Changing connection order (priority). This function is used to change the order (priority) of automatic connection of paired phones. Select [Phone List].
 Select [Priority] using the tuning knob

 Select mobile phone priority No. 1
- Select [Priority].
- From the paired phones, select the desired phone for priority No. 1.
- The changed priority order is displayed.
❈ Once the priority is changed, the new priority No. 1 mobile phone will be connected.
- When priority No. 1 cannot be connected: the system automatically tries to connect to the most recently connected phone.
- When the most recently connected phone cannot be connected: the system tries to connect in the order of the phones in the list.
- The connected phone will automatically switch to priority No. 1.
- Deleting. Select [Phone List]
 Select the mobile phone using the tuning knob

 Select [Delete]
- Select the desired phone.
- Delete the selected mobile phone.
- Deletion completion is displayed.
❈ When attempting to delete a currently connected phone, the phone is disconnected first.
WARNING
- When a mobile phone is deleted, its contacts will also be deleted.
- For stable Bluetooth® Wireless Technology communication, delete the mobile phone from the audio system and also delete the audio system from the devices paired with the mobile phone.
Saving contacts
This function is used to download the mobile phone's phonebook and call history to the audio system.
Select [Contacts Download] Make the setting using the tuning knob

WARNING
- The download function may not be supported by some mobile phones.
- If another operation is performed while the phonebook is downloading, the download will be interrupted. Contacts already downloaded will be saved.
- When downloading a new phonebook, delete the previous one before starting the download.
Auto Download
When a mobile phone is connected, the new phonebook and call history can be downloaded automatically.
Select [Auto Download]
 /
 using the tuning knob

Audio Streaming
Using the audio system, you can play the tracks (files) saved on your Bluetooth® Wireless Technology mobile phone.
Select [Audio Streaming]
 /
 using the tuning knob

Outgoing Volume
This function is used to adjust the volume of your own voice so that it can be heard by the other party during Bluetooth® Wireless Technology calls.
Select [Outgoing Volume] Set the volume using the tuning knob

❈ The volume can also be adjusted during a call using the button .
Turning Off the Bluetooth® Wireless Technology System
This function is used when you do not want to use the Bluetooth® Wireless Technology system.
Select [Bluetooth System Off] Make the setting using the tuning knob

❈ If a phone is already connected, disconnect it, then turn off the Bluetooth® Wireless Technology system.
Using the Bluetooth® Wireless Technology System
To use the Bluetooth® Wireless Technology system when the system is turned off, follow the steps below.
- Turn on Bluetooth® Wireless Technology using the button

Press the button Guide Screen
❈ Switches to the screen where Bluetooth® Wireless Technology functions can be used and displays the guide.
- Turn on Bluetooth® Wireless Technology using the button

Press the button Select [Phone]
- A screen will appear asking whether or not to use Bluetooth® Wireless Technology.
- On the screen, select
 to turn on Bluetooth® Wireless Technology and display the guide.
❈ If the Bluetooth® Wireless Technology system is turned on, the system will automatically try to connect to the last Bluetooth® Wireless Technology mobile phone that was connected.
WARNING
- On some mobile phones, the Bluetooth® Wireless Technology connection may work intermittently.
- Turn the mobile phone's Bluetooth® Wireless Technology function off and on, then try connecting again.
- Turn the mobile phone off and on, then try connecting again.
- Remove the mobile phone battery, restart, then try connecting again.
- Restart the audio system and try connecting again.
- Delete all devices paired with the mobile phone and the audio system, then try to pair the mobile phone again.
SYSTEM SETTINGS
Press the button Select [System]
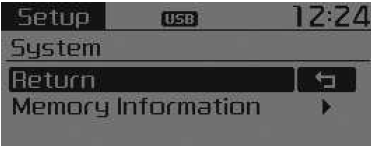
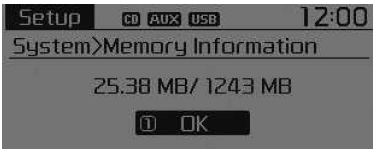
Memory information
Displays the memory currently in use and the total system memory.
Select [Memory Information] OK The memory currently in use is displayed on the left and the total system memory on the right.
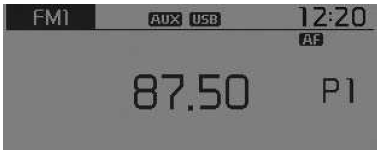
RADIO (MODELS WITH RDS)
❈ Radio may vary depending on the selected audio source.
Switching the RADIO mode
SEEK
Press the button
- Briefly press the button (for up to 0.8 seconds): Changes the frequency.
- Press and hold the button (for at least 0.8 seconds): Automatically searches for the next frequency.
Searching preset stations
Press button 1~6
- Briefly press the button (for up to 0.8 seconds): Plays the frequency saved to the corresponding button.
- Press and hold the button (for at least 0.8 seconds): Press and hold the desired button 1~6 to save the frequency currently playing to the selected button. A beep sounds when saving is complete.
SCAN
Press the button
- Press and hold the button (for at least 0.8 seconds): The station frequencies increase and each station can be previewed for 5 seconds. After scanning all frequencies, the current frequency is played again.
Manual tuning selection
Turn the tuning knob left or right to adjust the frequency.
Traffic Announcement (TA)
Briefly press the button (for up to 0.8 seconds):
 /
 the TA (Traffic Announcement) mode.
MENU
The button provides A.Store (Auto Store) and Info functions.
AST (Auto Store)
Press the button To select
 [1 AST] using the tuning knob
 or the

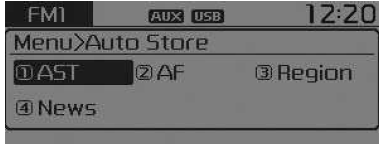
Select AST (Auto Store) to save the frequencies with better reception than presets 1~6. If no stations are received, the most recently received station will be played.
❈ On some models, only presets 1~6 of the FMA or AMA modes are stored.
AF (Alternative Frequency)
Press the button Select [2 AF] using the tuning knob
 or the
 .
The alternative frequency function can be turned on/off.
Region
Press the button to select [3 Region] using the tuning knob
 or the
 .
The regional function can be turned on/off.
News
Press the button To select
 [4 News] using the tuning knob
 or the
 .
The news function can be turned on or off.
Information volume
The information volume refers to the volume of incoming news and traffic information.
Information can be controlled by turning the tuning knob to the left or to the right while the information or traffic station is playing.
❈ AF, Region and News are RDS radio menus.
Test yourself
A quick Kia Picanto JA quiz: every answer comes with an explanation and a link to the manual page.