Drive Belt
Exploded View
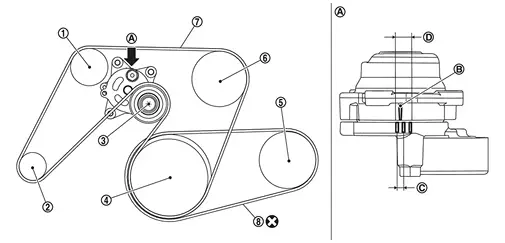
 |
Idler pulley |  |
Alternator |  |
Drive belt auto-tensioner |
 |
Crankshaft pulley |  |
A/C compressor |  |
Water pump |
 |
Drive belt |  |
A/C compressor belt | ||
 |
View |  |
Indicator |  |
Range when new drive belt is installed |
 |
Possible use range | ||||
 |
Always replace after every disassembly. |
Removal & Installation
REMOVAL
Drive belt
Remove front under cover, using a power tool (commercial service tool). Refer to Removal and Installation.
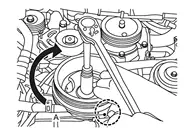
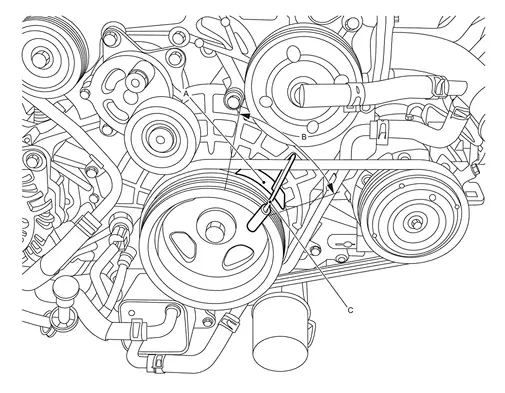
While securely holding the hexagonal part of drive belt auto-tensioner with a spinner handle (A), move spinner handle in the direction of arrow (loosening direction of drive belt).
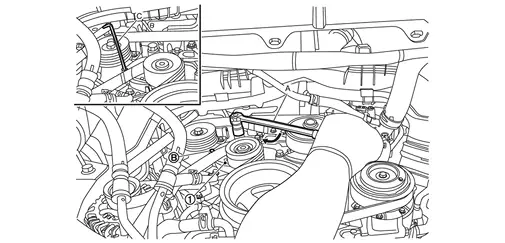
|
: Holding boss |
| C | : Metallic bar [approximately 6 mm (0.24 in) in diameter]* |
 |
: Loosening direction of drive belt |
*: Hexagonal wrench shown as example in the figure
Under the above condition, insert a metallic bar through the holding boss to lock drive belt auto-tensioner pulley arm.
Remove drive belt.
A/C compressor belt
Remove front under cover, using a power tool (commercial service tool). Refer to Removal and Installation.
Remove drive belt.
Cut A/C compressor belt.
INSTALLATION
Drive belt
Note the following, and install in the reverse order of removal.
A/C compressor belt
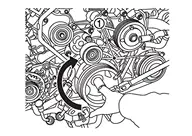
Install A/C compressor belt as shown below.
Attach A/C compressor belt to crankshaft pulley
 and A/C compressor as shown in the figure.
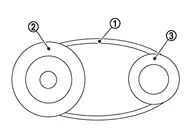
Install A/C compressor belt
between the crankshaft pulley on the crankshaft side and the engine assembly .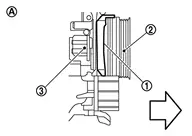
: vehicle front : Side view Install A/C compressor belt
to the A/C compressor .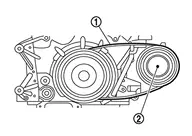
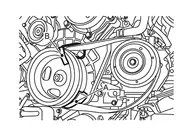
Do not reverse the installation position of the service tool (A).
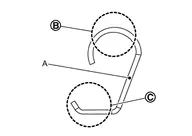
: A/C compressor belt side : Crankshaft pulley side
When installing to the crankshaft pulley, make sure that the crankshaft pulley protection tube
of the service tool (A) is not inserted too far.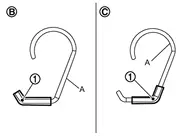
: OK : NG
 ) while making sure that the A/C compressor belt is not misaligned with the pulley groove.

Adjustment
Refer to Drive Belt.
Inspection
INSPECTION BEFORE REMOVAL
Drive belt
Check that the indicator (notch on fixed side) of drive belt auto-tensioner is within the possible use range.
Visually check the entire drive belt for wear, damage or crack.
If the indicator (notch on fixed side) is out of the possible use range or belt is damaged, replace drive belt.
A/C compressor belt
Visually check entire drive belt for wear, damage or cracks.
Using a tensiometer and confirm belt tension or vibration frequency value.
Measure belt
tension at " " points. (Both side measurement are correct)
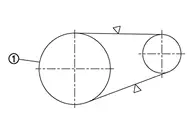
Confirm the belt tension value or the vibration frequency value. (see table below)
Belt tension Frequency 580 - 1327 N 192 - 292 Hz
INSPECTION AFTER INSTALLATION
Drive belt
Turn crankshaft pulley clockwise several times to equalize tension between each pulley, and then confirm tension of drive belt at indicator (notch on fixed side) is within the possible use range. Refer to Exploded View.