Front Cover
Exploded View

 |
Front cover |  |
Dowel pin |  |
Oil pressure sensor |
 |
Oil temperature sensor |  |
Crankshaft pulley bolt |  |
Crankshaft pulley |
 |
Front oil seal |  |
O-ring(oil line) |  |
O-ring(water line) |
 |
Comply with the installation procedure when tightening. Refer to Removal & Installation. | ||||
 |
: N·m (kg-m, ft-lb) | ||||
 |
: Always replace after every disassembly. | ||||
 |
: Should be lubricated with oil. | ||||
 |
: Sealing point | ||||
Removal & Installation
REMOVAL
Remove engine cover. Refer to Removal and Installation.
Disconnect battery cables from negative terminal. Refer to Removal and Installation.
Remove engine under cover front and front under cover using a power tool (commercial service tool). Refer to Removal and Installation and Removal and Installation.
Drain engine coolant. Refer to ENGINE COOLANT : Draining.
Remove the following parts:
Drive belt. Refer to Removal & Installation.
A/C compressor belt. Refer to Removal & Installation.
Air cleaner and air duct assembly. Refer to Removal and Installation.
Inlet air duct 2. Refer to Removal and Installation.
Air inlet tube 1 and 2. Refer to Removal & Installation.
Remove radiator hose (upper and lower). Refer to RADIATOR : Removal & Installation.
Remove reservoir tank tube. Refer to RADIATOR : Exploded View.
Remove electric water pump. Refer to Removal and Installation.
Remove multi-way control valve. Refer to MULTI-WAY CONTROL VALVE : Removal & Installation.
Remove intake manifold. Refer to Removal and Installation.
Remove valve timing control cover (bank 1 and bank 2). Refer to Removal & Installation.
Remove electric intake valve timing control actuator (bank1 and bank2). Refer to Removal & Installation.
Remove rocker cover. Refer to Removal and Installation.
Remove water pump. Refer to WATER PUMP : Removal & Installation.
Remove drive belt auto-tensioner. Refer to Removal and Installation.
Remove idler pulley. Refer to Removal and Installation.
Remove engine cover bracket 1 .

Remove fuel tube mounting bolt .
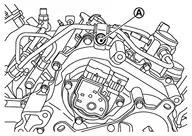
Remove oil level gauge guide .
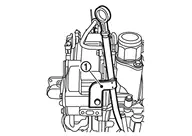
Remove water pipe 2. Refer to Removal and Installation.
Remove alternator. Refer to Removal and Installation.
Remove oil cooler pipe 1 and 2. Refer to Removal and Installation.
Disconnect the A/T fluid cooler hose connection. Refer to Removal and Installation.
Remove A/T fluid cooler tube mounting bracket. Refer to Exploded View
Remove A/C compressor and move it to a location where it will not interfere with work.
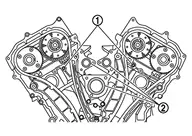
Obtain No. 1 cylinder at TDC of its compression stroke as follows:Rotate the crankshaft pulley clockwise as viewed from the front of the engine, and align the timing mark (grooved line without color) on the crankshaft pulley with  (fourth from the end on the bank 2 side) on the front cover .
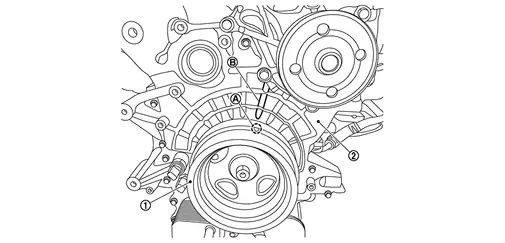
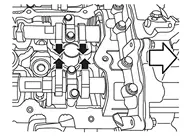
| : Engine front |
If not, turn crankshaft one revolution (360 degrees) and align as shown in the figure.
Remove crankshaft pulley as follows:Secure crankshaft pulley with a pulley holder (A) and loosen crankshaft pulley bolt.
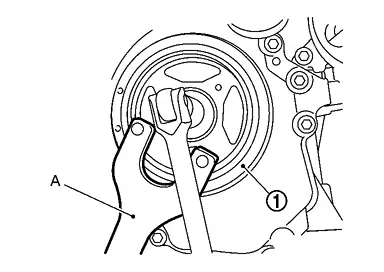
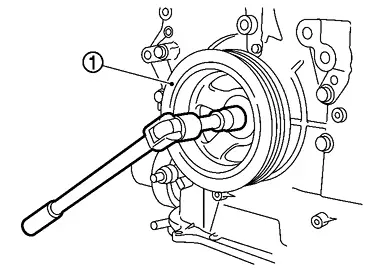
|
: Crankshaft pulley |
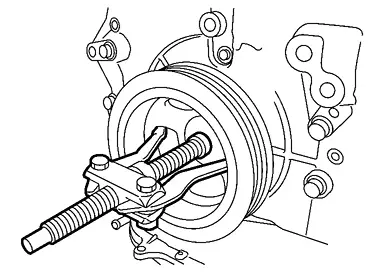
Remove front cover as follows:Loosen mounting bolts in the order from 34 to 1 as shown in the figure.
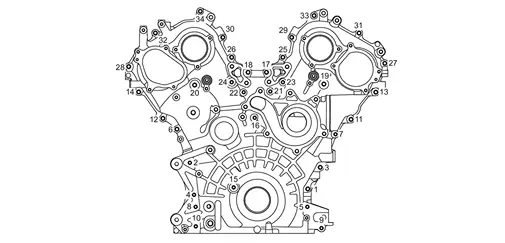
Use the seal cutter [SST: KV10111100 (NI-37228)] to cut liquid gasket for removal.
Remove front oil seal from front cover using a suitable tool.
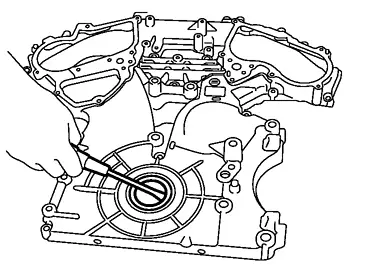
Use a screwdriver for removal.
Use a scraper to remove all traces of old liquid gasket from front cover and oil pan (upper), and liquid gasket mating surfaces.
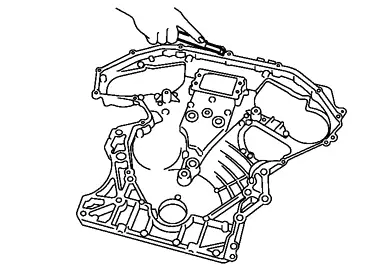
Remove old liquid gasket from bolt hole and thread.
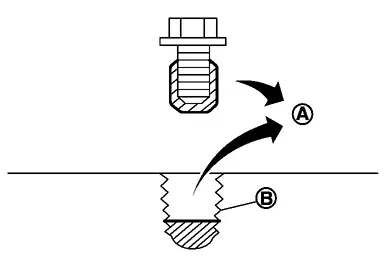
|
: Remove sticking old liquid gasket |
|
: Bolt hole |
INSTALLATION
Install in the reverse order of removal.
Install new O-ring(oil line) and O-ring(water line) .
Install new front oil seal on front cover. Refer to Removal and Installation.
Install front cover as follows:
Check O-rings stay in place during installation to cylinder head and cylinder block.
back side as shown in the figure. 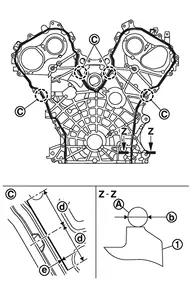
Use Genuine RTV Silicone Sealant or an equivalent. Refer to Recommended Chemical Products and Sealants.
|
: Liquid gasket |
 |
: φ2.7 - 3.7 mm (0.106 - 0.146 in) |
 |
: 15 mm (0.59 in) |
 |
: φ6.0 - 7.0 mm (0.236 - 0.276 in) |
: 11 N·m There are two types of mounting bolts. Refer to the following for locating bolts.
M6 bolts [thread length: 20 mm (0.79 in)] : 1,3,6,11,12,13,14,17,18,19,20,25,26,27,28,29,30,31,32,33,34 M6 bolts [thread length: 60 mm (2.36 in)] : 2,4,5,7,8,9,10,15,16,21,22,23,24
Install rocker covers (bank 1 and bank 2). Refer to Removal and Installation.
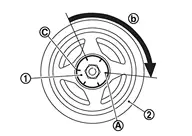
Install crankshaft pulley as follows:Fix the crankshaft in the same way as in removal. Install crankshaft pulley, taking care not to damage front oil seal.
When press-fitting crankshaft pulley with plastic hammer, tap on its center portion (not circumference).
: 126 N·m(13.0 kg-m, 93 ft-lb) Place a matching mark on crankshaft pulley aligning with the matching mark  of crankshaft pulley bolt . Tighten the bolt 120+6 degrees (one marks) .