Drive Plate
Exploded View
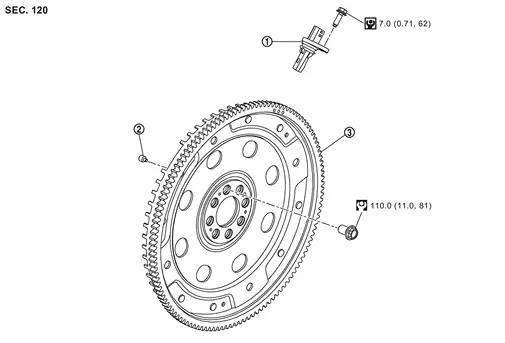
 |
Crankshaft position sensor |  |
Dowel pin |  |
Drive plate |
 |
: N·m (kg-m, ft-lb) | ||||
 |
: N·m (kg-m, in-lb) | ||||
Removal and Installation
REMOVAL
Remove A/T assembly from the vehicle. Refer to following :
2WD models: Refer to Removal and Installation.
4WD models: Refer to Removal and Installation.
Remove the drive plate using the following procedure:Secure crankshaft pulley with a pulley holder (A).

Remove the crankshaft position sensor if necessary.
INSTALLATION
Install drive plate , drive plate reinforcement as shown.
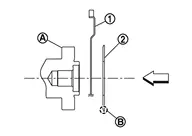
 |
: Crankshaft |
 |
: Rounded |
| : Engine front |
Hand tighten drive plate bolts in a diagonal order over several steps.
Tighten drive plate bolts using a suitable tool in a diagonal order over several steps.
If removed, install the crankshaft position sensor.
Installation of the remaining components is in the reverse order of removal.
Inspection
DRIVE PLATE DEFLECTION
Appearance of Drive Plate
Check the drive plate and signal plate for defamation or damage.
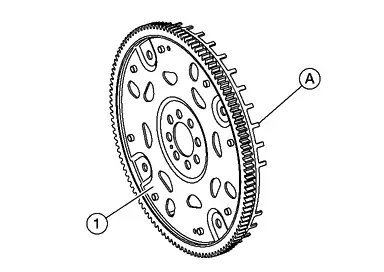
Replace drive plate if dents, scratches or damage exist.
Drive Plate Lateral Run-Out
Install drive plate to crankshaft and measure deflection with dial indicator (A).

Measure deflection on the drive plate to torque converter contact surface
. Measurements should be taken 11.0 - 20.6 mm (0.43 - 0.811 in) from the center of the torque converter bolt hole.Standard : 0.35 mm (0.0138 in) or less. If the measurement value is outside the reference value, replace drive plate.