Installing tire pressure warning valves and transmitters
When replacing tires or wheels, tire pressure warning valves and transmitters must also be installed.
When new tire pressure warning valves and transmitters are installed, new ID codes must be registered in the tire pressure warning computer and the tire pressure warning system must be initialized.
Have tire pressure warning valves and transmitter ID codes registered any authorized Toyota retailer or Toyota authorized repairer, or any reliable repairer.
■Replacing tires and wheels
If the ID code of the tire pressure warning valve and transmitter is not registered, the tire pressure warning system will not work properly. After driving for about 10 minutes, the tire pressure warning light blinks for 1 minute and stays on to indicate a system malfunction.
NOTICE
■Repairing or replacing tires, wheels, tire pressure warning valves, transmitters and tire valve caps
- When removing or fitting the wheels, tires or the tire pressure warning valves and transmitters, contact any authorized Toyota retailer or Toyota authorized repairer, or any reliable repairer as the tire pressure warning valves and transmitters may be damaged if not handled correctly.
- Make sure to install the tire valve caps. If the tire valve caps are not installed, water could enter the tire pressure warning valves, corrode the valve, and cause sticking and air leaks.
- When replacing tire valve caps, do not use tire valve caps other than those specified. The cap may become stuck.
■To avoid damage to the tire pressure warning valves and transmitters
When a tire is repaired with liquid sealants, the tire pressure warning valve and transmitter may not operate properly. If a liquid sealant is used, contact any authorized Toyota retailer or Toyota authorized repairer, or any reliable repairer as soon as possible.
Make sure to replace the tire pressure warning valve and transmitter when replacing the tire.
Initializing the tire pressure warning system
■ The tire pressure warning system must be initialized in the following circumstances:
- When rotating front and rear tires which have different tire inflation pressures.
- When changing the tire size.
- When the tire inflation pressure is changed such as when changing traveling speed or load weight.
- When changing between two registered wheel sets.
When the tire pressure warning system is initialized, the current tire inflation pressure is set as the benchmark pressure.
■ How to initialize the tire pressure warning system (with 7- inch display)
1. Park the vehicle in a safe place and turn the power switch off, wait for approximately 15 minutes or more, and then perform the procedure.
2. Adjust the tire inflation pressure to the specified cold tire inflation pressure level.
Make sure to adjust the tire pressure to the specified cold tire inflation pressure level. The tire pressure warning system will operate based on this pressure level.
3. Turn the power switch to ON.
Initialization cannot be performed while the vehicle is moving.
4. Press  of the meter control switch to select
 .
5. Press  to select "Vehicle Settings" and then press and hold
 .
6. Press  to select "TPWS Setting" and then press
 .
7. Press  to select "Setting Pressure". Then press and hold
 until the tire pressure warning light blinks 3 times.
Then a message will be displayed on the multi-information display. "--" will be displayed on the multi-information display for the inflation pressure of each tire while initialization is being performed.
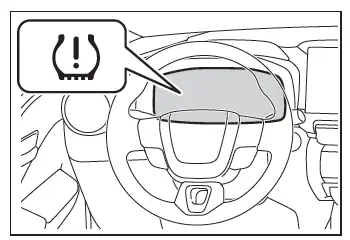
8. Drive straight (with occasional left and right turns) at approximately 40 km/h or more for approximately 10 to 30 minutes.
Even if the vehicle is not driven at approximately 40 km/h or more, initialization can be completed by driving for a long time. However, if initialization does not complete after driving for 1 hour or more, park the vehicle in a safe place for more than 15 minutes and please drive a vehicle once again with the power switch ON.
■ How to initialize the tire pressure warning system (with 12.3-inch display)
1. Park the vehicle in a safe place and turn the power switch off, wait for approximately 15 minutes or more, and then perform the procedure.
2. Adjust the tire inflation pressure to the specified cold tire inflation pressure level.
Make sure to adjust the tire pressure to the specified cold tire inflation pressure level. The tire pressure warning system will operate based on this pressure level.
3. Turn the power switch to ON.
4. Press and hold  to display the cursor on the content display area (center) of the multi-information display.
5. Press  of the meter control switches to select "
 Settings" and then press
 .
6. Press  of the meter control switches, select "Vehicle Settings" and then press and hold
 .
7. Press  of the meter control switches, select "TPWS setting" and then press
 .
8. Press  of the meter control switches, select the "Setting Pressure". Then press and hold
 .
Then a message will be displayed on the multi-information display. "--" will be displayed on the multi-information display for the inflation pressure of each tire while initialization is being performed.
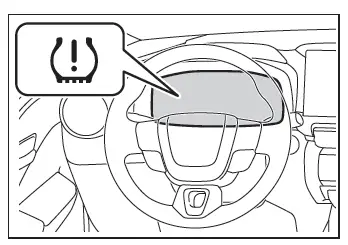
9. Drive straight (with occasional left and right turns) at approximately 40 km/h or more for approximately 10 to 30 minutes.
Even if the vehicle is not driven at approximately 40 km/h or more, initialization can be completed by driving for a long time. However, if initialization does not complete after driving for 1 hour or more, park the vehicle in a safe place for more than 15 minutes and please drive a vehicle once again with the power switch ON.
■Initialization procedure
- Make sure to carry out initialization after adjusting the tire inflation pressure.
Also, make sure the tires are cold before carrying out initialization or tire inflation pressure adjustment.
- If you have accidentally turned the power switch off during initialization, it is not necessary to press the reset switch again as initialization will restart automatically when the power switch is turned to ON the next time.
- If you accidentally press the reset switch when initialization is not necessary, adjust the tire inflation pressure to the specified level when the tires are cold, and conduct initialization again.
- While the position of each tire is being determined and the inflation pressures are not being displayed on the multi-information display, if the inflation pressure of a tire drops, the tire pressure warning light will come on.
■If the tire pressure warning system is not initialized properly
- In the following situations, initialization may take longer than usual to be completed or may not be possible. (Usually, the vehicle will need to be driven for approximately 10 to 30 minutes to complete initialization.) If initialization is not complete after driving approximately 30 minutes, continue driving for a while.
- If the vehicle is driven on an unpaved road, it may take longer to complete initialization.
- If the vehicle is backed up while performing initialization, data collected during initialization will be cleared and it will take longer than normal to complete.
- If the vehicle is driven in heavy traffic or another situation where other vehicles are driven close by, it may take time for the system to recognize the tire pressure warning valve and transmitters of your vehicle over those of other vehicles.
If initialization is not complete after driving for approximately 1 hour, park the vehicle in a safe place for more than 15 minutes and then drive the vehicle again.
- In the following situations, initialization will not be started or was not completed properly and the system will not operate properly. Perform the initialization procedure again.
- If, when attempting to start initialization, the tire pressure warning light does not blink 3 times.
- If, when the vehicle has been driven for about 20 minutes after performing initialization, the tire pressure warning light blinks for approximately 1 minute and then illuminates.
- If initialization cannot be completed after performing the above procedure, contact any authorized Toyota retailer or Toyota authorized repairer, or any reliable repairer.
WARNING
■When initializing the tire pressure warning system
Do not initialize the tire pressure warning system without first adjusting the tire inflation pressure to the specified level. Otherwise, the tire pressure warning light may not come on even if the tire inflation pressure is low, or it may come on when the tire inflation pressure is actually normal.