Registering ID codes

In this manual: Registering ID codes
Main Owner's Manual — 1Event data recorder — 1Exterior — 1Instrument panel (left-hand drive vehicles) — 1Switches (left-hand drive vehicles) — 1Interior (left-hand drive vehicles) — 1Instrument panel (right-hand drive vehicles) — 1Switches (right-hand drive vehicles) — 1Interior (right-hand drive vehicles) — 1For safe use — 1Before driving — 1For safe driving — 1Seat belts — 1Correct use of the seat belts — 1SRS airbags — 1Exhaust gas precautions — 1Child safety — 1Airbag manual on-off system — 1Riding with children — 1Child restraint systems — 1Child restraint system compatibility for each seating position — 1Child restraint system installation method — 1Child restraint system fixed with an ISOFIX lower anchorage — 1Emergency assistance — 1Hybrid system — 1Hybrid system features — 1Acoustic vehicle alerting system — 1Hybrid system precautions — 1Hybrid battery (traction battery) air intake vent — 1Theft deterrent system — 1Immobilizer system — 1Double locking system — 1Alarm — 1Warning lights and indicators — 1Warning lights — 1Indicators — 1Gauges and meters (7-inch display) — 1Meter display — 1Adjusting the clock — 1Gauges and meters (12.3-inch display) — 1Meter display — 1Adjusting the clock — 1Multi-information display(7-inch display) — 1Display contents — 1Changing the meter display — 1Driving support system information display — 1Settings display — 1Multi-information display(12.3-inch display) — 1Display contents — 1Changing the meter display — 1Fuel Economy — 1EV drive time ratio — 1Settings display — 1Head-up display — 1System components — 1Using the head-up display — 1Pop-up display — 1Energy monitor/consumption screen — 1Key information — 1Keys — 1Digital key — 1Opening, closing and lockingthe doors — 1Side doors — 1Unlocking and locking the doors from the inside — 1Back door — 1Unlocking and locking the back door from the outside — 1Opening/closing the back door (vehicles with power back door) — 1Changing settings of the power back door system (vehicles with power back door) — 1Smart entry & start system — 1Adjusting the seats — 1Front seats — 1Rear seats — 1Head restraints — 1Adjusting the steering wheeland mirrors — 1Steering wheel — 1Inside rear view mirror — 1Digital Rear-view Mirror — 1Adjusting the mirror — 1Cleaning the Digital Rear-view Mirror — 1Outside rear view mirrors — 1Opening and closing the windows — 1Favorite settings — 1Driving position memory — 1Registering/canceling/recalling a driving position to an electronic key (memory recall function) — 1My Settings — 1Before driving — 1Driving the vehicle — 1Cargo and luggage — 1Trailer towing — 1Driving procedures — 1Power (ignition) switch — 1EV drive mode — 1Transmission — 1Turn signal lever — 1Parking brake — 1Brake Hold — 1Operating the lights and wipers — 1Headlight switch — 1AHS (Adaptive High-beam System) — 1AHB (Automatic High Beam) — 1Fog light switch — 1Windshield wipers and washer — 1Refueling — 1Using the driving supportsystems — 1Toyota Safety Sense software update — 1Toyota Safety Sense — 1Sensors used by Toyota Safety Sense — 1Situations in which the sensors may not operate properly — 1Driver monitor — 1PCS (Pre-Collision System) — 1Operating conditions of each function of the pre-collision system — 1Situations in which the system may not operate properly — 1LTA (Lane Tracing Assist) — 1Enabling/disabling the system — 1LCA (Lane Change Assist) — 1Operating the LCA — 1LDA (Lane Departure Alert) — 1Changing LDA settings — 1PDA (Proactive driving assist) — 1FCTA (Front crossing traffic alert) — 1RSA (Road Sign Assist) — 1Types of road signs supported — 1Dynamic radar cruise control — 1Using the dynamic radar cruise control — 1Approach warning — 1Cruise control — 1Speed limiter — 1Emergency Driving Stop System — 1BSM (Blind Spot Monitor) — 1Blind Spot Monitor operation — 1Automatic Rear Flashing Hazard Lights — 1Secondary Collision Brake (Rear Impacts while Stopped) — 1Safe Exit Assist — 1Safe exit assist operation — 1Toyota parking assist-sensor — 1Sensor detection display, object distance — 1Toyota parking assist-sensor object warning function (vehicles with Advanced Park) — 1RCTA (Rear Crossing Traffic Alert) function — 1RCTA function — 1RCD (Rear Camera Detection) — 1When a pedestrian is detected — 1PKSB (Parking Support Brake) — 1System overview — 1Parking Support Brake function (static objects front and rear of the vehicle/static objects around the vehicle) — 1Types of sensors — 1Parking Support Brake function (moving vehicles rear of the vehicle) — 1Parking Support Brake function (pedestrians rear of the vehicle) — 1Toyota Teammate Advanced Park — 1Types of cameras and sensors used for the Advanced Park — 1Advanced Park guidance screens — 1Perpendicular parking (forward/reverse) function — 1Advanced Park perpendicular exiting (forward/reverse) function — 1Advanced Park Parallel parking function — 1Advanced Park parallel exiting function — 1Advanced Park memory function — 1Remote control function (if equipped) — 1Advanced Park cancelation/ suspension — 1Changing the Advanced Park settings — 1Driving mode select switch — 1GPF (Gasoline Particulate Filter) system — 1Driving assist systems — 1Driving tips — 1Hybrid electric vehicle driving tips — 1Winter driving tips — 1Selecting tire chains — 1Using the air conditioningsystem and defogger — 1Automatic air conditioning system — 1Air outlet layout and operations — 1Heated steering wheel/seat heaters — 1Using the interior lights — 1Using the storage features — 1List of storage features — 1Luggage compartment features — 1Other interior features — 1Power outlet — 1USB Type-C charging port — 1Wireless charger — 1Sun visors — 1Cleaning and protecting the vehicle exterior — 1Cleaning and protecting the vehicle interior — 1Maintenance requirements — 1Do-it-yourself service precautions — 1Hood — 1Positioning a floor jack — 1Engine compartment — 1Components — 1Checking the engine oil — 1Adding engine oil — 1Checking the coolant — 112-volt battery (2ZR-FXE engine) — 112-volt battery (M20A-FXS engine) — 1Tires — 1Checking tires — 1Tire rotation — 1Installing tire pressure warning valves and transmitters — 1Registering ID codes — 1Selecting wheel set — 1Tire inflation pressure — 1Wheels — 1Air conditioning filter — 1Cleaning the hybrid battery (traction battery) air intake vent — 1Electronic key battery — 1Checking and replacing fuses — 1Light bulbs — 1Essential information — 1Emergency flashers — 1If your vehicle has to be stopped in an emergency — 1If the vehicle is submerged or water on the road is rising — 1Steps to take in an emergency — 1If your vehicle needs to be towed — 1Emergency towing procedure — 1If you think something is wrong — 1If a warning light turns on or a warning buzzer sounds — 1If a warning message is displayed — 1If you have a flat tire (vehicles with an emergency tire puncture repair kit) — 1Location of the emergency tire puncture repair kit and tools — 1Taking out the emergency tire puncture repair kit — 1If you have a flat tire (vehicles with a spare tire) — 1Installing the spare tire — 1If the hybrid system will not start — 1If the electronic key does not operate properly — 1If the 12-volt battery is discharged — 1If your vehicle overheats — 1If the vehicle becomes stuck — 1Specifications — 1Maintenance data (fuel, oil level, etc.) — 1Fuel information — 1Customization — 1
~6min read

The tire pressure warning valve and transmitter is equipped with a unique ID code. When replacing a tire pressure warning valve and transmitter, it is necessary to register the ID code.

The ID codes can be registered on of the multi-information display.

Vehicles with 7-inch display

1. Park the vehicle in a safe place, wait for approximately 15 minutes or more and perform the procedure.

2. Turn the power switch to ON.

Operate the registering ID codes function cannot be performed while the vehicle is moving.

3. Press of the meter control switch to select .

4. Press to select "Vehicle Settings" and then press .

5. Press to select "TPWS Setting" and then press .

6. Press to select "Identifying Each Wheel & Position".

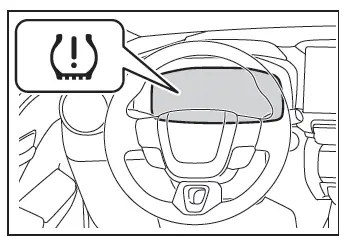
Then press and hold until the tire pressure warning light blinks slowly 3 times.

Then a message will be displayed on the multi-information display.

When registration is being performed, the tire pressure warning light will blink for approximately 1 minute then illuminate and "--" will be displayed for the inflation pressure of each tire on the multi-information display.
Toyota C-HR. Tires

7. Drive straight (with occasional left and right turns) at approximately 40 km/h or more for approximately 10 to 30 minutes.

Registration is complete when the tire pressure warning light turns off and the inflation pressure of each tire is displayed on the multi-information display.

Registration may take longer than approximately 1 hour in certain situations, such as when the vehicle is stopped for a long time at traffic lights, etc.

8. Initializing the tire pressure warning system.

Vehicles with 12.3-inch display

1. Park the vehicle in a safe place, wait for approximately 15 minutes or more and perform the procedure.

2. Turn the power switch to ON.

Operate the registering ID codes function cannot be performed while the vehicle is moving.

3. Press and hold to display the cursor on the content display area (center) of the multi-information display.

4. Press of the meter control switches to select " Settings" and then press .

5. Press of the meter control switches, select "Vehicle Settings" and then press and hold .

6. Press of the meter control switches, select "TPWS setting" and then press .

7. Press of the meter control switches, select the "Identifying Each Wheel & Position".

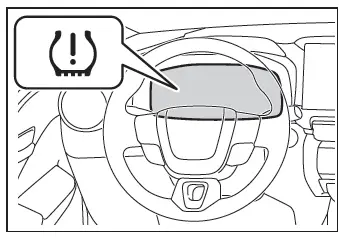
Then press and hold until the tire pressure warning light blinks slowly 3 times.

Then a message will be displayed on the multi-information display.

When registration is being performed, the tire pressure warning light will blink for approximately 1 minute then illuminate and "--" will be displayed for the inflation pressure of each tire on the multi-information display.
Toyota C-HR. Tires

8. Drive straight (with occasional left and right turns) at approximately 40 km/h or more for approximately 10 to 30 minutes.

Registration is complete when the tire pressure warning light turns off and the inflation pressure of each tire is displayed on the multi-information display.

Registration may take longer than approximately 1 hour in certain situations, such as when the vehicle is stopped for a long time at traffic lights, etc.

9. Initializing the tire pressure warning system.

■When registering ID codes

  • Before performing ID code registration, make sure that no wheels with tire pressure warning valve and transmitters installed are near the vehicle.
  • Make sure to initialize the tire pressure warning system after registering the ID codes. If the system is initialized before registering the ID codes, the initialized values will be invalid.
  • As the tires will be warm when registration is completed, make sure to allow the tires to cool before performing initialization.

■Canceling ID code registration

  • To cancel ID code registration after it has been started, operate the multi-information display again to select "Identifying Each Wheel & Position".
  • If ID code registration has been canceled, the tire pressure warning light will blink for approximately 1 minute when the power switch is turned to ON mode and then illuminate. The tire pressure warning system will be operational when the tire pressure warning light turns off.
  • If the warning light does not turn off even after several minutes have elapsed, ID code registration may not have been canceled correctly. To cancel registration, perform the ID code registration start procedure again and then turn the power switch off before driving.

■If ID codes are not registered properly

  • In the following situations, ID code registration may take longer than usual to be completed or may not be possible. (Usually, the vehicle will need to be driven for approximately 10 to 30 minutes to complete ID code registration.) If ID code registration is not complete after driving for approximately 30 minutes, continue driving for a while.
    • If the vehicle is driven on an unpaved road, it may take longer than normal to complete registration.
    • If the vehicle is backed up while performing registration, data collected during registration will be cleared, and it will take longer than normal to complete.
    • If the vehicle is driven in heavy traffic or another situation where other vehicles are driven close by, it may take time for the system to recognize the tire pressure warning valve and transmitters of your vehicle over those of other vehicles.
    • If a wheel with a tire pressure warning valve and transmitter installed is inside or near the vehicle, registration of the ID codes for the installed wheels may not be possible.

If ID registration is not complete after driving for approximately 1 hour, park the vehicle in a safe place for approximately 20 minutes and then perform the ID code registration procedure again.

  • In the following situations, ID code registration will not be started or was not completed properly and the system will not operate properly. Perform the ID code registration procedure again.
    • If, when attempting to start ID code registration, the tire pressure warning light does not blink slowly 3 times.
    • If, when the vehicle has been driven for about 10 minutes after performing ID code registration, the tire pressure warning light blinks for approximately 1 minute and then illuminates.
  • If ID code registration cannot be completed after performing the above procedure, contact any authorized Toyota retailer or Toyota authorized repairer, or any reliable repairer.