Engine Removal – Methods and Safety Precautions
If it has been decided to remove the engine for a major overhaul or repair of the main units, certain preparatory measures must be carried out.
It is extremely important to select a place where the work will be performed. The best place is, without doubt, a workshop. It is very important to have a well-equipped work area, as well as a place to store the vehicle. If there is neither a workshop nor a garage, at least a level and clean concrete or asphalt surface will be required.
Cleaning the engine compartment and the powertrain before starting removal will keep the tools clean and in constant working condition.
A floor crane or chain hoist will also be required. Make sure these devices have a load capacity margin and are capable of lifting the engine together with the transmission. Observing safety precautions plays a primary role here, since lifting the engine out of the vehicle is a potentially hazardous operation.
If engine removal is performed by an inexperienced person, an assistant is required. Consult and ask for help from persons experienced in such work. There are many examples of attempts to remove the engine single-handedly and lift it out of the engine compartment that ended unsuccessfully.
Plan your actions in advance. Before starting work, rent or purchase all the necessary tools and equipment. Among the devices that ensure safety during engine removal and installation and reduce labor input are (in addition to the hoist) a trolley jack of sufficient capacity, a complete set of wrenches and sockets, wooden blocks, rags, and a solvent for cleaning up the inevitable puddles of spilled engine fluids. If the hoist is to be rented, arrange this in advance and carry out all work that does not require this equipment first. This will save money and time.
Keep in mind that you will be unable to use the vehicle for a considerable time. Some work that is not possible at home due to the lack of special equipment will have to be performed at an automotive service workshop. These enterprises operate on a schedule, so it is advisable to consult them before engine removal in order to accurately estimate the time required for repair and component restoration.
Always be very careful when removing and installing the powertrain.
Careless actions may cause serious injury. Think through your actions in advance. Do not spare time for this, since the main thing is to work without injury.
Powertrain Removal and Installation
* Before performing work, read the contents of this section.
The manufacturer recommends removing the engine together with the transmission by lifting the entire powertrain upward and out of the engine compartment. The transmission is separated from the engine after the powertrain is removed and lowered to the workshop floor. If transmission repair is not planned, the engine can be removed separately, leaving the transmission in the vehicle. The engine is removed by lifting it upward and out of the engine compartment, for which the crankshaft pulley must be removed and the engine raised on the timing belt side so as not to strike the body
* The vehicles in question are equipped with airbags. At any time, with the battery connected, the airbag (which has a rigid construction) may deploy (inflate). To prevent accidental airbag deployment (and possible injury) when performing any work near airbag components, turn the ignition key to the LOCK position and disconnect the battery ground cable. After disconnecting the battery, wait two minutes (required for the backup capacitor to fully discharge). For a more detailed description, see Subsection 12.24
Removal
PROCEDURE
1. Relieve the fuel system pressure (see Subsection 5.2).
2. Disconnect the battery ground cable.
3. Remove the battery and battery tray.
4. Remove the hood, placing protective covering (see Subsection 11.8).
5. Remove the air cleaner (see Subsection 5.9).
6. Raise the vehicle and support it on stands. Drain the coolant from the cooling system, drain the engine oil, and remove the drive belts (see Subsection 2.6.4).
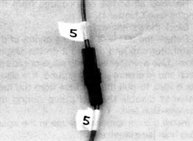
7. Apply clear marks to the cooling system and emission control hoses, vacuum hoses, wiring connectors, ground straps, and fuel lines. Secure the applied marks with adhesive tape or paint them so they are clearly visible. Take instant photographs or sketch the relative positions of components and brackets.
8. Remove the windshield washer reservoir and the coolant reservoir.
9. Remove the fan(s) and radiator (see Subsection 4.8 and Subsection 4.5).
10. Disconnect the heater hoses.
11. Release residual fuel pressure in the tank by loosening the filler cap and disconnecting the fuel lines from the engine (see Subsection 5.2).
12. Disconnect the throttle cable, the transmission throttle valve linkage, and the gear shift cable from the engine (if equipped).
13. Remove the battery and battery tray (see Subsection 3.3.2).
14. Remove the intake and exhaust manifolds, following the procedures in Subsection 3.1.1.4 and Subsection 3.1.1.5.
15. On vehicles equipped with power steering, unbolt the power steering pump. If there is sufficient clearance, tie the pump aside without disconnecting the hoses. If necessary, disconnect the hoses (see Subsection 10.19).
* Secure the compressor with wire; do not allow it to hang by its hoses.
16. Attach the slings to the engine, bring up the hoist and secure the slings to the hoist. Take up slack until the hoist is under slight tension.
17. Remove the driveshafts (refer to sub-section 8.3).
18. Remove the rear engine mount bolt (from the side of the bulkhead), remove the rubber plugs from the engine mount longitudinal member, and
remove the four nuts and five bolts (refer to sub-section 7.1.5).
19. Remove the drive belts, coolant pump pulley and crankshaft pulley.
20. Remove the engine mount bolt securing the radiator-side mount to the chassis.
21. On vehicles equipped with an automatic transmission, remove the plastic underbody shield from the lower part of the transmission case. Remove the bolts securing the torque converter to the drive plate (refer to sub-section 7.2.8) and carefully slide the torque converter toward the transmission.
22. Remove the bolts securing the transmission to the engine and separate the engine from the transmission (refer to sub-section 7.1.5). The torque converter must remain on the transmission.
* If the transmission is to be removed together with the engine, disconnect the left engine mount, cables, wiring and hoses from the transmission. Do not remove the transmission-to-engine bolts at this stage.
23. Check again that all components connecting the engine to the body or transmission have been removed. Remove all remaining components, marking them beforehand.
24. Secure the transmission case by placing a support stand and inserting a board to avoid damaging the case. Remove the engine mount bolts, except those relating to the transmission.
* After the powertrain has been supported on the hoist, do not perform any work under the engine or transmission.
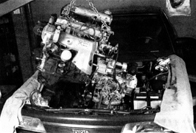
25. Carefully lift the engine (or powertrain assembly) out of the engine compartment. If necessary, pry the mounts off the engine frame brackets.
* When removing the engine from a vehicle equipped with a manual transmission, if the transmission remains in the vehicle, the transmission must be lowered using a support stand. This is necessary to tilt the engine and remove it from the engine compartment.

26. Move the engine away from the vehicle and carefully lower it until it rests on the floor, or remove the drive plate (clutch) and place the engine on a stand or workbench.
* On vehicles equipped with an automatic transmission, mark the inner and outer spacer washers (if fitted) and store the washers together with the drive plate.
Installation
PROCEDURE
1. Check the condition of the engine mounts. If damage or wear is found, replace the mounts.
2. On vehicles equipped with a manual transmission, check the condition of the clutch (refer to sub-section 8.2). On vehicles equipped with an automatic transmission, inspect the torque converter seal and bushing.
3. On vehicles equipped with an automatic transmission, apply a small amount of multi-purpose grease to the nose of the torque converter.
4. Carefully install the transmission on the engine, following the procedure in sub-section 7.1.5 and sub-section 7.2.8.
* If the transmission is difficult to install, do not force it by tightening the bolts. Otherwise, the transmission case or cylinder block may be damaged.
5. Install the transmission-to-engine bolts and tighten them to the torque specified in sub-section 7.1.1.
6. Attach the hoist to the engine and carefully lower the engine (or powertrain assembly) into the engine compartment.
* If the engine was removed without the transmission, lower the engine until an assistant aligns the locating dowels on the cylinder block with the transmission. Correct alignment of the transmission and engine requires manipulating both units.
7. Securely tighten the mounting bolts.
8. Install the remaining removed components and fasteners in reverse order.
9. Restore the coolant level, engine oil level, automatic transmission fluid level and power steering fluid level (refer to sub-section 2.8.4, sub-section 2.5.1.1 and sub-section 2.5.1.2).
10. Start the engine, check engine operation and check for leaks. Stop the engine and check the fluid levels in all systems.
Test yourself
A quick Toyota Corolla quiz: every answer comes with an explanation and a link to the manual page.