General information, Body. Plastic repair
- Introduction
- Distinction of types of plastic
- Explanation of terms relating to processing times
- 2-component plastic repair sealant D 180 KU1 A1
- Primer D 822 150 A1
- Preparing plastic repair
- Repairing deformations
- Bonding crack up to length of 100 mm
- Bonding scratches
- Bonding holes up to a diameter of 30 mm
Introduction
Introduction
Many of the body attachments made of plastic require knowledge of the material properties and repair techniques.
There are 2 procedures for plastic repairs to body attachments:
♦ Welding
♦ Bonding
The type of plastic repair to be carried out depends on the type of damage and the type of plastic. It is therefore important to know the different types of plastic and the associated particularities with regard to repair techniques.
Plastic attachments with a textured surface can be repaired. The surface quality after a plastic repair cannot fully reach the quality standard of a new part.
Distinction of types of plastic
Distinction of types of plastic
Plastics are classified into thermoplastics, thermosets and elastomers based on their chemical structure and behaviour when heated.
Thermoplastics and thermosets are often used in the automotive industry.
Elastomers are currently used to a limited extent in the automotive industry.
In addition, composite materials are used in the automotive industry.
Identification
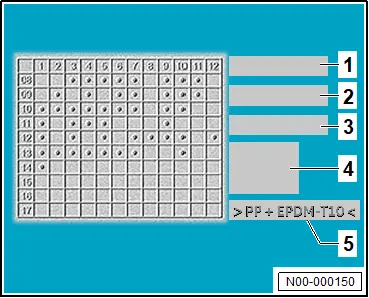
Most plastic attachments are marked with a standard code -5-. The standard code -5- indicates the composition and is located on the inside of the plastic attachment.
Important
● To view the standard code -5-, it may be necessary to remove the plastic attachment.
The standard code -5- indicates the type of plastic, additives or strengtheners. The standard code -5- consists of the symbol “>”, an abbreviation for the type of plastic and ends with the symbol “<”. The abbreviations stand for:
♦ Base polymer
♦ Special characteristics
♦ Type, properties and strengthener content
Base polymer
Designates the polymer or polymer blend from which the plastic attachment was manufactured.
For polymer blends, the individual polymers are separated by the symbol “+” and are indicated in descending order by their mass fraction.
Example >PP+EPDM<:
A blend consisting of polypropylene (PP) and ethylene propylene diene rubber (EPDM). The main component is polypropylene.
All vehicles (continued)
Special characteristics
Special characteristics of a base polymer, such as foamed, chlorinated, high strength or low density, are indicated after the base polymer separated by a hyphen (“-”).
Example: >PE-HD<:
A high-density (HD) polyethylene. Abbreviations of the special characteristics can also be indicated after the actual polymer, e.g. >HDPE<.
All vehicles (continued)
Type, properties and strengthener content
Strengthener additives are indicated with 1 or 2 letters after the polymer. The letters are separated from the base polymer by a hyphen “-”. The first letter refers to the type of additive and the second letter refers to the properties of the additive.
Abbreviations of additives, strengtheners and properties:
 Abbreviation1st letter2nd letterBBor
♦ Beads
♦ Pellets
♦ Balls CCarbon
♦ Pieces
♦ Chips DAluminium trihydratePowderEAluminium oxide- → Remark F-a) FibreGGlassShredded materialH-a) Single-crystal short fibreKCalcium carbonateMesh fabricLCelluloselayerM
♦ Mineral
♦ Metal FeltN-a) Non-woven (fabric)PMicaPaperQSilicate-a) RAramidWoundSOrganic-synthetic
♦ Scale
♦ Louvre TTalcumTwisted or braided fabric, cordV-a) Sheet metalWWoodFabricXNot specifiedY-a) YarnZMiscellaneous
Plastic reinforced with glass fibres is marked with the letters “GF” and the mass fraction of the additive.
Example >UPGF30<:
Unsaturated polyester (UP) containing 30 % of glass fibres as a strengthener.
All vehicles (continued)
Talcum is another additive. Talcum is marked with the letter “T” or “TD”, talcum in powder form.
Example >PP-T10<:
Polypropylene (PP) containing 10 % of talcum as a strengthener.
All vehicles (continued)
Thermoplastic
Thermoplastics are a brittle or viscoplastic plastics at normal temperature that can soften and be deformed when heated. After cooling, thermoplastics solidify and regain their original properties.
When thermoplastics come into contact with solvents, they can dissolve or swell.
Important
● When thermoplastics are welded, the material must be determined to identify the appropriate welding rod material and the welding temperature.
When welding, a higher mechanical strength can be achieved compared to bonding. It is recommended to weld fractures and cracks in thermoplastics.
Properties and areas of application:
DesignationAbbreviationPropertiesAreas of applicationPolyethylenePE
♦ excellent electrical properties
♦ high resistance to water and humidity
♦ low temperature resistance Fuel tank, wheel housing trims, bumper cover, air ductsPolypropylenePP
♦ high chemical resistance
♦ good mechanical and electrical properties
♦ higher thermal stability compared to polyethylene Bumper cover, headlight housing, wheel housing liners, battery housing, housing of heater and air conditioning unitAcrylonitrile-butadiene styreneABS
♦ high stiffness, surface hardness and toughness
♦ addition of metal coating and glass fibres possible Air ducts, wheel trims, sun visors, exterior mirror housingPolyamidePA
♦ high resistance against material fatigue
♦ high impact and abrasion resistance
♦ good mechanical characteristics
♦ reinforcement with glass fibres possible Air ducts, wheel trims, exterior mirror housingPolycarbonatePC
♦ high stiffness, toughness and impact resistance
♦ transparent in its original state Bumper cover, spoiler, air ducts, headlightPP and PE copolymerP/E
♦ by adding ethyl, polypropylene achieves a significantly higher impact resistance Bumper coverAcrylic-styrene-acrylonitrileASA
♦ high strength and surface hardness
Important
● acrylic-styrene-acrylonitrile must not be welded Air ducts, exterior mirror housing
Thermosetting plastics
Thermosetting plastics are brittle and viscoplastic plastics that do not soften or melt when heated. After exceeding the decomposition temperature, thermosetting plastics decompose and carbonise without changing shape.
When thermosetting plastics are subjected to a sufficiently high external force, their higher stiffness results in immediate material fracture without prior deformation.
Thermosetting plastics have a high resistance to chemicals, so they hardly swell and do not dissolve in solvents.
Important
● Due to their properties, thermosetting plastics may only be bonded for repairs.
Properties and areas of application:
DesignationAbbreviationPropertiesAreas of applicationEpoxy resinEP
♦ excellent adhesion to plastics
♦ addition of strengtheners possible Adhesives for plastic repairsUnsaturated polyester → Remark UP
♦ excellent mechanical characteristics
♦ high resistance to chemicals
♦ often reinforced with glass fibres Bumper cover, grille, flaps, exterior attachments of commercial vehicles
Elastomers
Elastomers are characterised by a high elasticity over a wide temperature range.
Elastomers deform when pressure is applied from the outside. Without pressure, elastomers return to their original shape. When elastomers are heated, they become soft but do not melt. When the decomposition temperature of elastomers is exceeded, they decompose or carbonise.
Important
● Due to their properties, elastomers may only be bonded for repairs
Polyurethane and ethylene propylene diene rubber are the elastomers most commonly used in the automotive industry.
Polyurethane
Polyurethane (PUR or PU) can have different chain structures depending on the manufacturing process and can be a thermoplastic, thermosetting plastic or elastomer.
Elastomers can be produced as a foam and are suitable as a reinforcement in bumper covers, dash panels or steering wheels.
Ethylene propylene diene rubber:
Ethylene propylene diene rubber s(EPDM) is often used in the production of bumper covers in combination with polypropylene or polypropylene copolymer and polyethylene to achieve a higher elasticity and impact resistance.
1) Not assigned
2) Unsaturated polyester, generally reinforced with glass fibres, is rarely used in the automotive industry.
Explanation of terms relating to processing times
Explanation of terms relating to processing times
Reaction time
The period of time until the original product has dissolved the surface.
Effective time
The period of time in which the surface is dissolved and the applied original product can bond with the component.
Flash-off time
The period of time that the contained solvents need to evaporate.
Processing time/pot life
The period of time in which the original product must be processed before curing begins. Within this time, the original product must be applied and the component, e.g. window, must be joined. Other joining procedures in the bonding area, e.g. riveting or bolting , must also be carried out within this time.
Minimum drying time
The time required for the original product to change from a liquid to a solid state.
The minimum drying time may change depending on temperature and humidity in the room.
Important
● No further work may be carried out on the vehicle during the minimum drying time.
The vehicle is safe to use only after the minimum drying time has elapsed.
Structural durability
The structural durability is attained after the minimum drying time.
2-component plastic repair sealant D 180 KU1 A1
2-component plastic repair sealant D 180 KU1 A1
Working temperature
The plastic adhesive must be processed at temperatures between 15 °C and 30 °C.
Processing time
The processing time at 23 °C is approx. 10 min. at 50 % relative humidity.
Minimum drying time
Important
● The plastic adhesive must cure for approx. 5 h at 23 °C.
With the help of a commercially available infrared heater, the curing time can be shortened to 15 min. at 60 °C to 70 °C.
Important
● A distance of 70 to 80 cm from the infrared heater to the plastic attachment must be observed.
Cleaning
Recently applied, uncured plastic adhesive can be removed dry and with suitable solvent. After final curing the plastic adhesive can only be removed using physical means.
Primer D 822 150 A1
Primer D 822 150 A1
Processing temperature
The primer must be processed at temperatures between 15 °C and 30 °C.
Reaction time
The reaction time of the primer is 10 min.
Effective time
The effective time of the primer is 24 h.
Important
● If the effective time of the primer has expired before the plastic adhesive has been applied, the primer must be applied again.
Preparing plastic repair
Preparing plastic repair
Special tools and workshop equipment required
♦ hot air blower -V.A.G 1416-
The plastic cleaner D 195 850 A1 will henceforth be referred to as “plastic cleaner”.
The plastic adhesive AMV 195 KD1 01 will henceforth be referred to as plastic adhesive.
– Remove plastic attachment.
– Determine type of plastic → Rep. gr.52; Distinction of the types of plastic.
– Evaluate whether a plastic repair is economically, aesthetically and technically feasible.
Important
● Safety-relevant plastic attachments, e.g. bumper covers, must not be repaired if their function is no longer guaranteed after repair.
– Remove dust, clay or grease residues from the component using water and soap.
– Insert a suitable welding nozzle into hot air blower -V.A.G 1416-.
Important
● The hot air blower must be adjusted to the plastic and the welding nozzle used:
– Set the temperature of the hot air blower according to the table:
The temperature to be used for plastic repairs depends on the type of plastic to be repaired.
Abbreviation of thermoplasticWelding temperatureControl settings on potentiometerAdapter nozzle for weldingQuick-welding nozzle, 5 mmWelding nozzle, wedge-shapedPA400 °C4.34.84.3PC+ABS350 °C3.64.13.6ABS350 °C3.64.13.6PC350 °C3.64.13.6P/E300 °C3.03.53.0PP300 °C3.03.53.0PP+EPDM300 °C3.03.53.0PE280 °C2.83.32.8
– Wait until the set welding temperature has been achieved.
If the plastic attachment is torn:
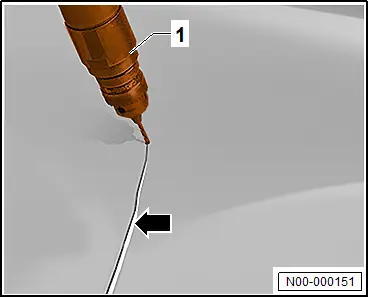
– Drill out end of crack with a commercial drill -1- at low speed.
Note
This will relieve the tension inside the material, and an extension of the crack -arrow- is prevented.
– Clean edges of crack with plastic cleaner → Rep. gr.52; Processing instructions – original products.
– Apply adhesive to one edge of crack → Rep. gr.52; Processing instructions – original products.
– Join the edges of crack.
Repairing deformations
Repairing deformations
Special tools and workshop equipment required
♦ hot air blower -V.A.G 1416-
– → Rep. gr.52; Preparing plastic repairs.
– Set hot air blower -V.A.G 1416- -1- to 200 °C by turning control -2- to position 3.3 of scale -arrow-.
Important
● The hot air blower -1- must be used without a nozzle.

– Heat repair area with hot air blower -A- until it is deformable.
– Move hot air blower -A- in a circular pattern.
Important
● The plastic attachment must not melt.
– To avoid forming of marks or deformations, heat the back side of the repair area.
Important
● Both sides of the repair area must be heated evenly in a circular pattern.
● The air stream must not be directed at one point for too long.
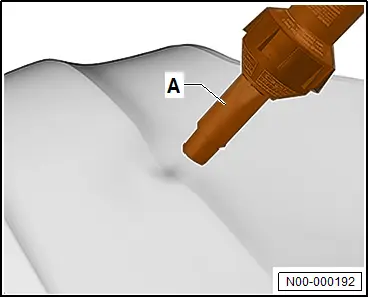
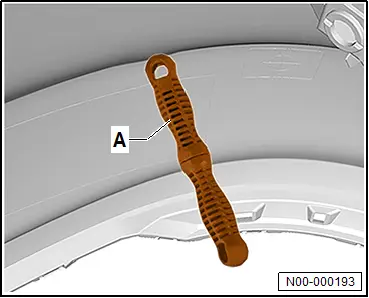
– Press a commercially available dent removal tool -A- in the opposite direction of the deformation until the original shape of the plastic attachment is restored.
Important
● A commercially available dent removal tool -A- made of temperature-resistant material must be used.
– Use the commercially available dent removal tool to knead the plastic attachment.
– To cool the repair area, apply water from a commercially available pump spray bottle, or put a wet cleaning cloth onto the surface.
– Hold pressure on the deformed area until the material cools down.
– Repeat heat and pressure application until the original shape of the plastic attachment is restored.
If the plastic attachment shows minor irregularities:
– Clean attachment with plastic cleaner → Rep. gr.52; Processing instructions – original products.
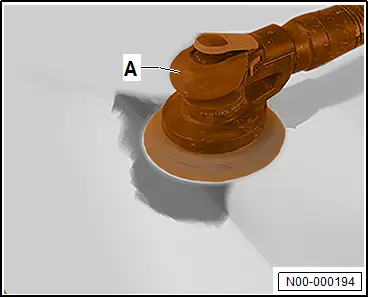
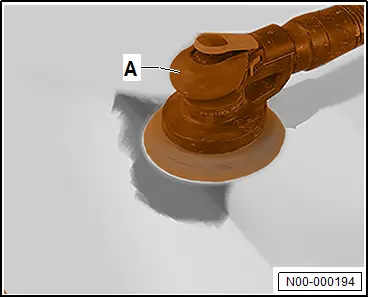
– Sand repair area with a commercially available orbital sander -A- and P120 grit sandpaper.
– Blow out sanding residues.
– Clean repair area with plastic cleaner → Rep. gr.52; Processing instructions – original products.
Continued
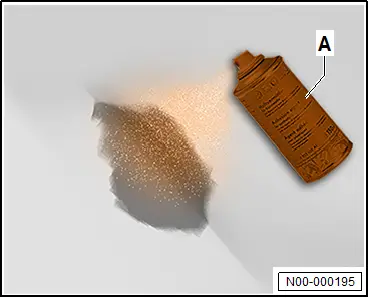
– Apply primer -A- → Rep. gr.52; Processing instructions – original products.
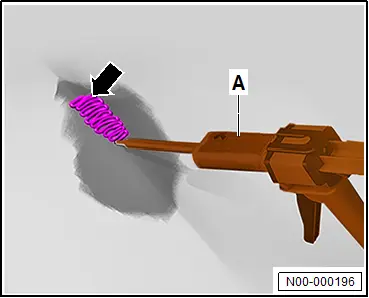
– Apply 2 cm of adhesive bead -arrow- on test piece.
– Make sure that both components of the plastic adhesive -A- are completely mixed.
– Apply plastic adhesive -A- → Rep. gr.52; Processing instructions – original products.
– Clean repair area with plastic cleaner → Rep. gr.52; Processing instructions – original products.
– Sand repair area with a commercially available orbital sander -A- and P150 grit sandpaper.
– Blow out sanding residues.
– Clean repair area with plastic cleaner → Rep. gr.52; Processing instructions – original products.

Bonding crack up to length of 100 mm
Bonding crack up to length of 100 mm
– → Rep. gr.52; Repair deformations.
Important
● Both sides of the crack must face each other in relieved condition.
– Clean repair area with plastic cleaner → Rep. gr.52; Processing instructions – original products.
– Sand repair area with a commercially available angle grinder -A- and P80 grit sandpaper.
Note
The size of the widening surface depends on the size and material thickness of the body attachment.
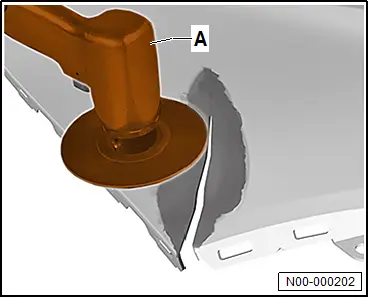
– Clean repair area with plastic cleaner → Rep. gr.52; Processing instructions – original products.
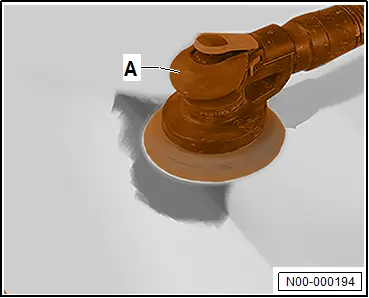
– Sand repair area with a commercially available orbital sander -A- and P120 grit sandpaper.
– Blow out sanding residues.
– Clean repair area with plastic cleaner → Rep. gr.52; Processing instructions – original products.
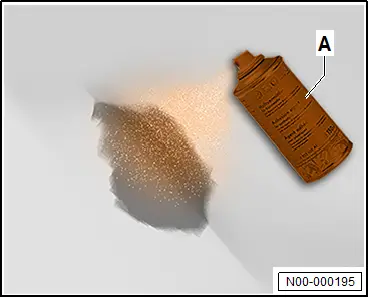
– Apply primer -A- → Rep. gr.52; Processing instructions – original products.
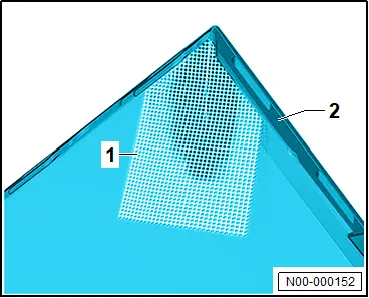
– Measure and adapt fabric -1-.
Important
● Fabric -1- must generously cover the crack in the body attachment -2-.
– Apply 2 cm of adhesive bead -arrow- on test piece.
– Make sure that both components of the plastic adhesive -A- are completely mixed.
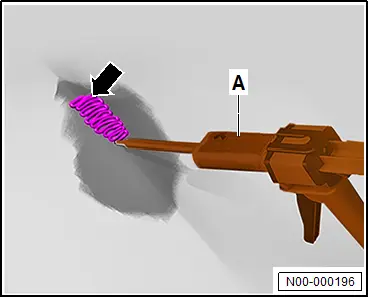
– Apply plastic adhesive -A- → Rep. gr.52; Processing instructions – original products.
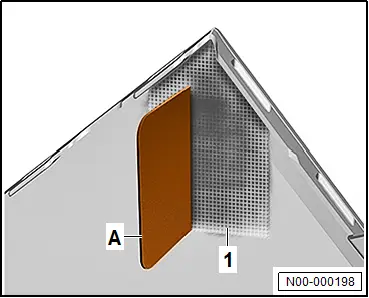
– Position fabric -1-, press it on with a commercially available spatula -A-, and spread applied plastic adhesive.
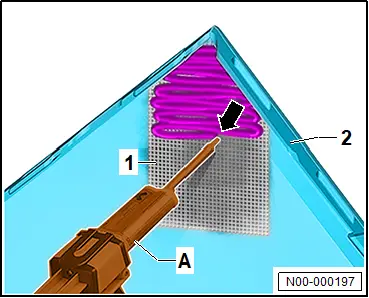
– Apply plastic adhesive -A- on fabric -1- → Rep. gr.52; Processing instructions – original products.
– Use a commercially available spatula to spread adhesive bead -arrow-.
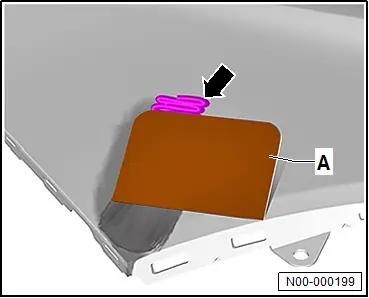
– Clean outer side of repair area with plastic cleaner → Rep. gr.52; Processing instructions – original products.
– Apply plastic adhesive, and use a commercially available spatula -A- to spread adhesive bead -arrow-.
– Sand repair area with a commercially available orbital sander -A- and P150 grit sandpaper.
– Blow out sanding residues.
– Clean repair area with plastic cleaner → Rep. gr.52; Processing instructions – original products.
Bonding scratches
Bonding scratches
If plastic attachments are deformed:
– → Rep. gr.52; Repair deformations.
Continued
– Clean repair area with plastic cleaner → Rep. gr.52; Processing instructions – original products.
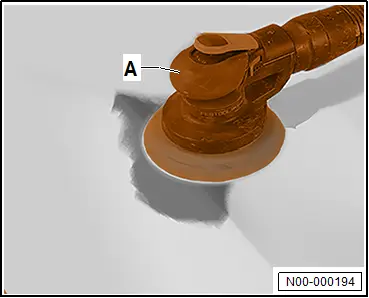
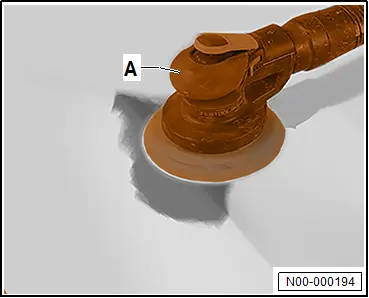
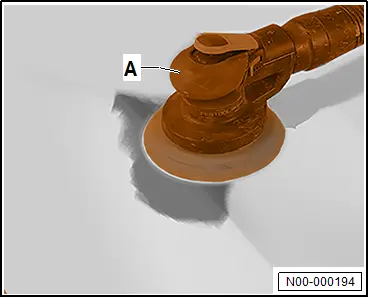
– Sand repair area with an orbital sander -A- and P120 grit sandpaper.
– Blow out sanding residues.
– Clean repair area with plastic cleaner → Rep. gr.52; Processing instructions – original products.
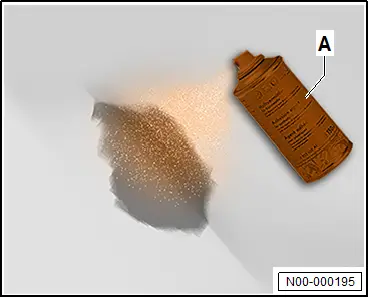
– Apply primer -A- → Rep. gr.52; Processing instructions – original products.
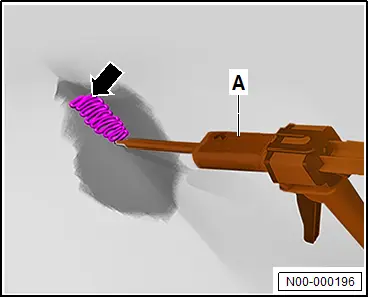
– Apply 2 cm of adhesive bead -arrow- on test piece.
– Make sure that both components of the plastic adhesive -A- are completely mixed.
– Apply plastic adhesive -A- → Rep. gr.52; Processing instructions – original products.
– Use a commercially available spatula to spread adhesive bead -arrow-.
– Clean repair area with plastic cleaner → Rep. gr.52; Processing instructions – original products.
– Sand repair area with an orbital sander -A- and P150 grit sandpaper.
– Blow out sanding residues.
– Clean repair area with plastic cleaner → Rep. gr.52; Processing instructions – original products.
Bonding holes up to a diameter of 30 mm
Bonding holes up to a diameter of 30 mm
– → Rep. gr.52; Preparing plastic repairs.
– Clean repair area with plastic cleaner → Rep. gr.52; Processing instructions – original products.
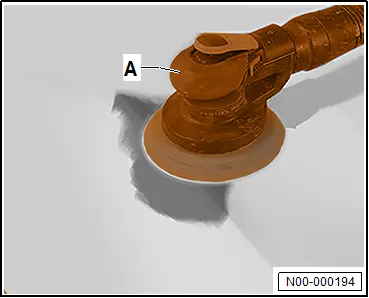
– Sand repair area with an orbital sander -A- and P120 grit sandpaper.
– Blow out sanding residues.
– Clean repair area with plastic cleaner → Rep. gr.52; Processing instructions – original products.
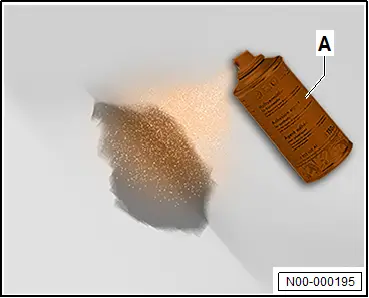
– Apply primer -A- → Rep. gr.52; Processing instructions – original products.
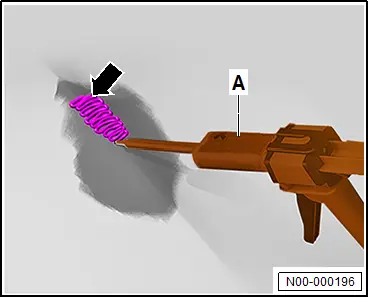
– Apply 2 cm of adhesive bead -arrow- on test piece.
– Make sure that both components of the plastic adhesive are completely mixed.
– Apply plastic adhesive → Rep. gr.52; Processing instructions – original products.
– Use a commercially available spatula to spread adhesive bead -arrow-.
– Clean repair area with plastic cleaner → Rep. gr.52; Processing instructions – original products.
– Sand repair area with a commercially available orbital sander -A- and P150 grit sandpaper.
– Blow out sanding residues.
– Clean repair area with plastic cleaner → Rep. gr.52; Processing instructions – original products.