Lower Anchors for Child Safety Restraints
The outboard seating positions of your vehicle may be equipped with lower anchors for child seats. The lower anchor rings, located at the seam between the seatback and the seat cushion, may be used only with child seats specifically designed for installation with lower anchor rings.
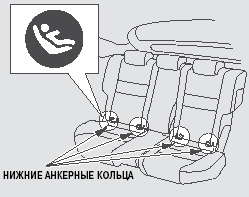
The location of the anchor rings is indicated by small buttons located above the rings.
A list of child restraint systems recommended for use in European countries is provided on page 47.
To install a child restraint system using the lower anchors:
1. Move the seat belt buckle or tongue so that it does not interfere with the child seat attachment.
2. Make sure there are no foreign objects in the area of the child seat attachment that could get into the connection between the seat attachment and the lower anchor.
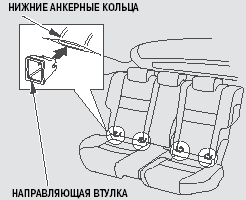
3. For some child seats: Guide sleeves may be supplied with the child seat to protect the seat upholstery during seat installation.
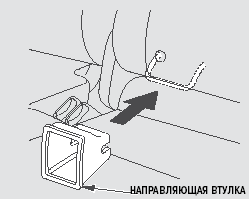
Attach the guide sleeves to the lower anchor attachment loops as shown in the illustration.
When installing the guide sleeves, follow the child seat manufacturer's instructions.
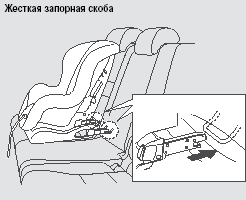
4. Place the child restraint on the right or left outboard rear seat, then, following the restraint manufacturer's instructions, attach it to the lower anchor rings.
Some child seats are equipped with rigid latch hooks for attachment to the lower anchor rings (see illustration).
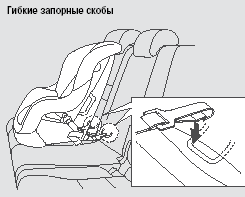
Other child seats are equipped with flexible latch straps (see illustration).
5. Regardless of the child seat design, follow all of the child restraint manufacturer's recommendations regarding adjustment and tightening of the fasteners.
Child seats equipped with flexible latch straps are supplied to some countries. Child seats of this type are not supplied to European countries.
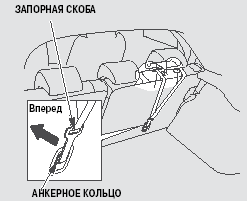
6. Attach the latch hook to the anchor ring as shown in the illustration.
Make sure the straps are not twisted, and tighten the attachments in full accordance with the instructions and recommendations of the child restraint manufacturer.
The upper illustration shows attachment of the latch hook in accordance with European standards.
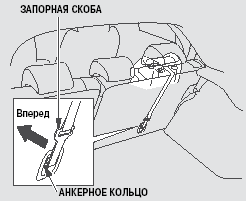
Raise the head restraint (page 162), then route the strap between the head restraint posts over the seatback, making sure the strap is not twisted.
Secure the strap latch hook to the attachment point, then tighten the strap in accordance with the child restraint manufacturer's recommendations.
7. After installing the child restraint, try to move it forward and backward and from side to side to check that it is securely held in the required position.
The integrity of the child restraint design, as well as its suitability for use in a specific vehicle, must be confirmed by the manufacturer and checked by the seller of the child restraint.
If you are not completely sure that a given child restraint is suitable for your vehicle, consult an authorized Honda dealer before purchasing it.
Test yourself
A quick Honda Civic quiz: every answer comes with an explanation and a link to the manual page.