Assembly
PROCEDURE
1. Apply lubricant to the sliding surface of the rack oil seal.
Recommended lubricant: Power Steering Fluid Type 3
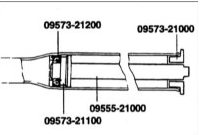
2. Install the back-up washer and oil seal into the steering gear housing in the position shown in the illustration.
3. Apply grease to the entire surface of the needle bearing.
Recommended lubricant: SAE J310, NLGI No. 2
4. Attach the needle bearing to special service tool 09432–21600 and install it into the steering gear housing until the tool contacts the housing.
Pay attention to the installation direction of the needle bearing.
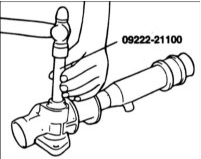
5. Apply lubricant to the ball bearing and install it using special service tool 09222–21100.
Recommended lubricant: SAE J310, NLGI No. 2
Always use a new bearing.
6. Apply lubricant to the oil seal surfaces of the rack bushing.
Recommended lubricant: Power Steering Fluid Type 3
7. Install the oil seal into the rack bushing.
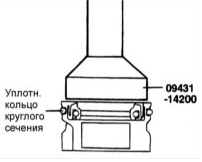
8. Apply lubricant to the O-ring and install it into the rack bushing.
9. Apply grease to the teeth of the rack and wrap it with adhesive tape.
Recommended grease: SAE J310, NLGI No. 2
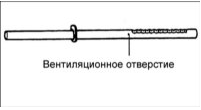
Do not block the vent hole in the rack with grease.
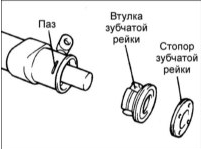
10. Install the rack into the steering gear housing. Then install the rack bushing and rack stopper.
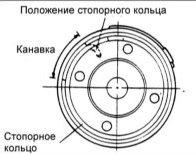
11. Press the rack stopper until the groove appears, and, while turning the stopper, install the snap ring.
The snap ring must not be visible through the hole in the rack housing.

12. Using SST 09432–21600, install the oil seal and ball bearing into the valve body.
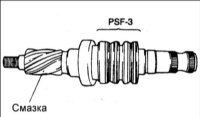
13. Apply oil and recommended grease to the valve assembly, and install it into the steering gear housing.
Recommended oil: PSF–3
Recommended lubricant: SAE J310, NLGI No. 2
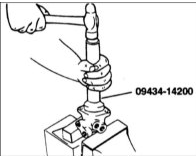
14. Apply oil and, using SST 09434–14200, install the seal into the valve body.
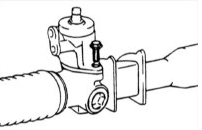
15. Install the valve body assembly with the O-ring into the steering gear housing.

16. Install the lock washer and tie rod, and stake the washer tab in two places.
Align the tabs of the lock washer with the notches in the steering gear housing.
Always use a new lock washer.
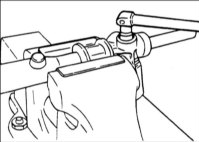
17. With the pinion turned fully clockwise, tighten the self-locking nut.
18. Apply sealant to the threads of the plug and tighten the plug to the specified torque.
Tightening torque: 50–70 N·m
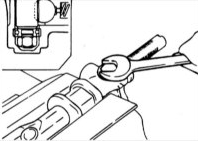
19. Stake the plug in two places around its circumference.
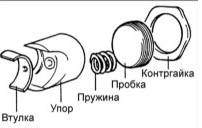
20. Install the bushing, stopper and spring in the order shown in the illustration. Before installation, apply sealant to the threads of the plug.
21. Set the rack to the center position and install the cover on the steering gear housing. Using SST 09565–21100, tighten the cover to 20–25 N·m. Loosen the cover by 10°, then tighten the locknut to the specified torque.
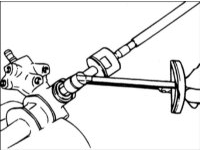
22. Tighten the guide tube to the specified torque and bond the rubber element in place.
Tightening torque: 50–70 N·m
23. Apply grease to the dust boot and install it into the groove of the tie rod.
24. Secure the dust boot with a clamp.
New clamps and a new clip must be used to secure the dust boot.
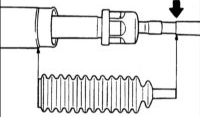
25. Check that the dust boot is not twisted.
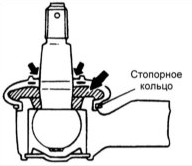
26. Fill the boot with grease, install it on the ball joint of the tie rod end, and secure it with the snap ring.
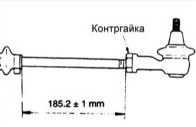
27. Install the tie rods so that the length of the left and right tie rods is the same.
Tie rod length: 185.2±1 mm
28. Check the pinion preload.
Test yourself
A quick Hyundai Accent quiz: every answer comes with an explanation and a link to the manual page.