Headlights
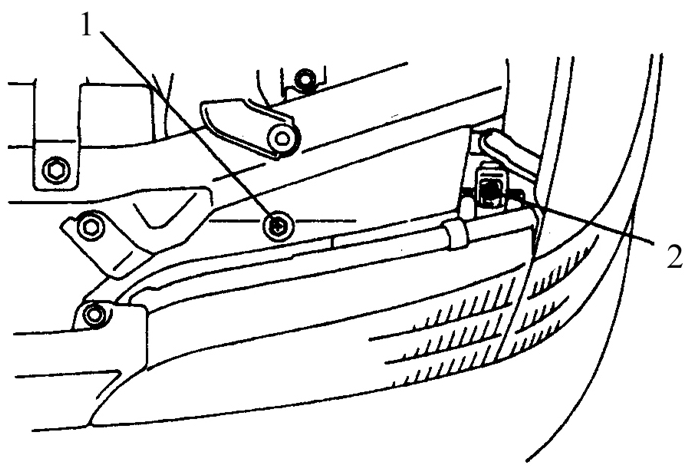
Headlight Aiming Screws 1. Horizontal aiming screw
2. Vertical aiming screw
It is very important that the headlight beam be correctly aimed. Incorrect aiming may dazzle the driver of an oncoming vehicle and lead to a traffic accident, or seriously reduce your view of the road.
Headlight aiming must be checked every 12 months and each time new headlights are installed or the front body structure is repaired.
It should be emphasized that the adjustment procedure described below is only a temporary measure until the headlights can be aimed at a workshop with the necessary equipment.
Adjustment
PROCEDURE
1. These models have two aiming screws: one on the side controls left-right movement, and one on the bottom controls up-down movement. They can be accessed from the rear of the headlight.
2. There are several methods of headlight aiming. The simplest method requires a clean wall, adhesive tape and a level floor.
3. Stick two vertical strips of adhesive tape on the wall at the center of each headlight, at headlight height.
4. Stick a second strip of adhesive tape horizontally on the wall at the center of the headlights. It will be easier to apply the tape to the wall if the vehicle is parked only a few centimeters from the wall.
5. Perform the aiming with the vehicle on a level surface, at a distance of 8 meters from the wall, with the fuel tank half full and no heavy load in the vehicle.
6. Starting with the low beam headlights, adjust the brightest zone of the beam to 5 cm below the horizontal line and 5 cm to the right of the vertical line. Turn the aiming screws to obtain the required beam direction.
7. With the high beams on, the brightest zone should be exactly at the center of the vertical strips, slightly below the horizontal strip. You may not be able to aim the headlights so that both the low and high beam are exactly adjusted. If you must compromise between these two settings, remember that low beam is used more often and is more important for driving safety.
8. Have the headlights aimed by a specialist without delay.
Removal
PROCEDURE
1. Disconnect the negative battery cable.
* If your vehicle's stereo has an anti-theft code system, make sure you know the radio activation code before disconnecting the battery.
2. Remove the radiator grille (see subsection 11.26).
3. Remove the parking light (see subsection 12.15).
4. Unscrew the bolt securing the headlight to the radiator crossmember.
5. After removing the parking light, the two side mounting nuts (indicated by arrows) become accessible.
6. Pull the headlight forward to disconnect the mounting at the lower corner (indicated by arrow).
7. Remove the bulb (see subsection 12.13).
8. Installation is performed in the reverse order of removal.
Test yourself
A quick Toyota Corolla quiz: every answer comes with an explanation and a link to the manual page.