Engine Control System/Fuel System
Fuel Pressure Control Valve Repair Procedures
In this manual: Engine Control System/Fuel System
11steps
~81min
5/5difficulty
3special tools
Done 0 of 11
Inspection
- Turn the ignition switch OFF and disconnect the negative (-) battery cable.
- Disconnect the fuel pressure control valve connector.
- Measure the resistance between terminals 1 and 2 of the fuel pressure control valve.
- Make sure the resistance is within specification.
Specification: Refer to "Specifications"
Removal
|

- Turn the ignition switch OFF and disconnect the negative (-) battery cable.
- Release the fuel line residual pressure. (Refer to Fuel System - "Release Fuel Line Residual Pressure")
When the fuel pump relay is removed, a diagnostic trouble code (DTC) is set. Clear the DTC with GDS after completing the "Relieve Fuel Pressure" procedure.
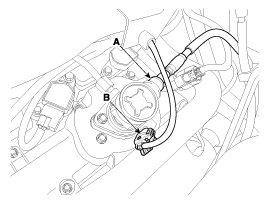
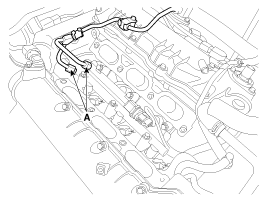
- Disconnect the quick connector (A) of the fuel feed tube using the clip release tool.
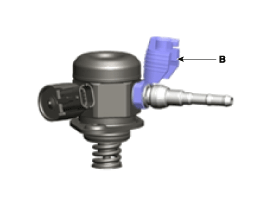
- Disconnect the fuel pressure control valve connector (B).
Open the clip cover (B) before disconnecting the quick connector. (If equipped with clip)
When removing the quick connector with the clip removal tool (A), be careful not to damage the plastic clip (B). If the clip is damaged, fuel line leakage may occur due to a poor connection.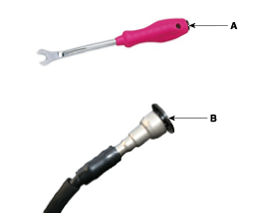
- Remove the intake manifold. (Refer to Engine Mechanical System - "Intake Manifold")
- Remove the high pressure fuel tube.
- Remove the bracket mounting bolt (A).
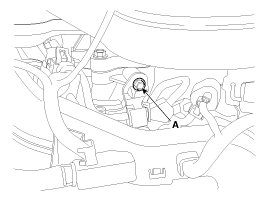
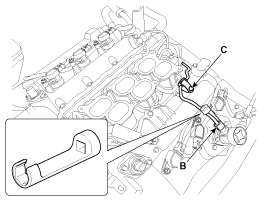
- Remove the high-pressure fuel pipe flange nut (A, B) in the following order. Use the special service tool [SST No.: 09314-3V100 or 09314-27130] for A and B.
- Remove the high-pressure fuel pipe bracket bolt (C).
- Remove the bracket mounting bolt (A).
- Remove the installation bolts (A) and remove the high-pressure fuel pump from the cylinder head.
Loosen the two bolts alternately by 0.5 turns. If one of the two bolts is fully removed while the other bolt is still installed, the cylinder head surface may be damaged due to the pump spring tension.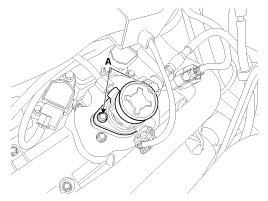
Installation
|
|
|
|
|
|
|
|
|
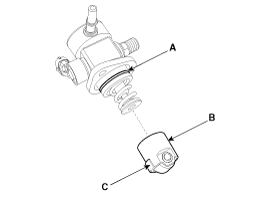
- Install in the reverse order of removal.
High-pressure fuel pump bolt: 12.8 ~ 14.7 N·m. High-pressure fuel pipe nut: 29.4 ~ 35 N·m. High-pressure fuel pipe bracket bolt: 9.8 ~ 11.8 N·m
Use the special service tool [SST No.: (09314-3Q100) or (09314-27130)] to install the high-pressure fuel pipe.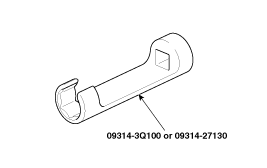
Test yourself
A quick Hyundai Genesis DH quiz: every answer comes with an explanation and a link to the manual page.
Was this page helpful?