Engine Control System/Fuel System
Engine Control Module (ECM) Repair Procedures
In this manual: Engine Control System/Fuel System
11steps
~66min
3/5difficulty
Done 0 of 11
Removal
|

|
- Turn the ignition switch OFF and disconnect the negative (-) battery cable.
- Remove the cover.
- Disconnect the ECM connector (A) and the IDB connector (B).
- Disconnect the TCM connector (C).
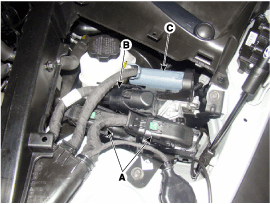
- Remove the mounting bolts (A) and nut (B) of the ECM, TCM and IDB brackets.

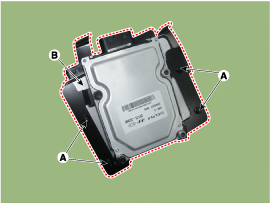
- Disconnect the TCM (B) from the bracket after loosening the mounting bolt (A).

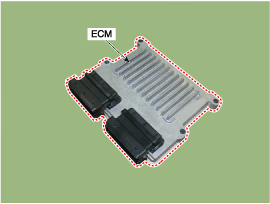
- Disconnect the ECM (B) from the bracket after loosening the mounting nut (A).
Installation
|

- To install, reverse the removal procedure.
ECM mounting bolt: 9.8 - 11.8 N·m
ECM Circuit Inspection Procedure
- ECM GROUND CIRCUIT INSPECTION: Measure the resistance between the ECM and chassis ground using the rear side of the ECM harness connector as the ECM-side checkpoint. If a problem is found, repair it.
Specification: Below 1 Ω
- ECM CONNECTOR INSPECTION: Disconnect the ECM connector and visually inspect the ground terminals on the ECM side and harness side for bent pins or poor contact tension. If a problem is found, repair it.
- If the problem is not found in steps 1 and 2, the ECM may be faulty. If so, replace the ECM with a new one, then check the vehicle again. If the vehicle operates normally, the problem may have been found in the ECM.
- RECHECK ORIGINAL ECM: Install the original ECM (possibly faulty) into a known good vehicle and check the vehicle. If the problem recurs, replace the original ECM with a new one. If the problem does not occur, it is an intermittent problem (Refer to "Intermittent Problem Troubleshooting" in the "Basic Troubleshooting Procedure").
Test yourself
A quick Hyundai Genesis DH quiz: every answer comes with an explanation and a link to the manual page.
Was this page helpful?