Fuel System
Repair Procedures - Injector
In this manual: Fuel System
18steps
~113min
5/5difficulty
1special tools
Done 0 of 18
Inspection
- Turn the ignition off.
- Disconnect the injector connector.
- Measure the resistance between terminals 1 and 2 of the injector.
- Make sure the resistance is within specification.
Specification: Refer to "Specifications"
Removal
- Turn the ignition OFF and disconnect the negative (-) battery cable.
- Relieve the residual fuel pressure from the fuel line. (Refer to Fuel System - "Relieving Fuel Pressure in the Fuel Line")
- Remove the delivery pipe and injector assembly. (Refer to Fuel System - "Delivery Pipe")
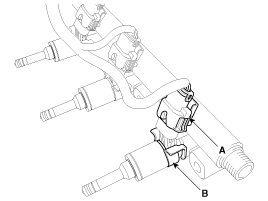
- Disconnect the connector (A) and the retaining clip (B), then separate the injector from the delivery pipe.
Installation
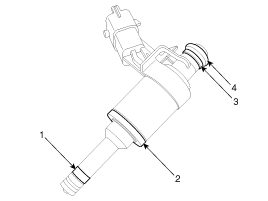
- Combustion Seal
- Rubber Washer
- Support Ring
- O-ring
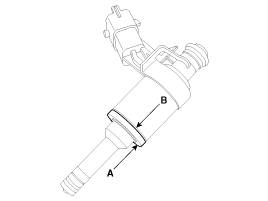
- Installation is the reverse of removal.
Replacement
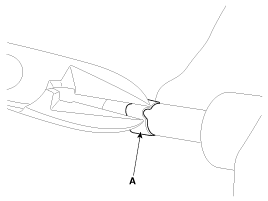
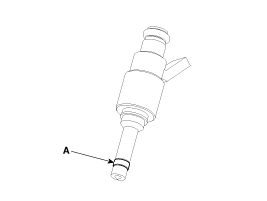
Replace the injector O-ring with a new one to prevent leakage after removal.- Remove the combustion seal (A) using cutting pliers.
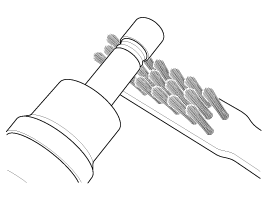
- Before installing the O-ring, clean the groove with a clean cloth. Any carbon deposits on the injector sealing surface must be carefully removed with a brass wire brush.
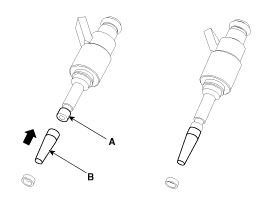
- Place the O-ring installation guide (B) (SST No.: 09353-2B000) on the injector tip, taking care not to damage the injector tip (A). Press the O-ring (C) onto the tapered installation tool with your thumb and index finger until it enters the groove. The complete installation should not take more than 2-3 seconds.
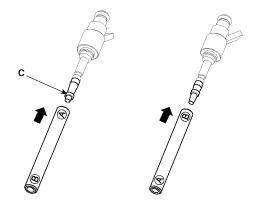
- To determine the O-ring size, first insert the injector into the sizing tool (A) (SST No.: 09353-2B000), then press and simultaneously rotate it 180° in the gauge tool.
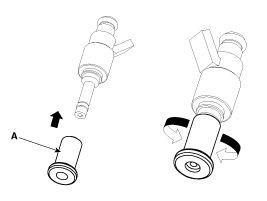
- Remove the injector from the gauge tool by rotating it in the direction opposite to that used during press-fitting.
- Check the installation of the combustion seal (A).
Test yourself
A quick Kia Cee'd quiz: every answer comes with an explanation and a link to the manual page.
Was this page helpful?