Ball Joints
Replacement
PROCEDURE
1. Loosen the wheel nuts, raise the vehicle and support it on stands. Remove the wheel.
2. Remove the cotter pin (if equipped) from the ball joint stud hole and loosen the nut (but do not remove it yet).
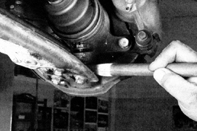
3. Separate the ball joint from the steering knuckle using a ball joint separator tool. Lubricate the rubber boot with grease and take care not to tear the boot.
4. Remove the nut from the ball joint stud. The clearance between the ball joint stud and the CV joint is very small. To remove the nut, loosen it one or two turns, lower the joint, loosen the nut another couple of turns, and repeat until the nut is removed.
5. Remove the bolts and nuts securing the ball joint to the control arm. Separate the ball joint from the arm using a pry bar.
6. To install the ball joint, insert the stud into the steering knuckle hole and start the nut, but do not fully tighten it yet. Do not insert the stud fully into the hole. Start tightening the nut as soon as the end of the stud appears through the hole, then continue tightening the nut to draw the stud through the hole.
7. Install the ball joint on the control arm, install the bolts and nuts, and tighten them to the specified torque (see subsection 10.1).
8. Tighten the ball joint stud nut to the steering knuckle to the specified torque (see subsection 10.1) and install a new cotter pin. If the cotter pin hole in the stud does not align with the nut slots, tighten the nut slightly more to align the holes. Do not loosen the nut to insert the cotter pin.
9. Install the wheel and start the wheel nuts by hand. Lower the vehicle to the ground and tighten the wheel nuts to the specified torque (see subsection 10.1).
Test yourself
A quick Toyota Corolla quiz: every answer comes with an explanation and a link to the manual page.