Strut Assembly

Strut Assembly Components 1. Shock absorber with spring
2. Cap
3. Strut mount
4. Dust boot
5. Spring seat
6. Upper insulator
7. Suspension spring
8. Rubber bump stop
9. Lower insulator
10. Shock absorber
If the strut assembly or spring shows clear signs of wear or damage (fluid leakage from the shock absorber, deterioration of damping performance, cracks or deformation of the spring), replace the strut assembly or spring. The shock absorber and spring are not repairable.
The strut assembly can be replaced together with the spring, or the strut can be disassembled and only the shock absorber or spring replaced. Before deciding, check prices and availability of replacement parts.
* Disassembling the strut assembly is a hazardous operation and must be performed with great care, as serious injury can result. Use only high-quality, reliable spring compressors and follow the manufacturer's instructions exactly when installing them on the spring. After removing the spring from the strut, place it in a safe location where it will not interfere with your work.
Disassembly
PROCEDURE
1. Remove the strut assembly, referring to the instructions in the previous section. Secure the strut in a vise, placing wooden blocks or rags between the vise jaws to avoid damaging the strut. Do not overtighten the vise.
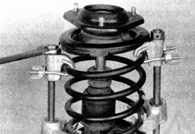
2. Following the manufacturer's instructions, install the spring compressors (available for purchase or rental) on the spring and compress the spring until it no longer presses against the upper seat. Check this by rocking the spring from side to side.
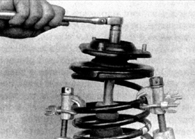
3. Loosen and remove the nut on the end of the shock absorber rod using a flare-nut wrench.
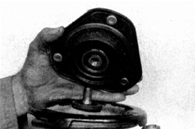
4. Remove the nut and the strut mount. Check the bearing in the strut mount. If it does not rotate freely, replace the strut mount. Inspect the rubber portion of the mount for cracks or other signs of wear. If the rubber is cracked or torn, replace the mount.
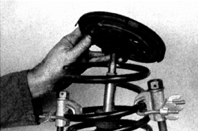
5. Remove the spring seat and the upper insulator from the shock absorber rod. Inspect the rubber spring seat for cracks or deterioration and replace it if necessary.
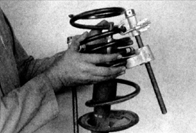
6. Carefully remove the compressed spring from the strut and place it in a safe location. Make sure that neither end of the spring is pointing toward your body.
* Make sure the ends of the spring are not near your head.
7. Remove the rubber bump stop from the shock absorber rod.
8. Inspect the lower insulator (if equipped) for signs of wear, cracks, or deterioration and replace it if necessary.
Assembly
PROCEDURE
1. If replacing the lower insulator, install it so that the protruding part engages the recess in the spring seat. Extend the shock absorber rod fully and install the rubber bump stop (see illustration Strut Assembly Components).
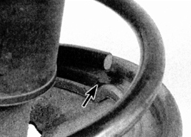
2. Carefully install the spring onto the lower insulator so that the end of the spring seats in the deepest part of the insulator, in the lower recess (indicated by the arrow).
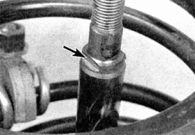
3. Install the upper insulator and spring seat, making sure the flat sides of the hole in the seat align with the flats on the shock absorber rod (indicated by the arrow).
4. Install the dust cover and the strut mount onto the shock absorber rod.
5. Install the retaining nut and tighten it to the specified torque (see subsection 10.1).
6. Install the strut assembly on the vehicle, referring to the instructions in the previous section (see subsection 10.2).
Test yourself
A quick Toyota Corolla quiz: every answer comes with an explanation and a link to the manual page.