Headlight Removal and Installation
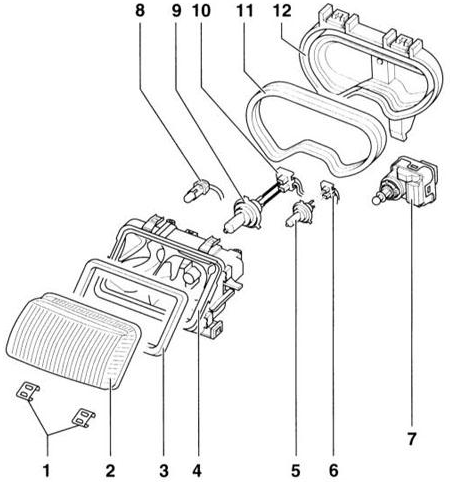 Headlight with Beam Range Adjustment Mechanism 1 – clips (6 pcs.) 2 – lens 3 – lens seal 4 – headlight housing 5 – low beam bulb 6 – connector 7 – beam range adjustment motor 8 – parking light bulb 9 – high beam bulb or high beam with fog light 10 – connector 11 – housing cover seal 12 – housing
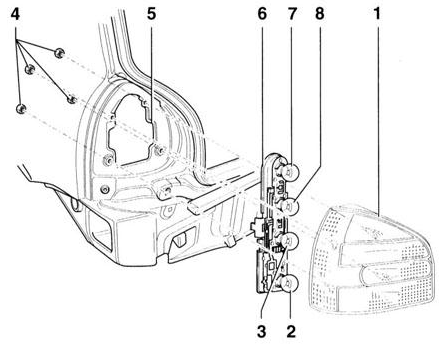 Rear Light 1 – rear light housing 2 – brake light/reverse light bulb 3 – reverse light bulb 4 – nuts, 4 N•m 5 – body 6 – bulb holder 7 – fog light bulb 8 – turn signal bulb
Rear Light
The lens and the headlight housing can be replaced independently of each other. REMOVAL
PROCEDURE
1. Remove the turn signal light. Refer to Front Turn Signal Light Removal and Installation.
2. To prevent damage to the paint finish when removing the headlight, mask the bumper around the headlight.
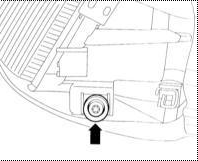
3. Unscrew the side mounting bolts (arrow in illustration) with a Torx T30 wrench.
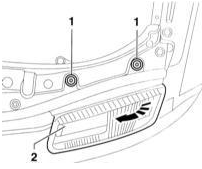
4. Unscrew the upper mounting bolts –1– with a Torx T
30.
5. Turn the headlight –2– toward the center of the vehicle (arrow) and then pull it forward out of the body.
6. Disconnect the headlight and beam range adjustment connector. INSTALLATION
PROCEDURE
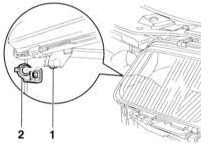
1. First insert the headlight near the center of the vehicle, with pin –1– into guide –2–.
2. Mate the headlight and beam range adjustment mechanism connector.
3. Lightly tighten the headlight, align it with the body contour, and tighten to 6 N•m.
4. Install the turn signal light. Refer to Front Turn Signal Light Removal and Installation.
5. Check the headlight alignment at a service station.
Test yourself
A quick Audi A3 quiz: every answer comes with an explanation and a link to the manual page.