Main Line Pressure Adjustment
1. Drain the automatic transmission fluid (ATF) from the automatic transmission.
2. Remove the AT oil pan.
3. Remove the oil filter.
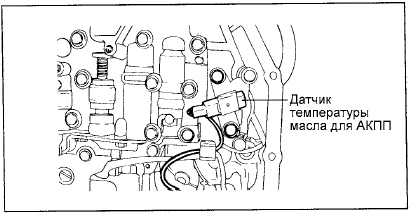
4. Remove the AT fluid temperature sensor.
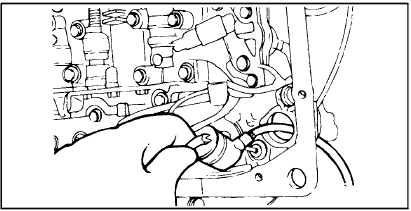
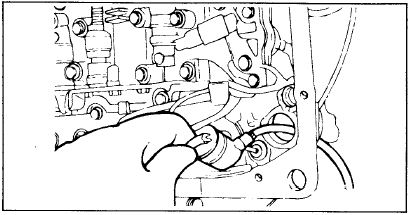
5. Press the retainers of the solenoid valve harness grommet and push it into the transmission case.
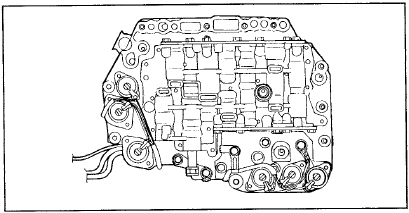
6. Remove the valve body assembly. The manual valve may fall out, so be careful not to drop it.
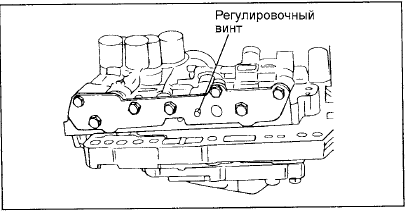
7. Turn the pressure regulator adjusting screw and adjust the main line pressure (kickdown brake pressure) to the specified value.
Turning the pressure regulator adjusting screw clockwise decreases main line pressure. Turning it counterclockwise increases main line pressure.
Standard value:
860 – 900 kPa Change in oil pressure per adjusting screw turn:
38 kPa 8. Check that the O-ring is correctly installed on the upper surface of the valve body assembly.
9. Replace the solenoid valve harness grommet O-ring with a new one.
10. Install the valve body assembly into the transmission case. Then insert the solenoid valve harness grommet from the inside. When installing, make sure the protruding parts of the connector are positioned as shown in the illustration. Be careful not to pinch the wires.
11. Tighten the valve body assembly bolts to the specified torque of 10 - 12 N·m.
12. Install the AT oil filter.
13. Install a new oil pan gasket and the oil pan.
14. Fill the AT with the specified quantity of ATF.
15. Check the AT hydraulic control pressure. If necessary, repeat the pressure adjustment.
Test yourself
A quick Hyundai Elantra CN7 quiz: every answer comes with an explanation and a link to the manual page.