Door
Removal
PROCEDURE
1. Remove the door trim panel (see subsection 11.12). Disconnect any electrical connectors and push them through the opening in the door so they do not interfere with removal.
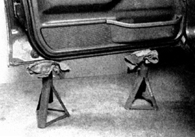
2. Place a jack or stands under the door, or ask an assistant to support the door while you unscrew the bolts.
* If a jack or stands are used, place a cloth between them and the door to protect the painted surface of the door.
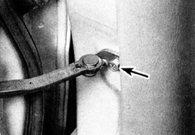
3. Unscrew the check strap bolt (indicated by the arrow) of the door check.
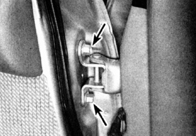
4. Before loosening or unscrewing the bolts (indicated by the arrows), make alignment marks around them to record their position.
5. Unscrew the hinge-to-door bolts and carefully remove the door. Installation is performed in the reverse order.
Adjustment
During installation, make sure the door is positioned correctly. If necessary, adjust it as described below:
PROCEDURE

1. Vertical and longitudinal adjustment is performed by loosening the hinge-to-body bolts and moving the door as required. You may need a special offset tool to reach some of the bolts.
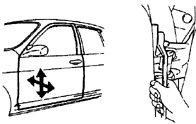
2. Vertical adjustment and door gap (depth) adjustment are performed by loosening the door side hinge bolts and moving the door as required. You may need a special offset tool to reach some of the bolts.
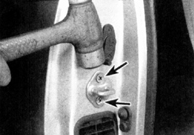
3. The door latch striker can also be adjusted vertically and horizontally to ensure proper engagement with the latch mechanism. To do this, loosen the striker bolts (indicated by the arrows) and move the striker as required.
Test yourself
A quick Toyota Corolla quiz: every answer comes with an explanation and a link to the manual page.