Hood
* The hood is quite heavy, so it is difficult to remove and install. At least two people are required to perform these procedures.
Removal and installation
PROCEDURE
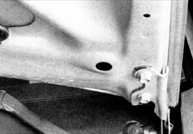
1. Make alignment marks around the bolt heads to ensure proper alignment during installation.
2. Use cloth to cover the body and fenders in the hood area. This will protect the body and paint during hood removal.
3. Disconnect any wiring or cables that may interfere with removal.
4. Have your assistant support the hood. Unscrew the bolts securing the hinges to the hood.
5. Remove the hood.
6. Installation is performed in the reverse order.
Adjustment
PROCEDURE
1. Longitudinal and lateral hood adjustment is performed by shifting the hinge flange after loosening the bolts.
2. Make a line around the entire hinge flange so you can judge the amount of movement.
3. Loosen the bolts or nuts and move the hood to achieve precise alignment. Move the hood a small distance each time. Tighten the hinge bolts and carefully lower the hood to check its position.
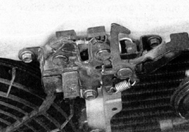
4. If necessary, after installation, the entire hood latch can be adjusted both vertically and horizontally on the radiator support so that the hood closes securely, flush with the fenders. To make the adjustment, make a line around the hood latch mounting bolts to use as a reference point, then loosen the bolts and move the latch as required. Tighten the mounting bolts.
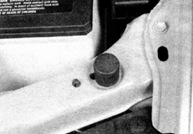
5. Finally, adjust the hood bumpers on the radiator support so that the hood is flush with the fenders when closed.
6. The hood latch, as well as the hinges, must be periodically lubricated with white lithium grease to prevent sticking and wear.
Test yourself
A quick Toyota Corolla quiz: every answer comes with an explanation and a link to the manual page.