Pistons and Connecting Rods
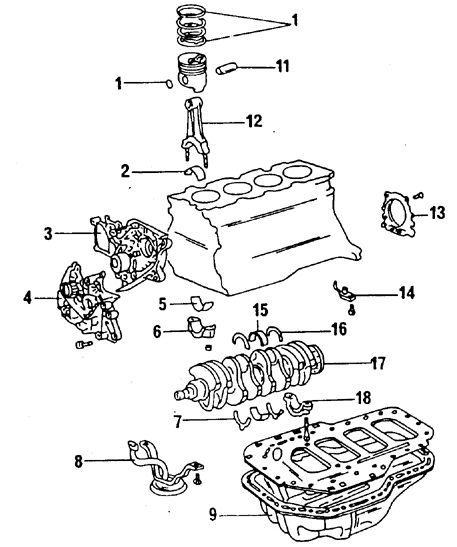
Installation drawing of crankshaft and connecting rod assembly, diesel engine 1. Snap ring
2. Connecting rod bearing shell
3. Water pump
4. Oil pump
5. Connecting rod bearing shell
6. Connecting rod bearing cap
7. Lower thrust washer (half ring)
8. Oil pump strainer
9. Oil pan
10. Piston rings
11. Piston pin
12. Connecting rod
13. Rear oil seal flange
14. Oil spray nozzle
15. Crankshaft main bearing shell
16. Crankshaft
17. Main bearing cap
18. Crankshaft main bearing shell
Removal and Disassembly
PROCEDURE
1. To remove the pistons and connecting rods, the cylinder head and oil pan (as well as the oil pump) must be removed, but the crankshaft can be left in the cylinder block. Then remove the connecting rod bearing caps and bearing shells, and push the pistons and connecting rods up and out of the cylinder block using a hammer handle from the inside of the block. Before performing this work, refer to the marking, installation position, etc. instructions given for gasoline engines.
2. To separate the pistons from the connecting rods, remove the piston pin snap rings. Then place the piston in hot water (at least 80 °C) and drive out the piston pin using a suitable drift and hammer. Remove the piston rings using piston ring pliers. Inspect the pistons and connecting rods in the same way as for gasoline engines, but refer to the values given in the Specifications table. Connecting rod bearing shells are selected according to the tolerance values. Bearing shells are marked with the number 1, 2 or 3, and the same number is stamped on the outside of the connecting rod bearing cap. Make sure both markings match.
Test yourself
A quick Toyota Corolla quiz: every answer comes with an explanation and a link to the manual page.