Fuel System Inspection
VORGEHENSWEISE
1. If a fuel odor is noticed while driving or after parking the vehicle in the sun, inspect the fuel system immediately.
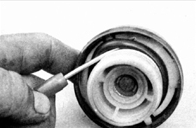
2. Remove the fuel filler cap and inspect it for corrosion and a damaged gasket. Remove a worn fuel filler cap gasket by carefully prying it off with a screwdriver, taking care not to damage the cap. The gasket should show a distinct impression of the filler neck edge. If the gasket is mechanically damaged or corroded, replace it.
3. Inspect the fuel supply and return lines for cracks. Make sure the tapered threaded connection of the fuel line to the injector and the banjo-type fittings of the fuel filter are tight.
4. It is best to inspect the fuel system with the vehicle raised on a hoist or supported on stands, since some fuel system components, such as the tank and part of the fuel lines, are located underneath the vehicle.
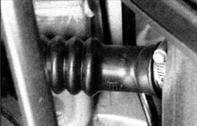
5. While under the vehicle, inspect the tank and the filler pipe. Pay particular attention to the connection between the filler pipe and the tank. Punctures, cracks and mechanical damage are not acceptable. A leak may sometimes be caused by a loose rubber filler hose connection or deteriorated rubber. Such defects can be corrected without special equipment.
* WARNING: Never attempt to repair the fuel tank yourself (except for replacing rubber parts). Welding or soldering can ignite the fuel vapors accumulated inside the tank, causing an explosion.
6. Carefully inspect all rubber hoses and metal lines leading from the tank. Check the connections for security and the hoses for wear, kinking and other damage. Carefully inspect the lines connecting the tank to the injector. If necessary, repair the damaged sections of the line or replace them (refer to Section 5.6).
Testen Sie sich
Ein kurzes Quiz zum Toyota Corolla: Zu jeder Antwort gibt es eine Erklärung und einen Link zur Handbuchseite.